Category: handmade

Our Handmade Felt Christmas Stockings

I am loving the fireplace at our new rent house. It makes us feel so cozy and at home, and it has been trying to decorate it for Christmas. We had some fancy velvet stockings that didn’t really go with our style or decor so I decided to make some felt ones that were much more us. As many of you know, I don’t own a sewing machine (though it is one my Christmas list) and don’t really know how to sew. I definitely prefer glue to a needle and thread, so I used it heavily in this project, with a little needle and embroidery floss thrown in for good measure. This project started at my friend Betsy’s Christmas craft night a few weeks ago. She had a bunch of inspirational ideas cut out of magazines for us to check out. I loved an idea from Land of Nod that I’ve attached at the bottom of this post, and it inspired me to make these stockings with a few touches of my own.
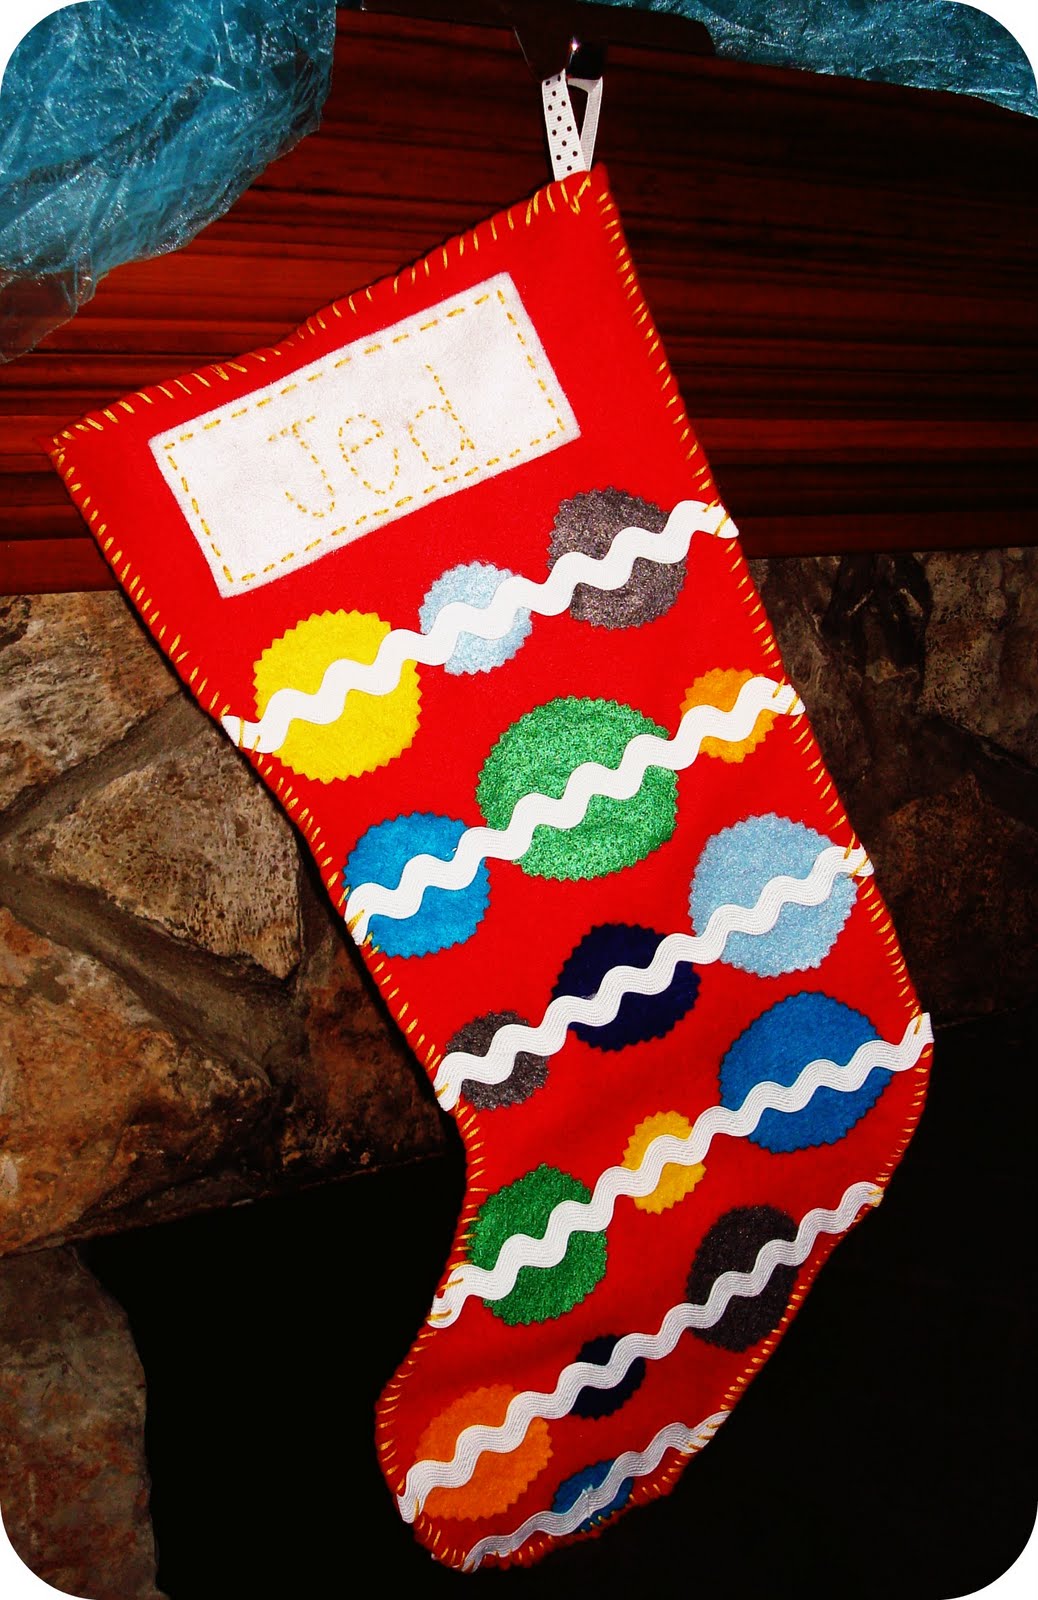
Here are our stockings. I think they are super cute. I cut them out of thick felt, on the fold so that the bottom would be reinforced.


I embroidered our names on white felt and then stitched them onto the top of the stockings.
I cut out the circles of many different colors of felt using pinking shears for a unique look. I made them three different sizes for variety. The color schemes are different for each stocking, but with a few repetitive colors. I glued the dots to the stockings using 3-in-1 Advanced Craft Glue. Then I glued thick ric rac over the dots.
After the glue dried, I hand stitched around each stocking with the embroidery floss that matched the name stitching. Hopefully they will hold up when filled with goodness.
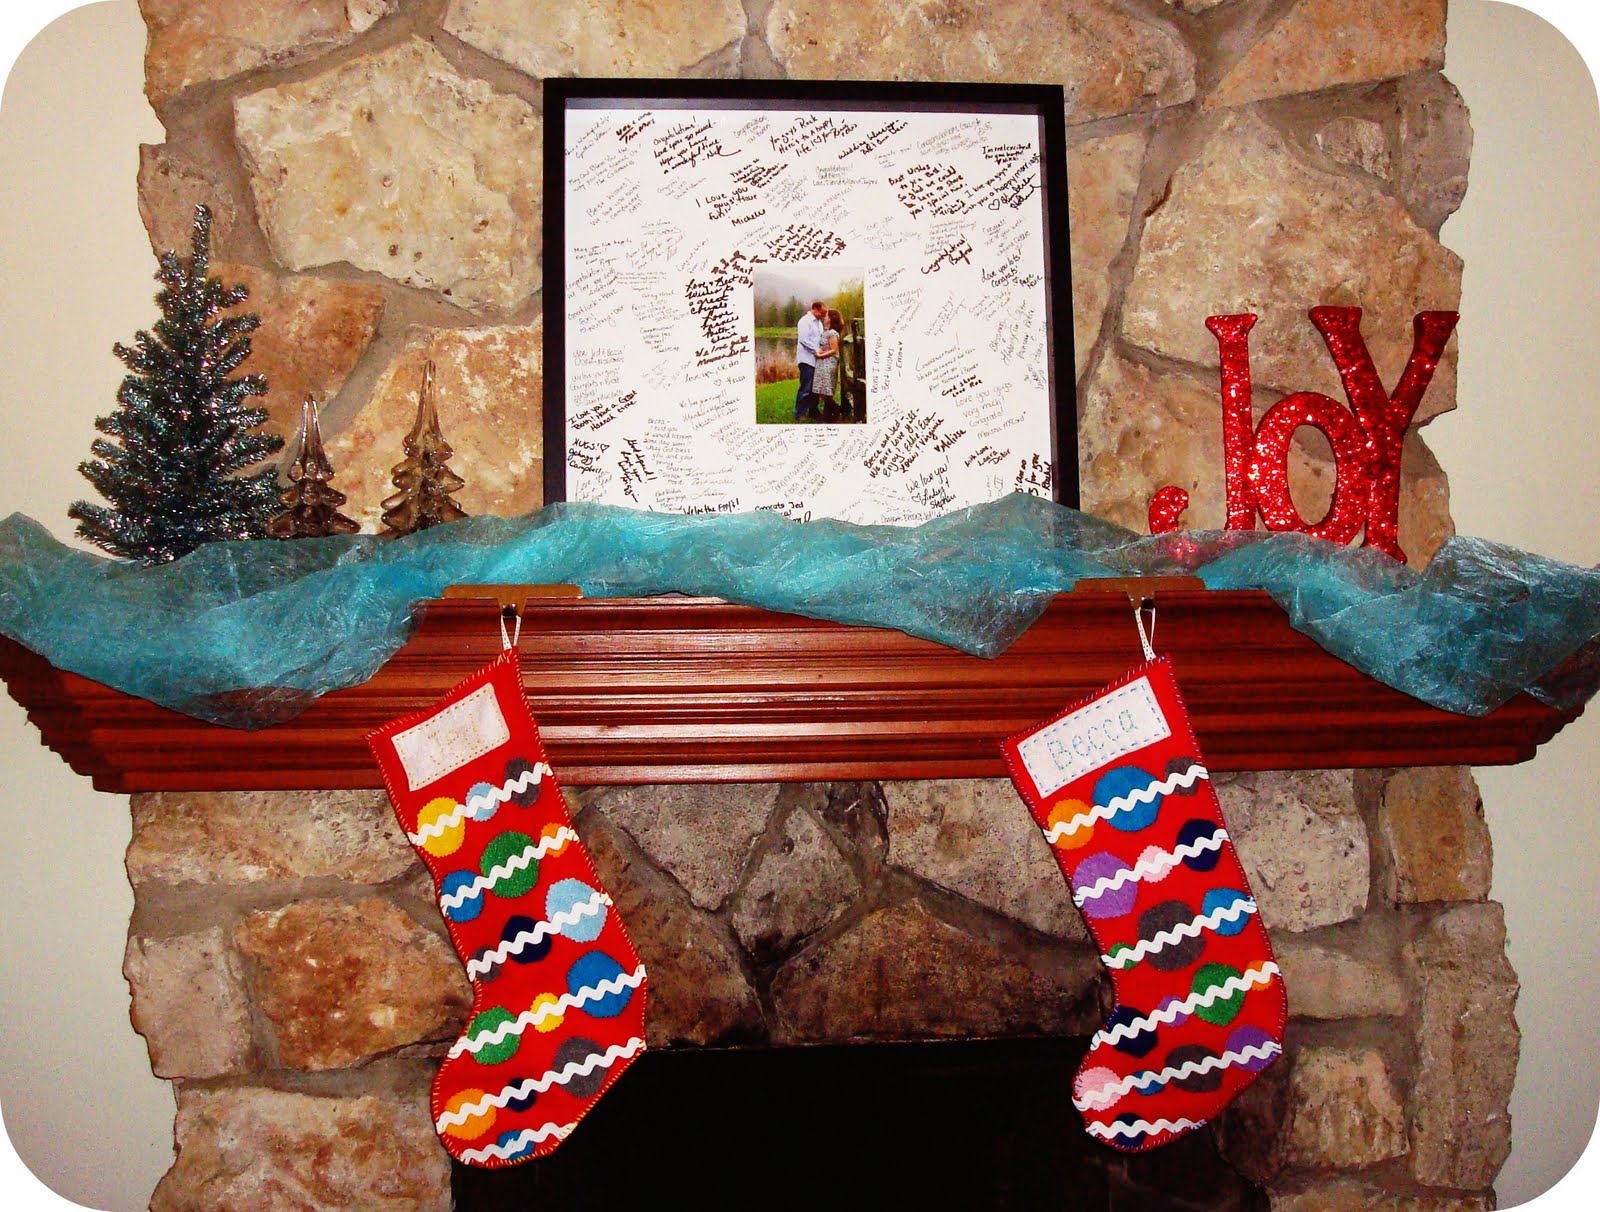
The last step was attaching polka dot grosgrain ribbon with both glue and a few stitches to the top right corner of each stocking to hang them by the chimney with care.
Here are the finished products above, along with Jackson’s stocking that I featured earlier this week. I need another stocking holder but I don’t mind sharing with the pup.
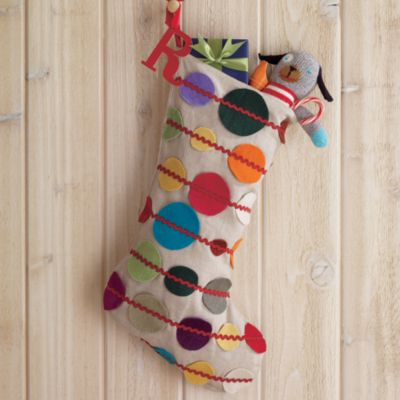
Here is the inspiration stocking from Land of Nod. They have such fun stuff, but it is mostly out of the budget. I saved about $50 dollars by making the stockings myself, though it did take a LOT of time. At one point I almost decided to just finish one this year, but decided to go for it. Next year I’ll need to make one for our little Bun that is baking in my oven.
What is inspiring you this Christmas season?
I’m linking up to some great parties. Check them out on my sidebar and join the fun.

Every Dog Needs a Cute Stocking

I bought this stocking for Jackson at an after Christmas sale last year. He did have a stocking for the first 9 years of his life, but I didn’t like it at all. This one came with a gold glitter paint pen to write his name on the felt. I’ve used said pen before while decorating stockings for my parents’ pets, and it is really difficult to use on the felt. I decided to hand stitch his name onto the stocking for a personal touch, and so it would go well with the stockings I’m making for Jed and me. This turned out to be far more difficult than I thought. I didn’t have felt to match the white on the stocking, so I had to stitch through the stocking itself. This was not super fun. The stocking is really thick and didn’t want to cooperate. It took so long that I had to rewrite his name in disappearing ink over 10 times. I persevered and I think the finished product was worth the effort.
Now I just have to finish our stockings so I can hang them on the mantle. Hopefully I’ll have them to show you soon.
Do your pets have stockings hung by the chimney with care? If so, does Santa bring them treats to fill their stockings?

I’m sharing my little project at some great parties. Check them out on my sidebar and join the fun.

Hoping for Fall – A Frugal Wreath

Dear Fall Weather,
The good people of the South are pining for your arrival. We are sweating in our jeans in hopes of hurrying you along. All we are asking for is a little cold front, just a taste of things to come. You are my favorite season, after all. This 95 degree with 85% humidity madness has to end.
Hopefully,
Becca


In honor of the fall weather that I just know is right around the corner, I decided it was time for a little frugal crafting. Hobby Lobby had wreaths and fake flowers on 50% off, so I got a grapevine wreath and a bouquet of sunflowers for under $5. Then I found a fall leaf garland at the Dollar Store. The grand total for the wreath was $6, plus the glue and scissors I already own. I’ve seen a few fall wreaths around that I’ve loved, but they cost $25-$45. Not in the budget…

I wrapped the garland around the wreath, securing it in the back in between the wires of the wreath, securing it with a little glue. I removed the flowers from their stems and covered the backs of them in glue. I wedged 3 of them in a row down into the wreath, holding them in place with pressure until the glue set.

Now I have a little simple fall festiveness to brighten up my front door.


Now if the weather will just cooperate, I will be spending a lot of time here:

Do you like the table Jed made out of our ice storm casualty? It holds a mason jar candle and will soon accommodate my drink of choice as I rock away. The mason jar candles got kicked off the front ledge to make room for the jar in the forefront, a solar powered mason-esque jar. Jed created 4 of them for our front porch. I’ll try to get him to do a tutorial. They are way cool.
Fall is my favorite season. What is yours?

crafty solutions: a new cake plate jewelry holder

my dresser is a disaster. jewelry and makeup are strewn about, and my jewelry box can’t hold all of my stuff. i know it is a ridiculous problem to have, but it bothers me. i’m sure you’ve seen these lovely cake plate jewelry holders all over blogland. they inspired me to try it for myself. i found 2 brass candle sticks at a garage sale for next to nothing and then started looking for cool plates. i looked everywhere. garage sales, estate sales, target, and then finally the crate and barrel outlet. at the c & b outlet i found 3 beauties for under $10 total. finally, we were ready for action.

seriously, this is not staged. this is my reality.
on the left is the untouched candle stick.
on the right is the sanded version.

we had a little bit of ivory bisque paint left over from a furniture painting project.
we used it to cover the brass for a totally different look.
jed decided he wanted to help,
and i was more than willing to let him.

we used gorilla glue to attach the plates to the candle sticks.
ta-da! here’s the finished product.
now i have to be patient enough to let it dry.
i have a light blue plate on the bottom,
an ivory plate in the middle,
and then one with cobalt blue flowers on the top.
i love it!
now i just have to make something
to hold the jewelry that won’t fit…

i’m entering this post in a contest over at CSI:Visit thecsiproject.com

picket fence wall art, finally finished

remember that piece of picket fence i picked up off a curb, cut into pieces, and hung on my wall? you can see that project here. my crafty to-do list is approximately 9 miles long, and i’ve been meaning to finish this piece off by adding hemp clotheslines and some of our favorite pictures. the inspiration was this:
this is the barn where we held our wedding reception. we had clotheslines hung throughout the barn with our favorite pictures attached with little wooden clothespins. one line held my pics, another held jed’s. at the end of the barn were 2 lines hung with the pictures of our dating and engagement story. my life, his life, and now our life together…
we still have all the hemp cord and pictures mounted on cardstock. we picked out 6 of our favorites and i hung them with the same cord and wooden clothespins. now we have a piece of our wedding reception in our bedroom, just in time for our 2nd anniversary next week.
i love it! we’ve included pictures from my baptism, our engagement at disneyworld, jed with his brother and daddy, jed and one of his best friends, our first date, and me and one of my best friends. we can always change them out later and mix things up.
it cost absolutely nothing, and is so personal for us. it makes my heart happy every time i look at it. that, my friends, is my new decorating rule. what in your home makes your heart happy every time you see it?

i’m linking to:

DIY Day @ ASPTL
 http://linda-coastalcharm.blogspot.com/
The Trendy Treehouse

the golden touch – new sandals inspired by anthropologie

first – go enter my giveaway to win some of my designs and a $25 pottery barn giftcard. click here to enter.

i found these lovely “rosalita” sandals on anthropologie last week. i fell in love, but they cost $148. that, my friends, is not in the budget. here they are:
i then went to old navy and found these beauties for only $19.99. that is a little more in my price range.
i made 4 fabric roses using this silky vintage fabric i bought at an estate sale. i backed them with felt, and attached them to the sandals.
here is the finished product. they are a little different from the inspiration shoes, but i love them. i especially love that they didn’t cost very much. that makes them even more fabulous. if you want some lovely vintage fabric rosettes to add to your favorite sandals, let me know.

i’m linking to:  http://www.thethriftyhome.com Photobucket

The Trendy Treehouse
Get your craft on Thurs.
Transformation Thursday thrifty thursday! giveaways
Join us Saturdays at tatertotsandjello.com for the weekend wrap up party!