Month: June 2013

Fun and Frugal Fourth of July Inspiration Round Up

I love everything about the 4th of July, fireworks, bbqs, red/white/blue color palettes, and watermelon.  I also love an inspirational idea, don’t you? I found some super cute, fun, and frugal ideas to share with y’all inspire us for Independence Day.  Each of these projects is very cheap to make and all are pretty quick.  Check out the projects below, get inspired, and visit each blog for the full tutorial.  All photos are by the original bloggers and used with permission.  If you decide to pin an individual project (and I hope you do) please pin from the original poster.  Let’s get ready for the 4th!
Patriotic Ice Cream Sandwiches from Kleinworh & Co.
Genius, pure and simple.  

Star Garland from Crazy Little Projects
Super cute, and I think I could make it even with my limited sewing skills.

DIY Ric Rac Flag T-shirt or Onesie from Our Good Life
I’m a sucker for ric rac and grosgrain.
American Flag Yarn & Button Wreath from The Cellar Door Stories
This one is so clean and simple, but still festive.
Red, White, and Blue Tin Can Luminaries from Days of a Domestic Dad
Such a cute idea and a perfect project to do with your kiddos.
Festive Firecracker Bows from Craft Quickies
The cute is exploding all over her head, and I love it.
DIY Flag Tank Top from Naturally Nesters
Don’t have a 4th of July outfit? Make one in under an hour.  
What’s on your summer crafting list? 

Frugal Friday: Four Easy Ways to Declutter Your Life {and Make $$}

We are on a mission around here, people.  Every season we make a pile and get rid of stuff.  We sell what we can and donate the rest.  This summer’s declutter sales are motivated by an unexpected loss of summer income.  We thought Jed was going to teach summer school but it was cancelled at the last minute, which means we don’t get several thousand dollars we were counting on.  For today’s Frugal Friday post I’m sharing a few ways we declutter and make a little money at the same time.  Here are the top four ways we clean out our life and make a little cash money…

1) Team Garage Sale – These can be a big money maker, but take a lot of time and effort.  You can make it easier on yourself and more profitable in the long run by joining forces with neighbors or friends to create a much desired “multi family” garage sale.  We are attempting to get a few of our neighbors to go in on one with us.  One house hosts the sale, everybody tags their own stuff and divides up the shifts.  You make the money off whatever sells of your stuff.  Multi family sales draw a bigger crowd, and sharing shifts lightens the work load, so everyone wins.

2) Selling Online – There are lots of online sites that will buy your old junk.  We’ve sold everything from cell phones to DVDs to ink cartridges, and plan to sell more.  I’m cleaning out my old CDs and DVDs to sell right now.  Most of these sites will let you scan or search online to find out how much your stuff is worth before you send it off.

3) Craigslist – This is best reserved for big ticket items, because it takes more effort on your part.  Right now we have a few items listed and Jed is wheeling and dealing to get rid of them.  Take the time to take good pictures and write a detailed description.  Always put your phone number as well as an email address because most buyers prefer texting to emailing.  We like to meet buyers in a neutral place rather than our home to protect ourselves, but that might just be our own paranoia.  Trust your instincts and if the deal feels shady, don’t do it.

4) Donate – If your stuff won’t sell, donate it.  If you don’t need the money but want to get rid of things that are still useful, try Freecycle, Goodwill, or the Salvation Army.  Freecycle is a localized forum for folks to give away almost anything (except services and pets) to keep junk out of landfills.  That old broken computer could be really useful to someone who likes to rebuild them as a hobby.  Don’t throw it away!  Goodwill has donation stations all over the place.  There are probably non-profits in your area that will even come and pick up your junk.  This is a great solution for post-garage sale clutter.

How do you get rid of clutter?  

Duck Creek DIY: Cheap and Easy (But Sturdy) Behind the Couch Shelf

We love our little Duck Creek Ranch – my affectionate pet name for our 70s rancher that sits on a little creek inhabited by ducks and geese.  You can read more 
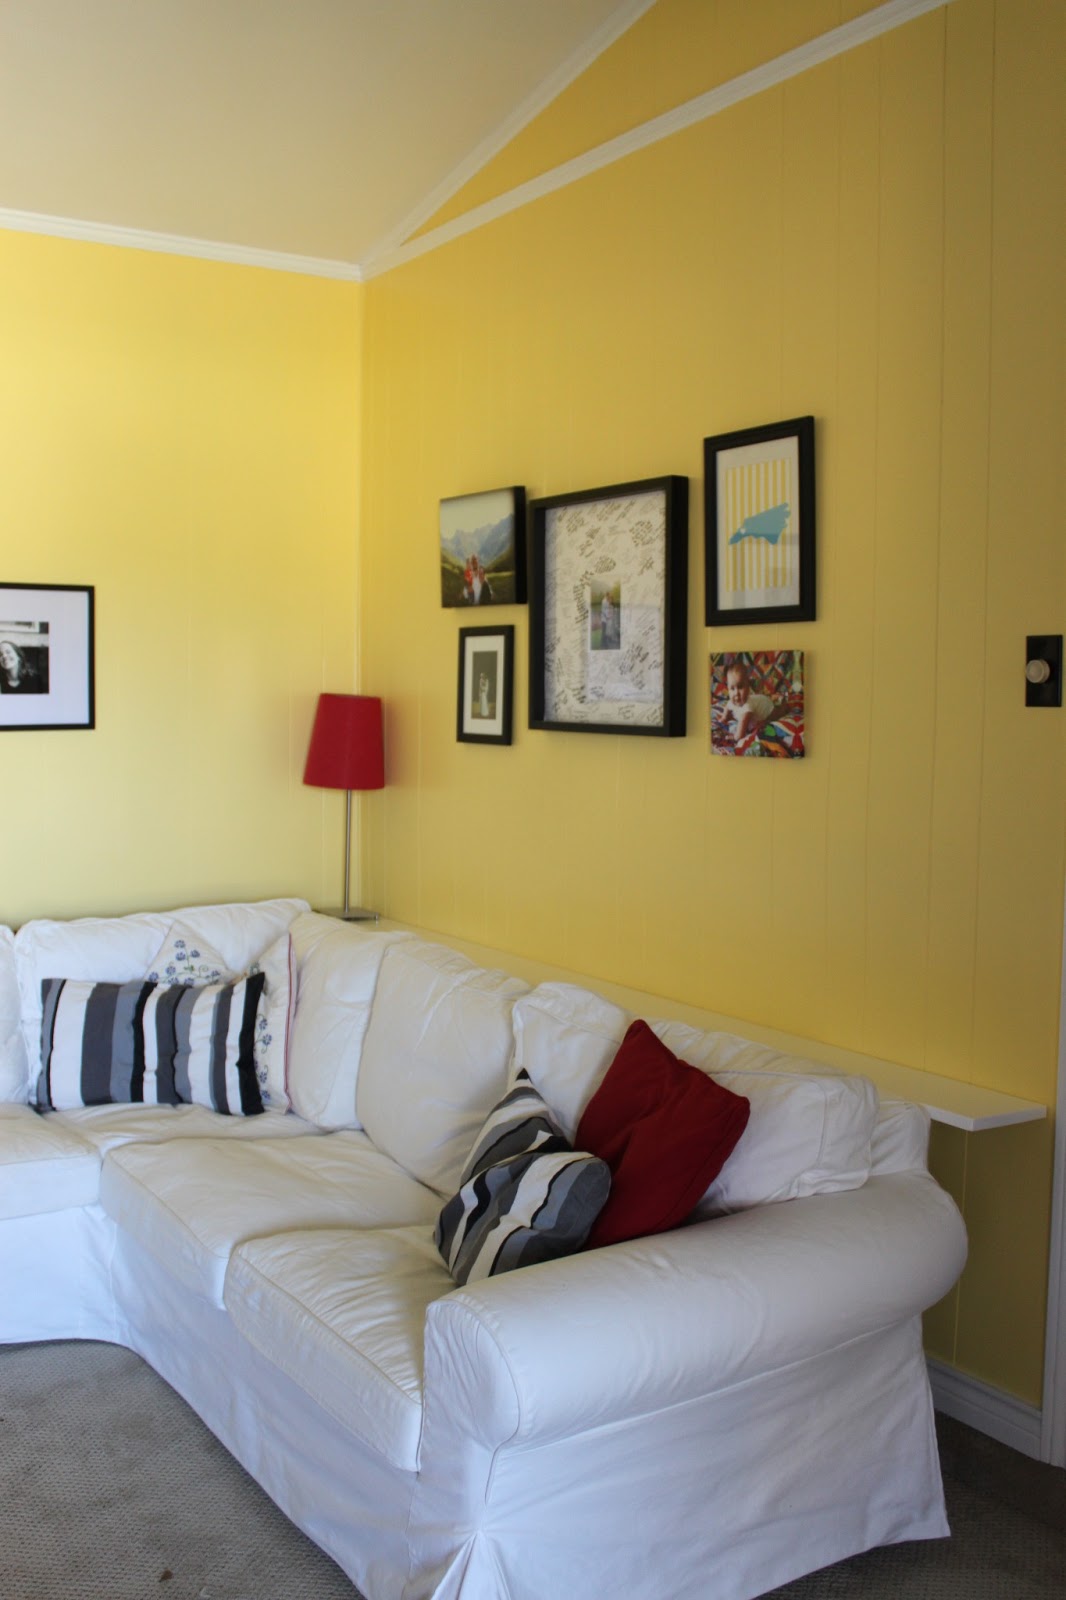
about it and our DIY projects here.  Like most houses built in other eras, there are some things about DCR that are just a little weird.  Our living room is lovely and open with lots of light, especially now that we covered the wood paneling with festive yellow and white paint.  The problem is that there is only one place to put our couch.  It can only go in this one corner, and that corner leaves no room for a side table.  I looked for options online and found a few tutorials for behind the couch shelves, but Jed worried they didn’t look sturdy.  When you have a 32 pound toddler climbing on things, they need to be tough.  
Here’s what you need:
1×8 inch board – cut to the length you need (Our’s is 8 ft long.)
paint or stain
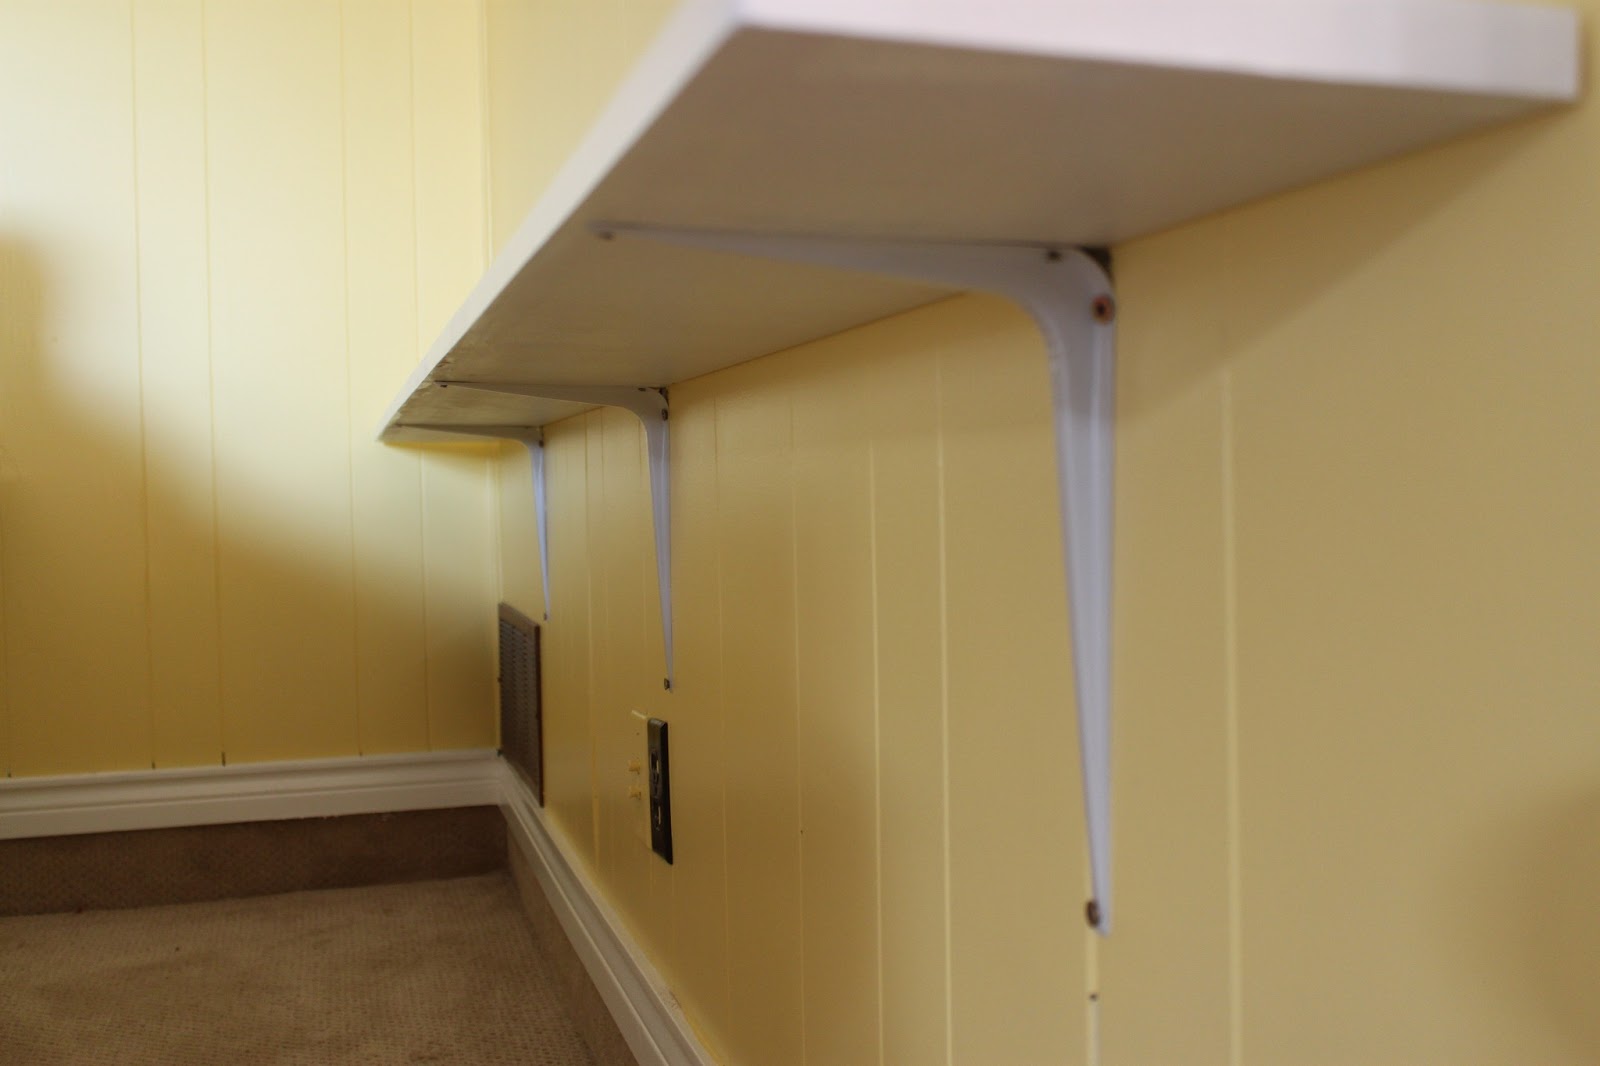
3 shelving brackets (made for a 1×8 board)
screws – 9 (3 in) and 6 (1/2 in)
drill 
studfinder
sandpaper
1) Preparation: Sand your board. Prime it.  Sand it again.  Paint it.  Sand it one more time.  Then paint it one last time.  This is only necessary on the top and sides.  On the bottom you can just sand and prime.  All these steps help it to be more durable because you will be putting things on it constantly.

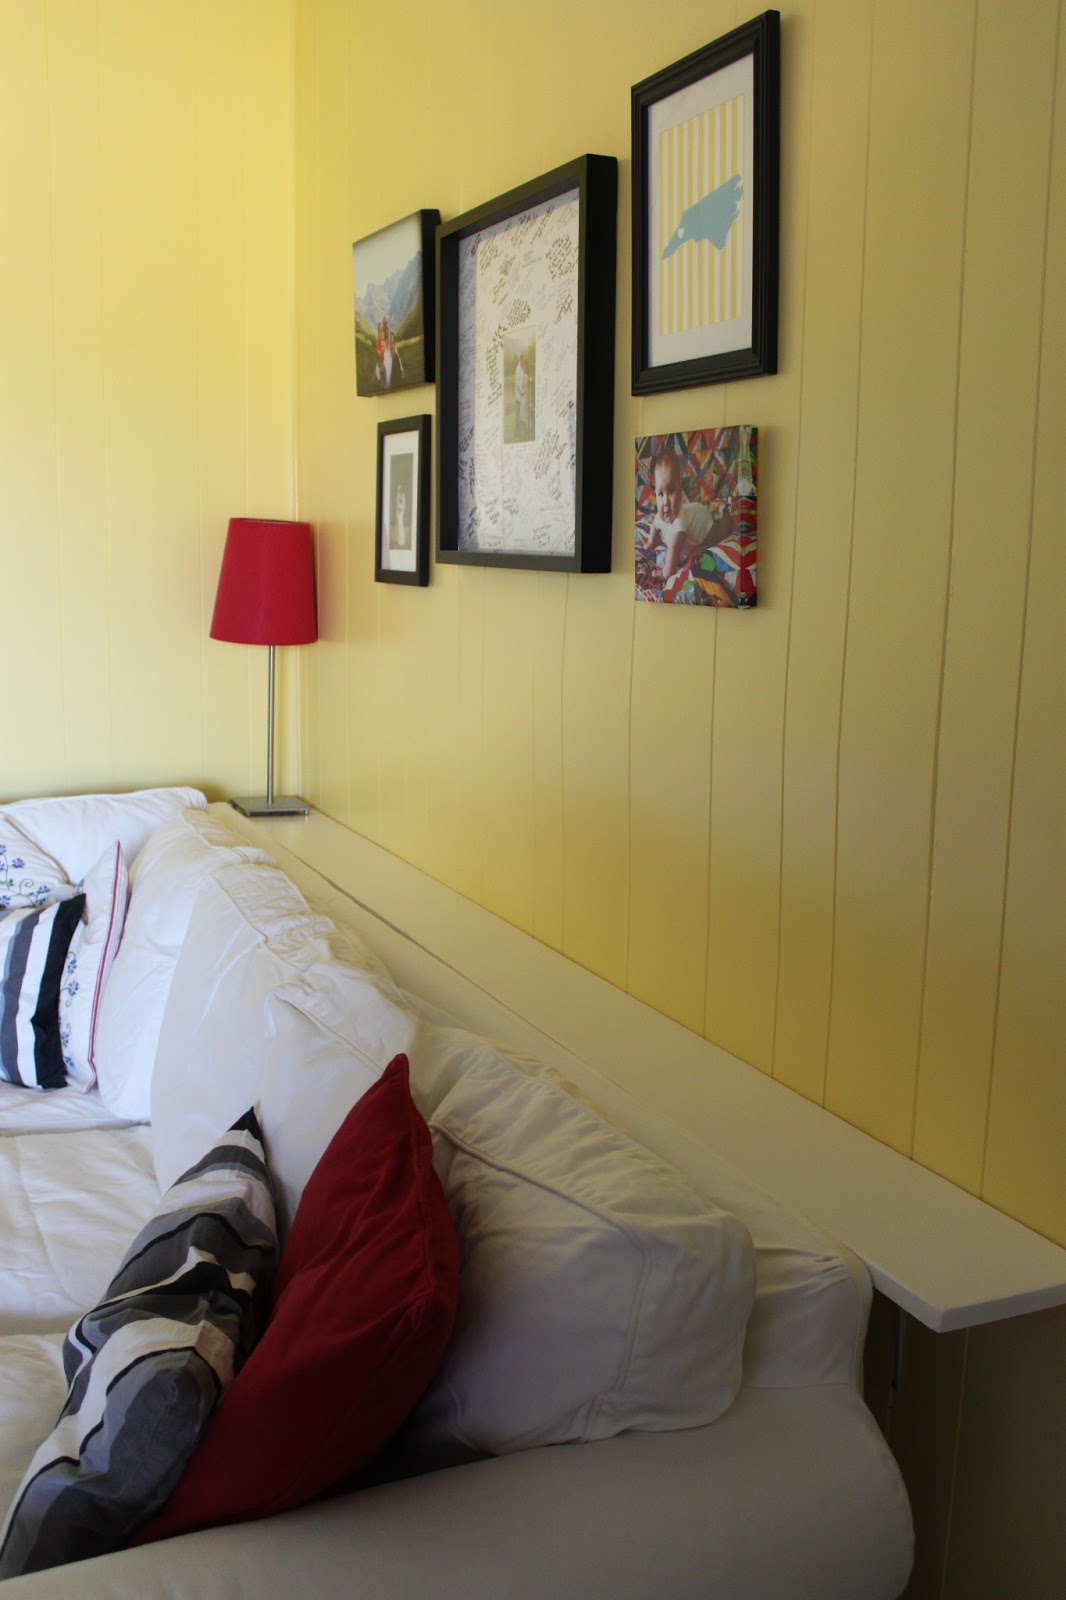
2) Location: Find your studs and attach your L brackets to the stud.  Measure from the floor to the back of the couch to see how high you want your shelf.  Then measure again to be sure.  Check your brackets to make sure they are level once they are attached.  Use your long screws to attach the brackets to the stud.

3) Placement & Finishing: Once your board is dry, place it on the L brackets and use the smaller screw to attach the board to the brackets.  Check to be sure it is level.

4) Be patient.  Let the paint really dry for a few days before you start putting things on it.  Then enjoy your new shelf.  The brackets are made to hold a lot of weight, so don’t be afraid to decorate.  I’m still figuring out what I want to go on the shelf.  You can also use the space between the shelf and couch for storage.

What is your next DIY project?
We’re working on a kids’ picnic table around here.
Click here to see all of our Duck Creek DIY posts. 
We’ll have lots more fun DIY coming your way soon.

Green Cleaning with the Norwex Dust Mitt & Kitchen Cloths

Last week I reviewed the Norwex Enviro Cloth for y’all, which is my favorite Norwex product.  Today I’m sharing details about two of my other favs, the dust mitt and the kitchen cloths.  Together with the Enviro Cloth and the Window Cloth, these products have helped us drastically reduce the chemical usage in our home, as well as reduce our paper waste and bring down our cleaning budget. 

First up is the dust mitt.  In my opinion, this little beauty is the most fun to use.  You put it on and just go for it, dusting any and every surface.  You don’t need Pledge, chemicals, or paper towels.  When you are done you bang the dust out of it (like you would a rug) and throw it in the laundry after a couple of uses.  It picks the dust up without spreading it around, so your surfaces stay dust free for quite a while and nothing ends up on the floor.  It can easily clean between mini blinds and the tops of ceiling fans.  The dust mitt retails for $16.99 and will last for years, paying for itself in savings on paper towels and chemical dusting sprays in a few months.  You can also get it as part of the Household package (my personal favorite deal) with the Enviro Cloth and Window Cloth for $48.99.  Click here to shop and be sure to list me (Becca Eby) as your hostess.

My other must have item from Norwex is the kitchen cloth.  This comes in two sizes (cloth and towel) and I have both.  I love the small one for cleaning up after meals and wiping down the counters and Bear’s high chair, and the large one for bigger messes.  As you can see below it has a looser weave than the Enviro cloth which helps it to grab onto big food particles and pick them up rather than spread them around.  The kitchen cloths contain silver making them anti-bacterial.  As long as you wring them out after each use bacterial growth in inhibited in the cloths and they won’t cross contaminate.  You can buy the small kitchen cloth for $9.99 and the larger kitchen towel for $19.99.  You can get a better deal and buy them together in the Kitchen Microfiber Collection with the Veggie and Fruit Cloth and Kitchen Scrub Cloth for $54.99.

If you are truly interested in reducing the chemicals in your home, reducing your paper waste, and reducing your household cleaning budget, give Norwex a try.  There are several small collections you can check out just to get started.  The products are made with fair trade practices and will last for years, paying for themselves in savings on chemicals and paper goods in just a few months.  Feel free to email me or comment below if you have questions.  You can check out the full line of Norwex products here and shop away.  Please put my name (Becca Eby) as your hostess.  My online party will be open until June 20th.  

Frugal and Fast {Last Minute} Father’s Day Craft and Card Round Up

As the Queen of Procrastinators, I found myself searching Pinterest for Father’s Day craft ideas this week in a desperate quest to find that perfect project.  I found a few great ones to share with you if you are in the same boat.  It’s not too late!  All of the projects below can be done at the last minute for very little money, but will still make that special Daddy feel loved.  I’m still wavering but I think I’m going with the chalkboard cookie jar and some Instagram magnets.  If the magnets work out well {fingers crossed} I’ll post a tutorial soon.  If you choose to pin this post (and I hope you do) please use the image above, and pin the projects from their original sources.  Both the photos and text below are linked to the original bloggers with permission.

DIY Chalkboard Cookie Jar from City to Sticks
Easy and Reusable

Rustic Wood Free Printable Father’s Day Card from Agus Yornet
Available in English and Spanish!

Free Printables from She’s Kinda Crafty
All you need is a printer and a pen.
“I Love You to Pieces” Goody Jar from
Scrappy Mel
This one is super fast and easy.
S’mores Gift Basket and Chalkboard Frame from Gallamore West
What do you have planned for the father or grandfather in your life this week?

Five Easy Ways to Entertain Toddlers in the Summer

Summer is officially here and our regular week day events during the school year have slowed down or stopped completely until September and we are constantly looking for ways to keep the Bear entertained.  Today I’m breaking down my favorite toddler entertaining ideas for you that are all free or super cheap ways to beat the heat and keep that kiddo happy.

#1 Fill up a Kiddie Pool in your yard.  We actually have 2, one from Amazon and one from a consignment sale and he LOVES them.  He will splash and play for hours in both of them.  Give a toddler a hose and a few buckets and he will be happy all day.  At the end of the day we take his buckets and water the plants and trees with whatever is left in the pools, so nothing goes to waste.
#2 Visit you neighborhood pool.  Our city has 5 neighborhood pools and membership is super cheap ($60 for the whole family for all 5 pools all summer).  We visit a different pool every few days and swim our hearts out.  The Bear has a great little Puddlejumper life jacket and is already jumping off the wall into the water.  We love it and he always eats and sleeps well after a big swim.  As a former pool rat (shout out to my Leawood pool peeps) there is no better summer getaway than the neighborhood pool.  We use cloth swim diapers in both our backyard and our neighborhood pool.  You can read all about swim diapers here and shop for them here.
#3 Go to Story Time at the Library. Air conditioning + free = awesome.  Our local library has story times for every age group as well as one for the whole family.  We signed up for the toddler class and are so excited to have an air conditioned, fun, educational, and FREE place to get out of the sun all summer long.
#4 Find a free Splash Park in your area.  We are so lucky to have several free splash parks near our house and will be spending lots of time there this summer when the playground equipment is too hot to touch. Check out your city’s Parks and Recreation website to find splash parks in your area.  They typically have several water elements and a soft pad underneath for kids to run on barefoot.
#5 Mall walk and play at the indoor playground.  Several of our local malls have great indoor, air conditioned play spaces perfect for toddlers.  We pack up the fam and a picnic lunch and head to the mall in the morning to mall walk like champs getting a little exercise for mama and then hit the mall play ground to get a work out for the Bear.  Everybody wins and nobody sweats.
How do you entertain yourself and/or your kids in the summer?