Best of Bare Feet on the Dashboard – Crafty Edition

It’s my 3 year blogging anniversary this week, and I’m celebrating by bringing you my favorite and most popular posts from the past 3 years.   I’m kicking off the party with my favorite crafty posts.  I started blogging to have a creative outlet, and creating fun stuff is a huge part of that.  I’d love for y’all to check out my old projects and feel free to pin away if you like what you see.

DIY Baby Book with Free Printable Pages
(My most popular crafty post so far.)
The Picket Fence Project – Roadside Trash to Wall Decor
Part One   Part Two
Anthro Inspired Sandal Makeover
Anthro Inspired Headband with Vintage Fabric
Cake Plate Jewelry Holder
Festive Paper Flower Tutorial
The Mod Podge Doily Canvas Project
DIY Solar Powered Light Jars
Ribbon Mobile for Baby’s Nursery
Felt Embroidered Bird Onesie
Handmade Felt Christmas Stockings
Burlap Easter Wreath
A Burlap Wreath for All Seasons
Bowtie Onesie Tutorial
Vintage Highchair Makeover
Birds in Flight Nursery Mobile
Burlap and Pinwheels Summer Wreath
Cheap Giant Photo
Pinterest Free Printable
There they are, all my fav crafty posts.  Happy blog anniversary to me!  
What was your favorite craft project that you made in 2012? 

Duck Creek DIY: Our Wallpaper Removal Miracle

 As you may have seen in our before pictures, we have been working with some seriously ugly wallpaper all over our little Duck Creek Ranch.  We’ve dreaded the removal process, but decided to tackle the dining room and entry hall over Christmas break.  We’re so glad we did because what we experienced was nothing short of a Christmas miracle.

 There were not one but 2 layers of wallpaper on an accent wall in the dining room and in the entry hall.  I apologize for the poor lighting, but you can see the 2 layers of ugly from the hall above.  Not the underneath layer in the dining room is actually kind of retro cool, but we couldn’t save it during the removal.

 The wallpaper has been up there for at least 15 years (top layer) and almost 40 for the bottom layer.  We just knew in our hearts it was going to take hours upon hours of spraying and scraping to remove it.  Amazingly, Jed started peeling it from the corners just to see what would happen.  It came off!  Smoothly!  In giant chunks!

A true Christmas miracle.  
In under an hour we removed all the wallpaper from the dining room, entry hall, kitchen, and master bath.  We tried to do the same in our guest bath, but our good luck ran out.  I can’t wait to show you what we’ve done in the dining room and hall.  They are both transformed.  

**UPDATED** Pinterest and Time Management ~ Free Printable

We’ve all seen them.  There are so many unbelievable ideas on Pinterest, but some of them really make you wonder what kind of time the creator had on his or her hands.  Apparently that creative mama is managing her time a little better than I am.  She is probably out making something cool right now rather than wasting her life away skimming through Pinterest.  This little saying came to mind today.  

 After wasting a considerable amount of time on my beloved Pinterest today looking for ideas for Mini Bear’s room, I decided a free printable was in order. Click HERE for the free PDF.  Just play nice and link back here if you post it.

What’s your biggest internet time sucker?

Frugal Christmas: Our Red and Aqua Mantle and Color Scheme

My goal this year was to decorate our new house in as festive a manor as possible while spending as little as possible and repurposing old decorations.  For this project I ended up buying only one can of spray paint and two spools of ribbon.  Everything else came from old decorations or prior projects.  Mission accomplished.  I just love red and aqua together, and I had some candles, mason jars, and Christmas balls that worked toward the color scheme, so I went for it.  

 These blue mason jars were a gift from my Meme (that’s southern for grandmother) and I use them all the time.  I filled them with Smell of Christmas potpourri by Aromatique, an Arkansas company.  I tied red ribbon leftover from other projects around them and placed this cute little trio on one end of the mantle.  

 Our stockings are hung by the chimney with care.  I made Jed’s and mine, but ended up throwing the one I attempted for the Bear away in a fit of crafting rage last year (long story).  You can read about how I made ours here.

 For the wreath I took apart this spring wreath, spray painted it white, and wrapped it in aqua ribbon.  I used pine cones that were already wired from my bouquet in Marci’s winter wedding, spray painted them white, and tied them with aqua and white ribbons.  I attached three red jingle bells leftover from the Bear’s toddler friendly Christmas tree.  I hung it with wide aqua ribbon.  

 I bought the joy sign at a yard sale a few years back, and the red and aqua Christmas balls were from after Christmas clearance years ago.  I nestled them in aqua fine net tulle that I also used the last few years.

 The red candles normally live in other spots around the house, but they look cute as a trio mirroring the trio of mason jars.

 I carried the red and aqua theme into our bedroom by decorating another mini tree with leftover jingle bells and white ribbon.

What’s your favorite Christmas color scheme?
How do your stay frugal with holiday decorating?

Daddy and the Four Wheeler

 Jed was so excited to take the Bear on his first four wheeler ride when we visited the ranch over Thanksgiving.  Don’t worry, he was just planning on circling the driveway.  The Bear was not equally excited, and you can see below how things played out.  He started out a little nervous.

 Then he progressed to uncomfortable and tried to escape.  Then the whole situation escalated into a full scale meltdown.  Needless to say, the Bear’s first four wheeler ride will come sometime in the future.

Toddlers and Tractors

 The Bear’s obsession of the moment is all things farm.  When we were invited to the Goertz’s ranch for Thanksgiving, he was in heaven.  Not only were there big tractors, cows, horses, and 4-wheelers, there was also a pint sized tractor perfect for him.  He spent hours on this thing.

He also loved watching his big cousins, Preston, Parker, and Noah, do fun big kid stuff.  You know, like drive full sized gators around.  

Look at the pure concentration on Preston’s face.  This kid is going to be an awesome driver by the time he turns 16.  

Now I just need to find one of these mini tractors for our backyard.  Craigslist is calling…

Frugal Christmas: A Toddler Friendly Mini Tree

 I LOVE decorating for Christmas.  I long for a touch of Christmas cheer in every room of the house.  The Bear’s room is a special challenge because he is now 18 months old and into EVERYTHING.  He can reach to grab things off his shelves and has a special gift for taking things apart.  I decided the answer was a toddler friendly mini tree, but my budget was only $5.

I found this mini tree in the dollar section at Target years ago, along with the hat topper and mini tree skirt.  They cost $2 total.  Target has mini tinsel trees right now, and all of their Christmas stuff will go on sale soon if it isn’t already. 


 I looked at mini tree ornaments at Michael’s, Hobby Lobby, and Target, but most of what I found was either breakable or a choking hazard.  Yikes.  I remembered seeing a fun idea using plastic animals on Young House Love last year, but I couldn’t find the post and got frustrated.  After strolling the aisles of Hobby Lobby I came across a big container of large red jingle bells on sale for $3.50.  Jingle bells are festive, give a pop of color on my little silver tree, aren’t breakable, and are too big to be a choking hazard.  Hooray!  I bought white grosgrain ribbon on sale for $1 and pieces through each bell.

 The Bear had a fabulous time playing with the bells and was able to help me decorate his tree.  Hello, fine motor skill development!  I love the simplicity and festiveness of his tree, and the fact that he can’t break it or hurt himself on it.  Let’s call it a Christmas Mini Tree Miracle.

Here’s the toddler eye view.  Shiny!
Do you decorate your kid’s rooms for Christmas? How do you make it kid proof?

Frugal Gift Ideas: Personalized Coffee Mugs

I saw this idea on Pinterest a while back and thought it would be a perfect craft for my MOPS group.  I’m one of the craft leaders for our MOPS group this year.  The original pin recommended using a Sharpie marker to decorate a dollar store coffee mug, then baking it for 30 minutes at 350.  After a little research I discovered that Sharpies are not food safe.  Uh oh.  Acrylic paint is food safe, so I tried to find a way to incorporate it into the idea.  I found another pin that used paper doilies as a stencil and thought that might work well with the acrylic paint.  I found mugs and doilies at our local Dollar Tree and brought acrylic paint, foam brushes, and Sharpies as well.  Here’s how it went down.   

 Everyone found a mug of their choice.  There were three different shapes and sizes.  I told everyone the could use Sharpies as long as they didn’t put it near the lip of the mug or on the inside.  I shared the doily stencil idea, and demonstrated how to tape the stencils onto the mugs.  Then everyone went for it.  Some folks used just Sharpies, others used just acrylics, and still more used a combination of the two.  I let them all dry, baked them at 350 for 30 minutes, and then let them cool.  The Sharpies ran until they dried, FYI.

Take a look at a few of our finished products.  I used a Sharpie to paint my mug, but kept the marker clear of the area where my mouth would be.  You can see the pattern the doily made on a few of the mugs above and below.

 Some of the mugs that were totally covered in acrylic needed to be glazed after baking.  They ended up with a rough, dry finish.  The Sharpied mugs and mugs with smaller patches of paint looked great after being baked.  If you make these as a gift, be sure to let the recipient know that they need to be hand washed.

What frugal gifts are you giving this year?  

Cute Cousins

 My siblings and I are all spread out all over the country, so when we get together we have to get a picture of the kids all together.  As you might imagine, getting 3 kids age 3 and under to sit still and pose is nearly impossible.  Sweet Luke hadn’t quite mastered the whole sitting up thing, which made it even trickier.  There was a small scuffle over the little blue fish in the middle, but we persevered.  Two more cute cousins will be added to this side of the family in April and June.

How do you get kids to sit still for a photo?

Duck Creek Ranch: The Before Pictures, A Celebration of 80s Home Decorating

 Here are some of our before pictures, complete with the previous owner’s furnishings.  We took these during a walk through before she moved out.  I’ll have more later.  We plan to ditch the grape wallpaper and paint the cabinets white.  I’d love new counter tops, but that is a long range project.

 We will paint all the trim and wainscoting white, as well as the cool built in to the left.  I’m looking for inspiration to replace that light fixture on pinterest.

 Here’s the half bath off the kitchen, the scene of plumbing nightmare #1.  Eventually we’ll paint the wood and the walls, and replace the light fixture.  I’m thinking I’ll paint the mirror’s frame a fun color.

 The kitchen opens up to the living room.  Let’s play count the grapes on the wall.

 Here’s the living room complete with nightmare popcorn ceiling and so much wood paneling.  We ripped out the carpet and took down the popcorn.  We’ve painted the paneling and are almost done with the trim.  I can’t wait to show you the after pics!

 You still can’t see the popcorn very well, but trust me when I say it was awful.  Popcorn ceilings have never really urked me, probably because I grew up in the 80s.  These were a whole other level of popcorn, big nasty kernels everywhere.  Gross.

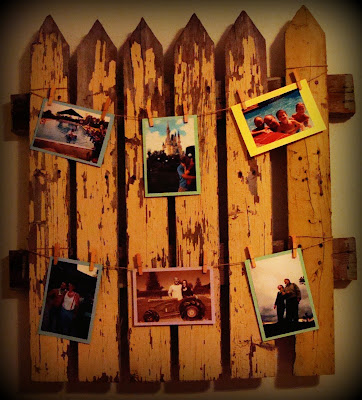
 This is the front door and entryway.  We plan to rip off the wallpaper and make this a fun focal wall with family pics.

 The dining room was otherwise known as the previous owner’s cat’s litter box.  Thanks to advice from some of my cat loving friends we are battling the cat pee destruction day by day.  We’ve ripped out the carpet and are hitting the pee daily with Nature’s Miracle Enzyme cleaner.  Jed said it is the nastiest job he’s ever had to do.  He ripped out the base boards and is fighting with the concrete below.  We plan to put in wood laminate flooring and take down the wallpaper as soon as we get the cat pee under control.  We haven’t decided on a paint color yet, but I’m leaning toward an aquamarine.

 Our master bedroom feels so big, and we have fallen in love with the parquet flooring though we hated it at first.  We’ve already painted in here and I’ll have after pics up soon.

 The master bath is the scene of plumbing nightmares #2-5.  Eventually we want to gut the whole dang thing. Don’t you love the magnolia trim and gold flaked wallpaper?  You don’t?  I HATE it.  Please note the teeny tiny bathtub.  Who fits in that?  It was not made for a full grown human.

This will be the Bear’s bedroom eventually, and the almost identical bedroom will be Mini Bear’s.  We’ve set up Bear’s stuff in the other room so that we can paint this one without all his furniture in the way.  
Take away all the previous owner’s furniture, add in new carpet, tons of boxes, and the odor of cat pee, and you’ve got a great picture of our Duck Creek Ranch.  We know we will make it into a beautiful home for our family eventually, but the getting there is going to take a while.
How long did it take you to feel at home in your house?