Searching for "creative play"

Fun and Funky Gifts for Everyone on Your List: An Uncommon Goods Review

If you are one who likes to give the unexpected, the creative, the responsibly sourced, or the incredibly unique, Uncommon Goods is the place to shop.  When they contacted me about doing a review, I was quickly sucked in to the rabbit hole of shopping on their site.  A few of my favorite items are shown above: a men’s belt made from recycled bike parts, blocks with braille and sign language, sleeping bear and pig slippers, and a gorgeous rough stone ring.  Click here to find the perfect holiday gift for everyone on your list from Uncommon Goods.  Besides featuring a plethora of recycled, upcycled, eco-friendly, and handmade goods, Uncommon Goods uses sustainable environmental and fair wage practices. I’m giving away a $25 gift card from the generous folks at Uncommon Goods as well, so click here to enter.  
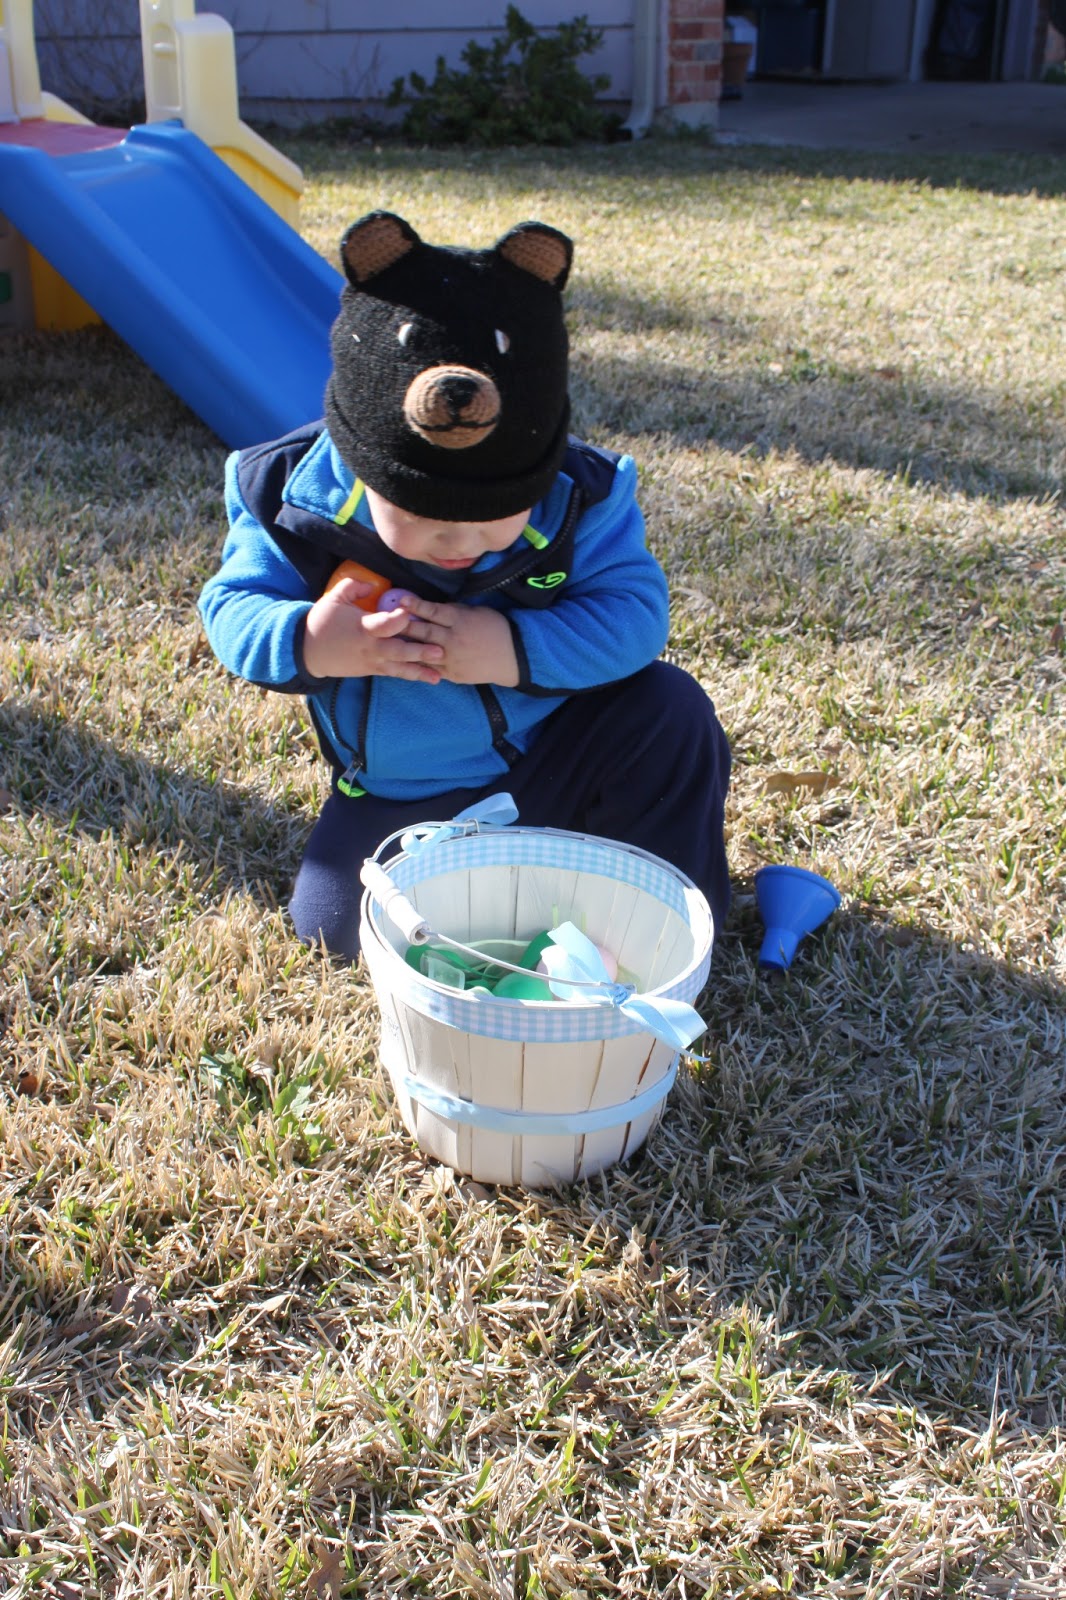
I chose to review gifts for the Bear and Jed – Kinetic Sand and a Pick Punch. 
For review purpose I gave the gifts early, and they were both a big hit.
We all agreed the Kinetic Sand is one of our favorite review items EVER.  
If you have a curious kid on your list, this stuff is ridiculously amazing.
We received the small package weighing 2.2 pounds (1 kg) that retails at $15.  It pretty much saved us during the crazy ice storm we had this weekend. We got it out 4 times the first day and 5 times the second day, playing for 20-30 minutes each time.  That is an eternity in toddler years, people.   

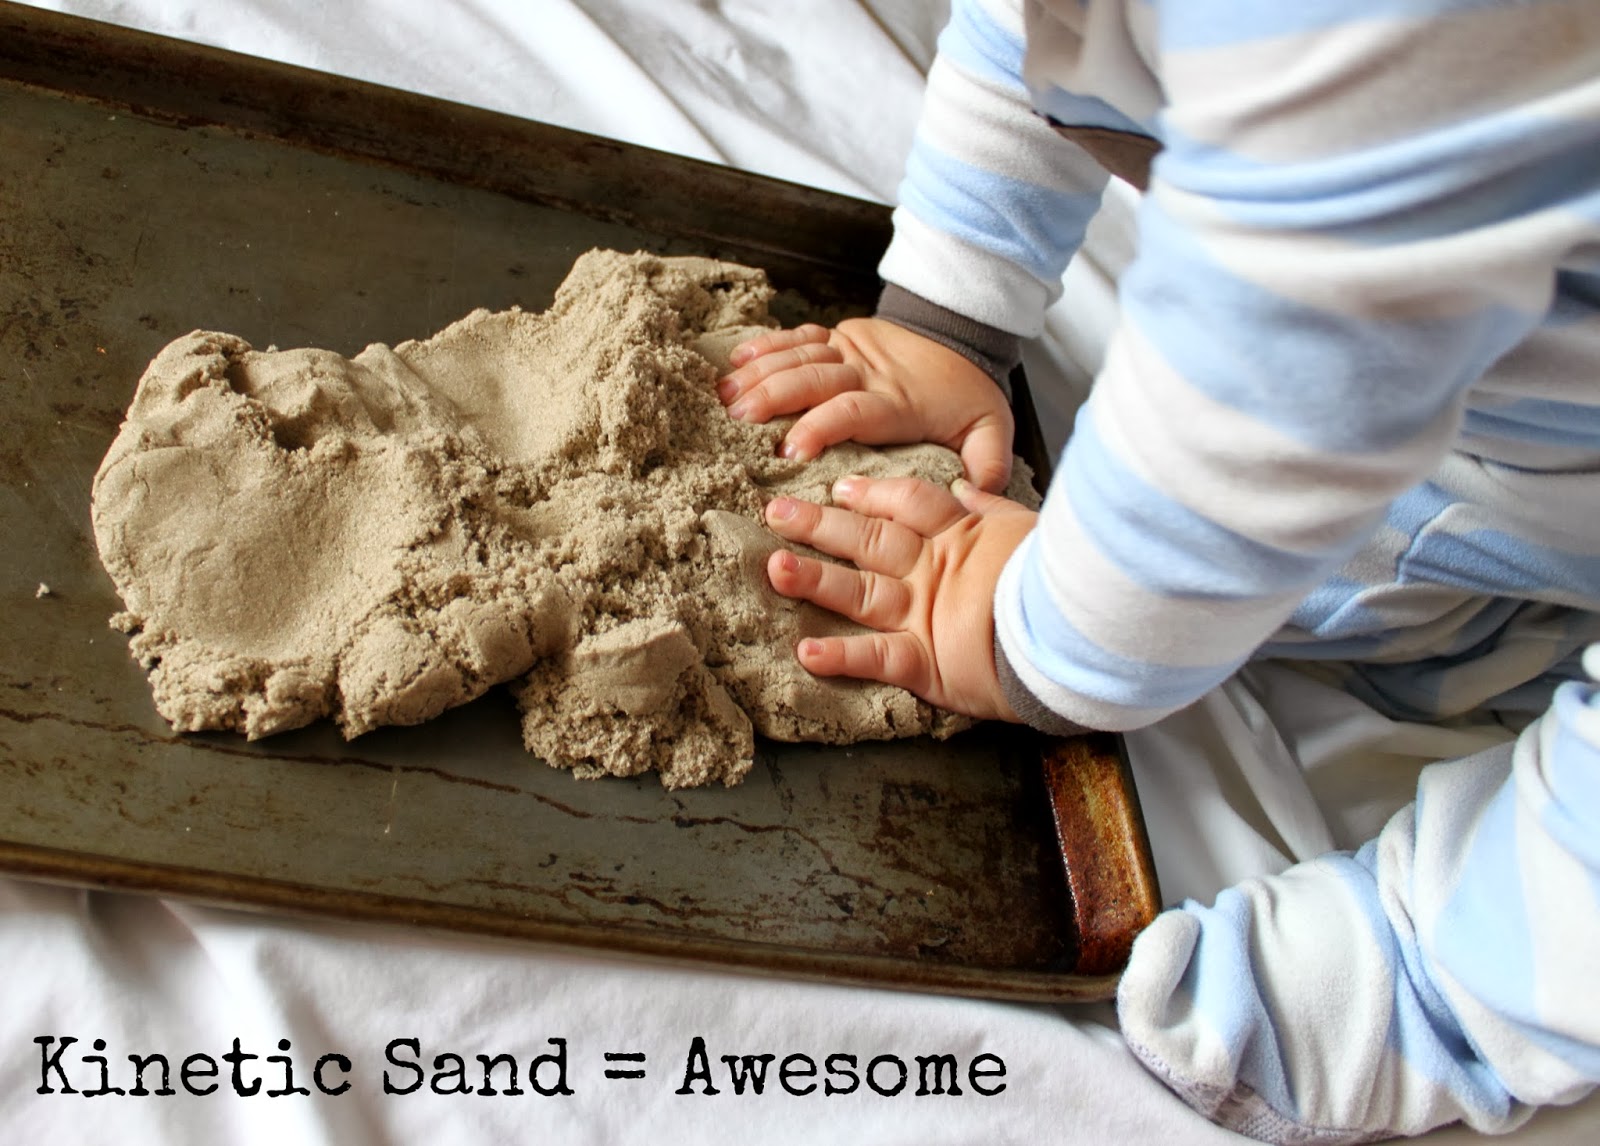
I was worried about the mess so I put it on a cookie tray on a sheet.  Turns out I didn’t need to worry.  The stuff is pretty much magic.  It sticks together and if some gets away you can pick it up with a chunk of the sand.  Crazy and awesome.  It feels like a fun science experiment mixed and we all seriously loved it.  I was skeptical at first, but I played almost as much as Bear. 

I’ve missed my calling as a sculptor, obviously.
You can mold it, shape it, cut it, let it drift through your fingers, and then roll it up and do it over again.
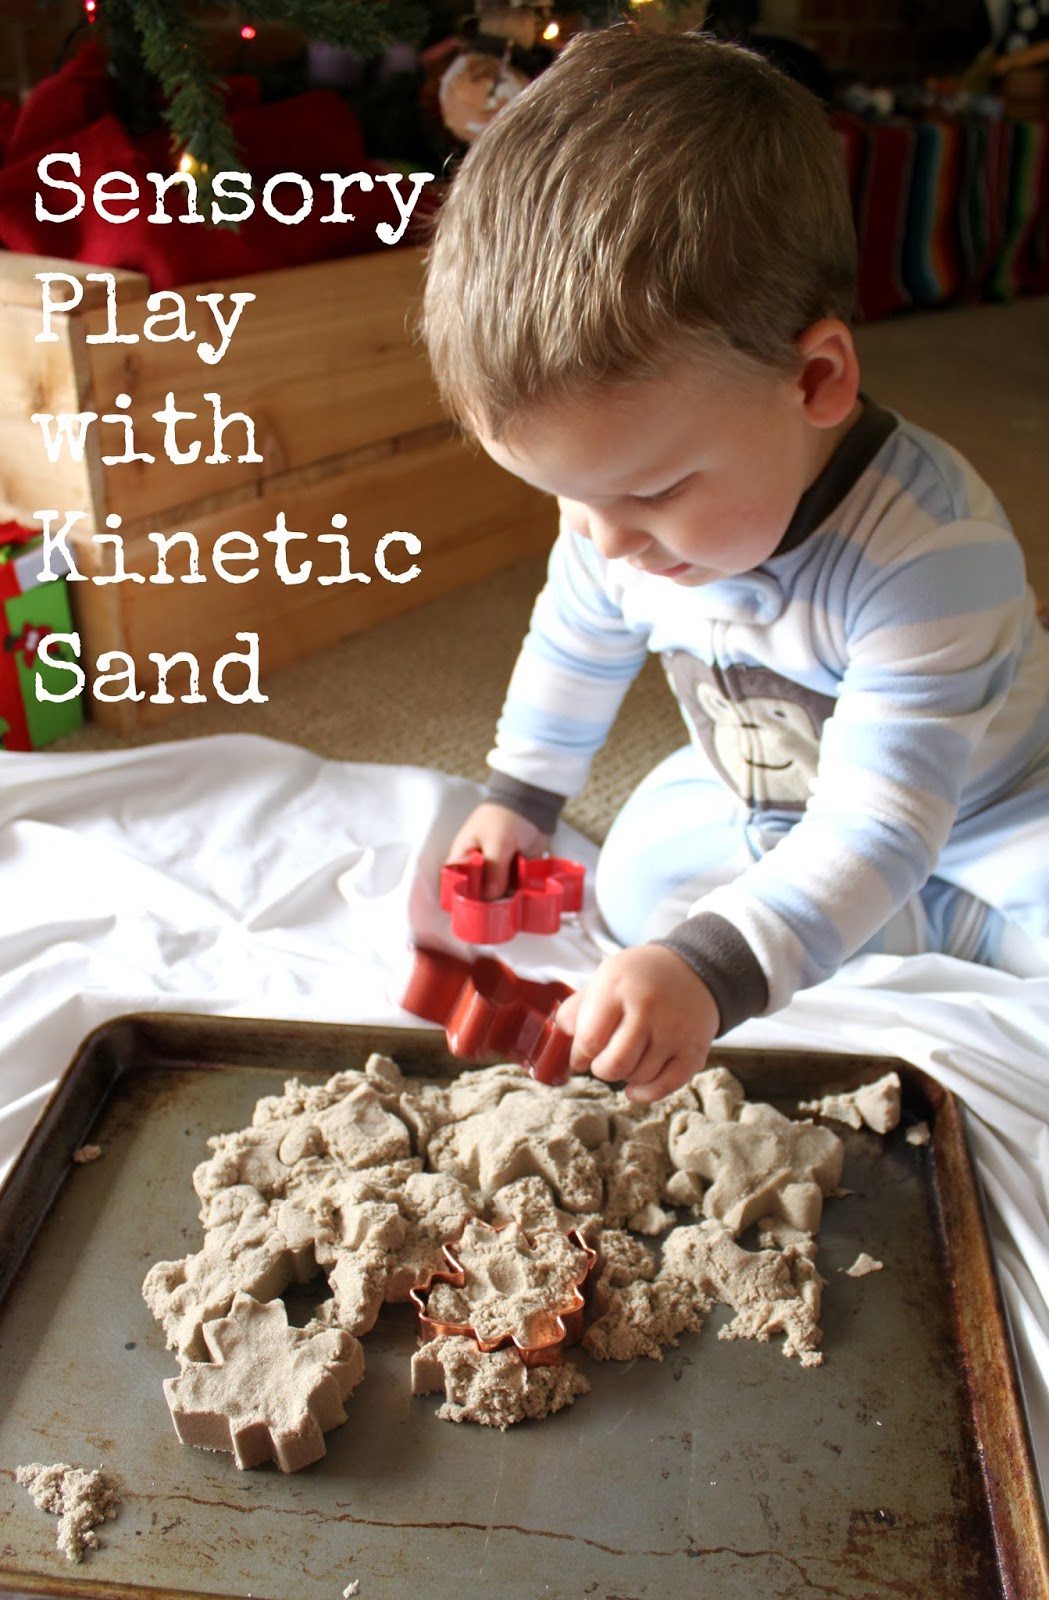
The Bear’s favorite game was to build a castle and then promptly bash it.  

I don’t know what kind of wizardry is used to keep it together, but I’m dying to find out.
The girl who spent a summer at science camp and was the historian of her high school science club came out to play for sure.  Nerd alert.  Jed was fascinated as well.  He starting teaching Bear how to use a butter knife to play with the sand.  Then we got out the cookie cutters.  The possibilities are endless.  

If you have a kid or kid-at-heart on your list, this is the perfect gift.  
We could not recommend it any more.  We truly love it. 

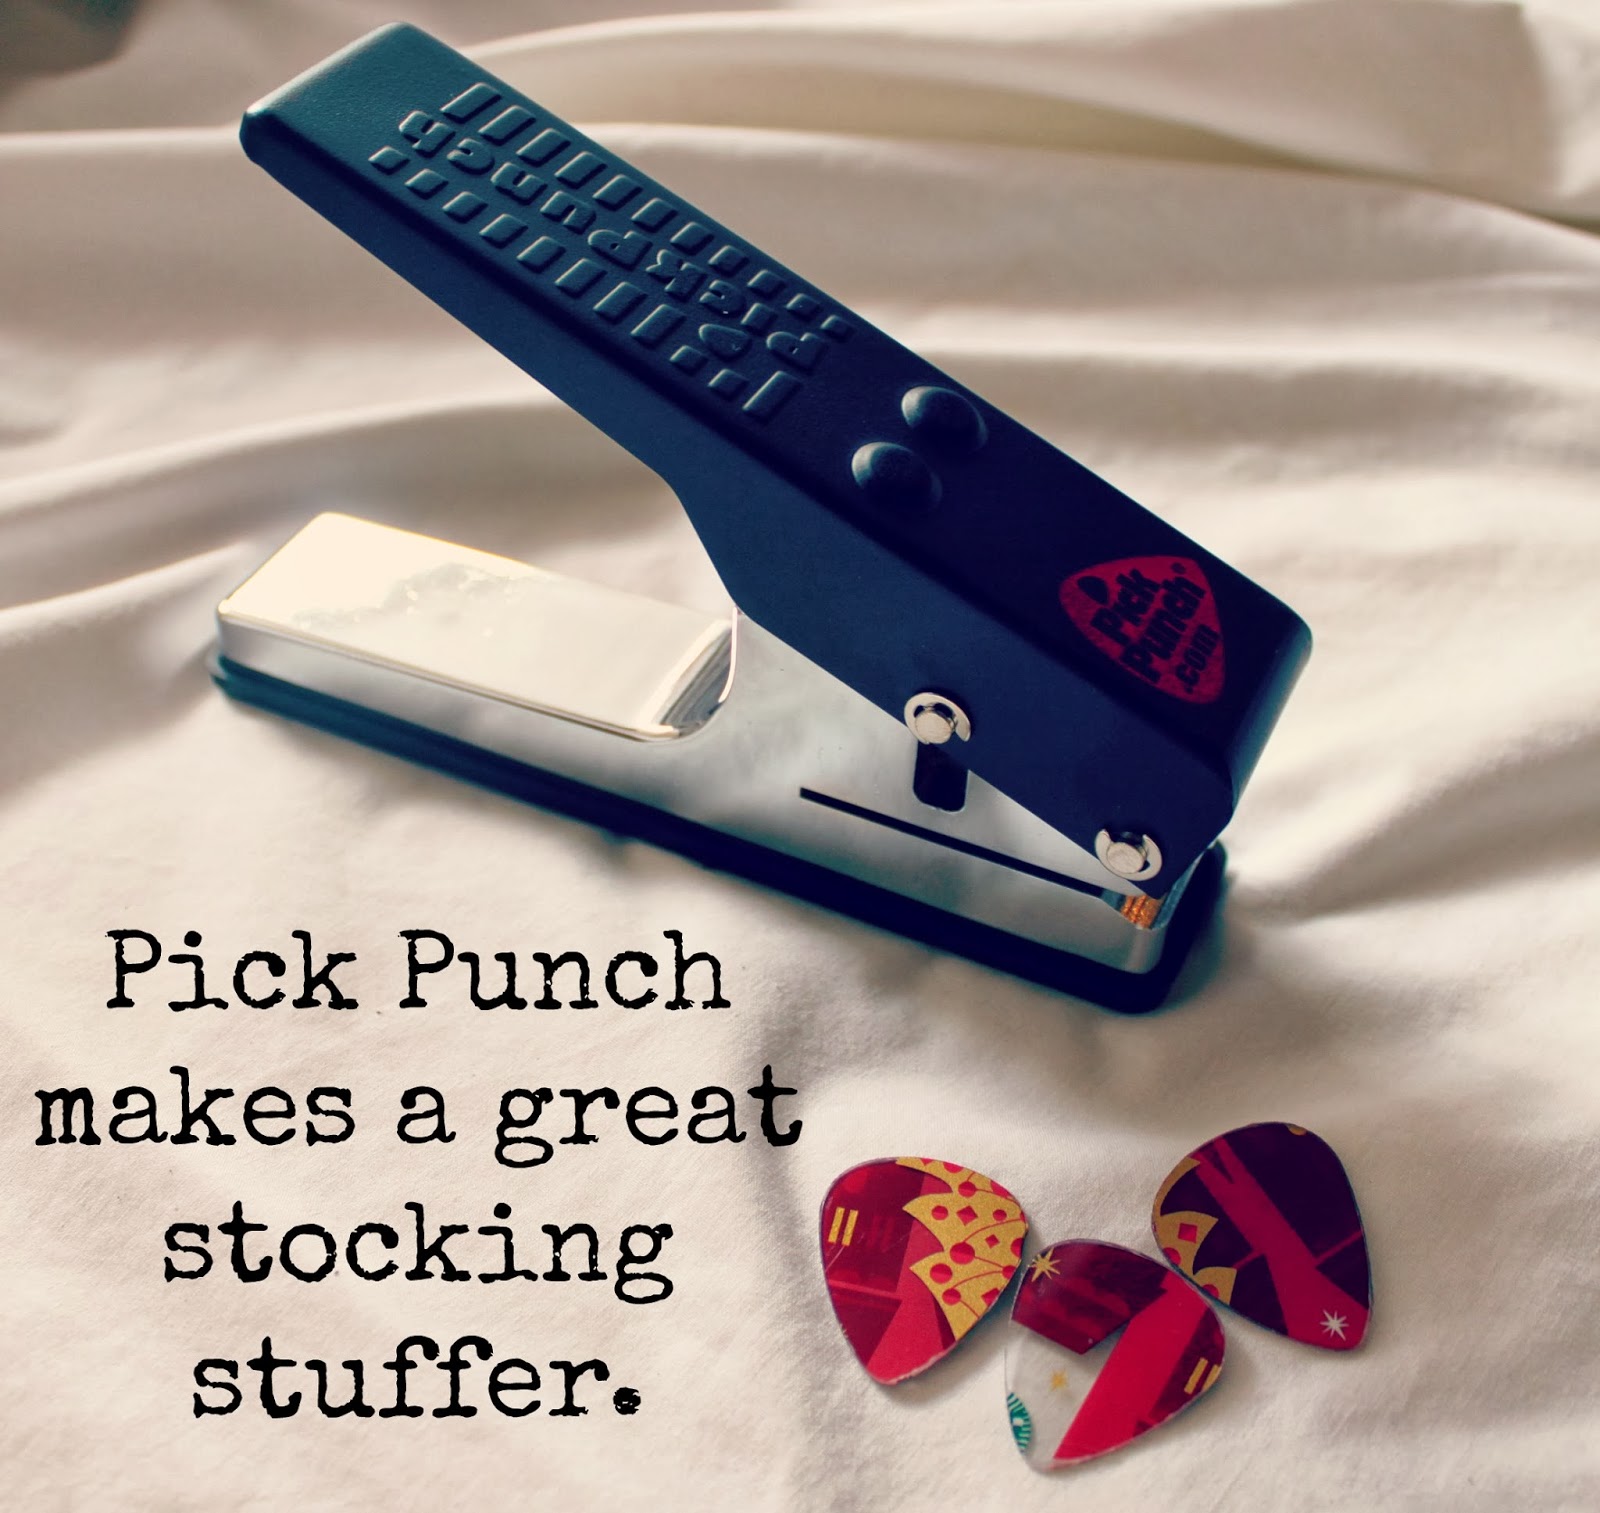
My husband, Jed, loves to play the guitar.  I gave him the Pick Punch to review, and he thinks it is really fun.  He used an old Starbucks gift card to test it out, and was able to create three picks from one gift card.  They are the same size as the picks he purchased, and work perfectly.  

If you have a musician in your life, the Pick Punch would make a great gift.  It retails for $25.  Teenagers who’ve taken up the guitar would be prime recipients, as would rock start dads like my husband.  In my experience, men and teenagers are the most difficult to buy for.  My husband is picky, and he loves this little machine.  If you need more gift ideas for men, click here.  

Uncommon Goods is also budget friendly.  Click here to find a great selection of gifts under $50.

Check out Uncommon Goods and come back and tell me your favorite item.  
Be sure to enter my giveaway for a $25 gift card here (ends 12/16).

Why I’m NOT Dreaming of a White Christmas {And Never Will Again} ~ A NickMom Inspired Story #Motherfunny

I am most definitely NOT dreaming of a white Christmas, and I never will again.  Sure, the idea of a snowy holiday season is romantic, but the reality was just a little too much for us last year and I hope we never have a repeat.  For those of you from the northern latitudes, this tale of woe will seem ridiculous.  My sisters from the warmer regions of the world will most likely empathize with our story of Snowmageddon 2012.  You should know that I am one who takes the holidays a little too seriously and longs for a picture perfect celebration that never quite comes to fruition.  If you fall short of the Martha Stewart mark like me, take a minute and head over NickMom and you’re guaranteed to laugh and realize you’re not alone.

Last year, there was a lot of anticipation as Christmas approached.  I’m the oldest of four kids and all of us were finally going to share a holiday celebration after living spread across the country.  We all arrived in Arkansas at our parents’ house with our kids and dogs and spouses and presents and suitcases and got seriously amped up to celebrate. We glanced at the forecast, which was calling for snow, but dismissed it thinking it probably wouldn’t happen.  When you are from a mostly mild climate, everyone panics whenever snow is predicted and raids the grocery store buying all the things and then we get two minutes of flakes.  It is such a letdown every time.  So, you learn not to get your hopes up.  After all, it was in the 60s outside will full sunshine.  We hoped to wake up to a white Christmas, but just knew it wouldn’t happen.

Santa came and delivered in a major way.  Toys and boxes and wrapping paper littered the living room.  We ate a glorious lunch and then packed up two members of the family to make their flights.  The airport car returned and the storm rolled in, out of nowhere.  All of a sudden, it was raining, then sleeting, then snowing.  The sleet stuck to the tree branches and the snow stuck to it.  Branches started to fall, and the transformer in our neighborhood blew, knocking out the power.  Nobody panic, I’m sure it will be on again soon.  Little did we know, it was going out all over the state.  Craziness was about to let loose.

We gathered candles and made it a fun game at first.  Then it started to get cold.  Really cold, really fast.  We added layers and figured out dinner, thinking surely the power would come on soon.  The snow kept coming.  This type of weather is normal in Minnesota, but not down south.  Most towns in Arkansas don’t have sand trucks and most southern people wouldn’t know what to do with snow chains.  We just stay inside and huddle up.

What you need to know about a power outage, is that the first day is pretty fun.  You feel like you’re on a camping trip and the kids feel like everything’s a big adventure.  I pretended I was a character in a Jane Austen novel carrying my candle around and blowing it out before bed.  The FIVE dogs we had in the house where an asset, really, because they provided warmth.

A white Christmas may make you feel like this.  Be careful what you ask for.

Day 2 of a power outage, the fun quotient goes out the window.  Survival mode sets in and everyone is in a bad mood.  The carnage of our Christmas feast mocked us.  The dishes were unwashed and we were too cold to deal with them.  The toys sat abandoned as our children shivered and asked when the lights would come back on.  It was a Christmas disaster.

Did I mention the trees? Not the beautiful Christmas tree my mother painstakingly decorated.  Oh no, I’m talking about the trees in the backyard.  In the middle of the night, we woke to a huge crack.  It wasn’t a return visit from Santa’s sleigh, but a giant pine tree careening towards the house.  The fall was broken by smaller trees, and we all ran downstairs in a panic because my brother was asleep in the den directly in the tree’s path.  All of the adults stared out the glass door awestruck.  We woke my brother and told him the tree was coming for him.  He sat up, looked out the window, and then said, “Nope, it’s not going to hit me.” Then he went back to sleep.  Seriously, dude?  He is a decorated war veteran who lost a leg in Afghanistan, so his reaction to danger is a little different than your average person.  He’s not one to panic.  He was right, too.  The tree didn’t hit our house, but instead took out the neighbor’s fence.  And several other trees.  Good times.  

Branches in the backyard at the beginning of the storm.

By the afternoon of Day 2 we knew we had to get out of there.  Miraculously, we discovered the power was on at my great aunt’s house.  We loaded all of our stuff up, with 6 adults, 3 kids, and the 5 dogs.  We picked up my grandmother and headed over to camp at Aunt Freda’s.  Let me set the scene.  Freda has lived alone for the last 50 years since her parents died, and was in a rehab facility because of a recent stroke.  She was thrilled to help, but to move 10 people and 5 dogs in to a house where one person has lived alone doesn’t always work well.  We learned a lot about Aunt Freda that week.  For instance, the only things in her cupboard were 24 boxes of waffle cones.  And in the fridge… you guessed it, lots of ice cream and not much else.  Perfect for a snow storm {sarcasm font}.  The alarm system went haywire and Freda couldn’t remember the codes.  Jed had to get creative to get the endless beeping to stop before we all lost it.  The plumbing in the kitchen backed up because it was used more than it could handle.  My brother showed up after a grocery store run with a super intoxicated friend he didn’t want driving.  The Bear stepped in a pile of dog poop from one of the FIVE dogs we had in the house, and he FREAKED out.  It was an adventure.  

The power was out for about 10 days, but we all cleared out as soon as the roads did leaving my parents to deal with the aftermath.  We’re jerks, I know.  Most of the state of Arkansas was without power for a week and the destruction was epic.  Lots of folks were in the same boat as we were, and I’ve heard many hilarious stories from friends whose holidays were affected by Snowmageddon 2012.

Our perfect Christmas went down in flames, or rather in a bank of snow.  We still had a great time together and spent more time talking and laughing than we would with the normal distractions that things like electricity bring.  I hope you enjoyed our snowy story.  If you’re looking for more holiday funnies, check out this post and this one as well on NickMom.com.  You can also follow @NickMom on Twitter and on Facebook for more giggles during this crazy season.

Vintage Blue Mason Beach Memory Jar

I am blessed to have a small collection of vintage blue Mason jars from my paternal grandmother, my Meme.  Most of them have their original tin lids and are in perfect condition.  I display them all over our house and am constantly changing out the displays.  Every time I help host a bridal or baby shower, the jars come with me to add a bit of vintage flair to the decorations.  After our recent beach trip, I decided to add to the beach memory jar I started a few years ago.  It is a simple and affordable way to preserve our special finds and remind our family of our amazing travels.  I filled the bottom of the jar with the pure white sand of the miracle strip of beach we visit in Navarre Beach, Florida.  It looks like sugar and reminds me of one of my favorite places in the world.  Next I carefully drop shells into the jar one by one.  I use the tines of a fork to arrange the shells.  It is a bit tricky to get everything positioned the way I want it, but worth the effort.  I love that I can easily add to and rearrange my little collection with special finds after every trip.  
How do you preserve travel memories?

If you would like to start your own collection of blue Ball Mason jars, the company recently re-released a heritage collection.  You can use the link below to get a set of 6 for around $2 a jar.The link is an affiliate link, which means you pay the same price but your purchase helps support our family.  We appreciate it any time you use a sponsor or affiliate link.  Thanks for reading!
  

I love linking my ideas at these blog parties.  Click the links to check them out and find crafty inspiration.  If you’ve never visited a blog party, you will be blown away by the creativity shared and imaginative ideas.
Monday: CraftOManiacMad in CraftsSew Chatty,  Keeping It SimpleC.R.A.F.T.Boogie Board Cottage, and Sumo’s Sweet Stuff   
Tuesday:  Hope StudiosToday’s Creative BlogCoastal Charm, and New Nostalgia
Wednesday: The Trendy TreehousePolka Dots on ParadeLil Luna, and The Thrifty Home
Thursday: All Things with Purpose, Somewhat SimpleThe Shabby Creek CottageThe Girl Creative, and House of Hepworths
Friday: Sugar and SpiceKojo DesignsDiana Rambles Pin Me Party, and The Shabby Nest
Weekends: Sweet Tea Social @ Texas Women BloggersTatertots and Jello, Serenity NowButtercream Bakehouse, and Candace Creations 


Easy DIY Instagram Magnets {Make 6 for $3}

I heart Instagram.  For ages I used it just to add fun filters to my phone photos but finally started using it socially a few months ago.  Now I’m addicted.  You can follow me on Instagram here.  The big drawback of taking pictures on your phone has always been the difficulty in printing and displaying them in real life.  My friend Sarah who blogs here shared a tutorial for creating Instagram magnets using the Walgreens app, and I thought it sounded like a fabulous idea.  When I went to Joann’s to looks for magnet strips, I found something exciting – a whole magnetic sheet!  I’d never seen one before and thought it would be perfect for this little project.  I used a coupon at both Joann’s and Walgreens so the total cost of this project was only $3 for 6 magnets.  If you print off your pics in a 3×3 format instead of the 4×4 using the app, you could get 12 magnets out of a sheet instead of 6.  Bonus!  Here’s how I did it:

Materials needed:
1 8×12 magnetic sheet (use your mobile craft store coupon)
6 4×4 Instagram prints (or 12 if get them printed 3×3)
Exacto knife or box cutter
piece of cardboard

Make it:
Get your pictures printed through the Walgreens app, or format and print yourself at home.  Strip the adhesive backing off of your magnetic sheet.  This is the hardest part.  That backing was not trying to come off for me.  Lay out your photos on the magnetic sheet.  Put a piece of cardboard underneath to protect your work surface from your cutting implement.  Cut them out.  Done.

These make a fun and very personal gift.  I gave the set of 5 to Jed for Father’s Day to take to his classroom, and saved one for our fridge at home.  My goal is to make these once a month so that we have our Instagrams on display in real life and have a festive fridge.

How do you display your phone pictures?

Be sure to follow me on Instagram at Bare Feet on the Dashboard.  

I love linking my ideas at these blog parties.  Click the links to check them out and find crafty inspiration.  If you’ve never visited a blog party, you will be blown away by the creativity shared and imaginative ideas.
Monday: CraftOManiacMad in CraftsIt’s So Very CheriSew ChattyThe Girl CreativeKeeping It SimpleC.R.A.F.T.Boogie Board Cottage, and Sumo’s Sweet Stuff   
Tuesday: Raising 4 PrincessesThe Kurtz CornerHope StudiosToday’s Creative BlogCoastal Charm, and New Nostalgia 
Wednesday: The Trendy TreehousePolka Dots on ParadeLil Luna, and The Thrifty Home
Thursday: All Things with Purpose, Somewhat SimpleThe Shabby Creek Cottage, and House of Hepworths
Friday: Sugar and SpiceKojo Designs, and The Shabby Nest
Weekends: Tatertots and Jello, Serenity Now, and Candace Creations 

Family Travel: Sharing a Hotel Room with Babies {Without Losing Your Mind}

If you’ve traveled with small children, you know it can be a challenge.  Sharing a hotel room with small people who go to bed early can end with parents exiled to bathrooms and balconies.  Not fun.  I’m a traveler with a gypsy soul, and plan to continue seeing the world with my two wee ones in tow.  We’ve discovered that it is possible to share a hotel room with our small people without losing our minds.  The Bear goes to bed at 7 and turns into a grump if he stays up late, so we try to honor bed time no matter where we are.  Here’s how we do it.

 I apologize for the crappy pictures.  Hopefully you can still get the idea.  You will need a Pack ‘n Play , two blankets, thumb tacks, and the room’s clock radio.  We build a hotel tent around our pack-n-play.  On one ill-fated occasion we used the hotel “crib” at a super nice resort that shall remain nameless.  It resembled something found in an orphanage in Kazakhstan.  Horrible.  We went out the next day and bought a cheap pack-n-play and then donated it to a ministry in the area when we left.  It would have cost $50 to fly with our travel crib from home each way ($100 total) and the cheap-o crib cost $40.  Awesome.

Set up your pack-n-play in the corner of the room.  Plug in your clock radio and set it to a non-station playing only white noise.  Turn it up and place it under the pack-n-play.  Tack your blankets to the ceiling making a tent.  Rock that wee one to sleep and place them in their lovely mini room.  Continue to go about your business in your room, even enjoying your tv or computer on a low volume.  White noise is miraculous, my friends.  Some folks use a wifi monitor and head to the hotel lobby or pool, but that is up to you and your level of comfort.  I go back and forth, but it really depends on the hotel.  We’ve used the hotel tent method in many different venues, and it always works.  We are not co-sleepers, so our kiddos are used to sleeping in their own space.  We use a Twilight Turtle with our older child so the dark isn’t scary.  It may take a few tries to get your child used to the Hotel Tent, but it will be well worth it when you aren’t trapped with your spouse on a bathroom floor.  Your child gets the sleep they need to enjoy the trip and you don’t have to watch a movie in the bathtub.  Everybody wins.  
What are your secrets to traveling with kids?  

Let’s Make an Easter Basket – A Tutorial

I love the joy of Easter and the new life it brings.  You can read some of my other Easter posts here.  Last year I looked long and hard to find the perfect Easter basket for the Bear, but all the options I loved were too pricey.  I had paint and ribbon on hand and decided to make a frugal, durable, cute Easter basket. I purchased a peck size basket at Hobby Lobby for about $4.  Here’s a crappy image of a peck basket from Amazon so you can see what it looked like before.  I totally forgot to take before pics.

I painted the basket using Rustoleum Painter’s Touch Satin in Heritage White and a sponge brush.  It took two coats to really cover the wood.

I used my glue gun to line the inside and outside with satin ribbon leftover from our wedding.  Yes, we’ve been married almost 5 years.  Yes, I probably over bought on wedding ribbon.  Oh well.  The ribbon serves two purposes.  It looks super cute and covers up the rough edges and staples that hold the peck basket together.

I tied satin ribbon into bows on each handle and glued them in place.  I’m sure these will have to be replaced someday but they are holding up well so far.

I painted the Bear’s name onto the basket using a navy blue paint pen.  I am not skilled in the handwriting department so it took a few tries and a few wipe off/repaints.  I finally went with dot letters because they are very forgiving and look super cute.  I highly recommend this method if you struggle with paint pen writing like I do.

We use ribbon as Easter grass after seeing the idea on Young House Love and not wanting to find the plastic stuff everywhere.  My dad hates the plastic Easter grass with a passion (4 kids = a ton of Easter grass clean up over the years) and loves this idea.  I used two rolls of green ribbon from the dollar store and just unrolled them completely and put them in the basket.  The clean up is incredibly easy.  You just pick up each long piece of ribbon and throw it back into the basket.  We’ve made a game out of tossing the ribbon and eggs back into the basket after Bear inevitably dumps them out.

The Bear loves his basket even more this year.  He has carried it all over the house and loves playing with the ribbon and plastic eggs.

What’s your favorite Easter candy?
I’m obsessed with Cadbury eggs.


**UPDATED** Pinterest and Time Management ~ Free Printable

We’ve all seen them.  There are so many unbelievable ideas on Pinterest, but some of them really make you wonder what kind of time the creator had on his or her hands.  Apparently that creative mama is managing her time a little better than I am.  She is probably out making something cool right now rather than wasting her life away skimming through Pinterest.  This little saying came to mind today.  

 After wasting a considerable amount of time on my beloved Pinterest today looking for ideas for Mini Bear’s room, I decided a free printable was in order. Click HERE for the free PDF.  Just play nice and link back here if you post it.

What’s your biggest internet time sucker?

Austin, TX with a Baby

For your viewing enjoyment, I present a photo collage via Instagram of our trip to Austin this week.  
It was in the 30s and 40s, with a hazy shade of winter cast over the city.  We stayed downtown at the Stephen F. Austin Intercontinental Hotel, because we were in town for a state teacher testing conference representing Jed’s school.  Fisher and I did a lot of lounging around in our room because of the cold both weather and illness affecting us.  We shopped and ate and enjoyed ourselves, and would love to go back when the weather is nice.  Downtown is very walkable, and the city has so much to explore.  I would choose a different hotel next time.  The Intercontinental was nice and had lots of architectural interest, but our room was tiny and expensive (paid for by the school) and the mandatory valet parking was very pricey.    
Where did we eat? 
The Mellow Mushroom near the University of Texas campus was our first dinner stop.  We were headed out to Hula Hut at the lake, but traffic was horrendous so we decided to stay close.  We love Mellow Mushroom in Asheville, so we went for what we know.  We had the Funky Chicken pizza and the soft pretzels.  The key at MM is to order a side of the Esperanza house dressing.  That junk is so good.  
The next day Jed had a long lunch break so we went to Mellow Johnny’s, Lance Armstrong’s bike shop.  My husband is a cyclist and could entertain himself in a bike shop for hours.  He showed Fisher all the cool bike stuff while I shopped for Christmas presents for him.  If you are into bikes, the shop is a must see.  Many of Lance’s bikes are on display along with a well thought out selection of cycling gear and accessories.  It also has a cafe called Juan Pelota’s that serves breakfast burritos and coffee.  
For lunch we headed to the Taco Shack.  I had a chicken torta with bread that melted in my mouth.  Delicioso.  
At the Taco Shack, Fisher had a big first.  He sat up in a high chair throughout the meal.  Yay!!  He loved playing with his toys and sitting up like a big boy while we ate.  

Fisher and I did a little more exploring, driving around the state capitol and South Congress shops.  We picked up a few cupcakes from Hey Cupcake, one of the famous food trucks on South Congress.  I surprised Jed with them when he got back to the hotel.  

Fisher and I did lots of snuggling on the big king sized bed in our room.  A sniffly baby makes exploring in the cold not so much of an option.    
Our last night in town we went to Magnolia Cafe on South Congress.  It rocked my world.  It was cheap and delicious with a laid back atmosphere and creative menu.  I had baked acorn squash with the chef’s special pecan pesto on top, with a side of curried shrimp and veggies.  Oh my.  I was in broccoli heaven.  
We came back to Dallas and were greeted by gridlock.  We loved the feel of Austin and hope to go back and explore more when the weather is nicer.  Where would you like to explore?   

A Trio of Burlap and Shell Beach Shadowboxes with Tutorial

We found a ton of shells this summer, so I’m trying to find creative ways to display them. I decided to make these three little shadowboxes for my bathroom. I actually bought the sand dollar and starfish, but found the shell. I was mad because we found several sand dollars (already dead) after I bought this big one. Oh well. I’m sure I will find a home for them too.
I bought three of these 5×7 shadow boxes at Hobby Lobby for $4.50 a piece. They were on sale and cheaper than their friends because they are a weird grey color.
I taped the glass to avoid getting paint on it, and then painted all the wood with antique white paint and a foam brush. I let it dry, and then sanded it to give it a worn, beachy feel.
I cut each piece of burlap to cover the backing from the frames. I tried using Gorilla Glue first, but it didn’t hold. I definitely Gorilla glued my fingers nicely. My friend Whitney pointed out that I should use wax paper next time so I wouldn’t get glue on my fingers. She is a genius. I glued the burlap down with hardcore craft glue, and pressed it with the wax paper. You have to be careful with glue placement, because it may still show once dried.
Once the glue dried, I trimmed the burlap to fit exactly inside the frame. My frames wouldn’t allow me to wrap it and staple on the back, as I had originally planned. Then I centered each shell and glued it down, pressing for 30 seconds.
Then I put the finished product into their frames and hung them in my bathroom. I love the rustic, beachy simplicity. This project was a little time consuming, but worth the effort.


If you don’t have time to make your own, I’m selling these on Etsy, made with found shells only, for $20. Check out my Etsy site on the sidebar.

Don’t forget to link up to the Beach Week party!

I’m linking to some great parties. Check them out here.