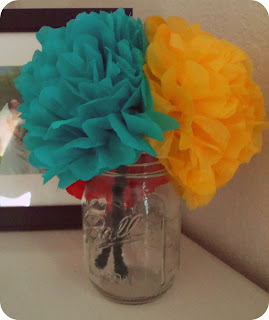
 Back in May, I decorated my living room with handmade paper flowers. They are cheap and easy to create, and I love the festive color they add to our home. I intended to make a wreath of the same flowers to hang on the door between our kitchen and living room three months ago. I just got around to it. The Queen of Procrastination strikes again.
I found a wreath at the Dollar Store, and already had the tissue paper and wire. I decided to create a tutorial this time around, because several readers asked for it last time.  1) Cut a rectangle in your desired size from at least 4-5 sheets of tissue paper. You can cut it all with one cut. Your flowers will be the size of the smaller end of the rectangle. The number of sheets and length determine the fluffiness of your flower.
2)Start at one of the short ends, folding like a fan in one inch (ish) folds. Continue these folds all the way to the other end.
3)This shows the fan like folds.
4)Cut two small triangles in the center of your folded paper.
5)Cut a 10 inch piece of wire and wrap it around your flower. Twist it at the bottom of the flower so it hangs like a stem.
6)Start fluffing your flower from one side, then the other. Do this by separating each piece of paper from the others, one at a time. You can cut the edges into points, rounded edges, or leave them straight. I prefer the rounded edges.
 Take each flower and twist the wire around the wreath. I created flowers of all sizes for this wreath. You could create a more homogeneous design with flowers all the same size or same color. I like the festiveness that the different sizes and colors create.
 Here is the finished product. I think it is bright, happy, and pure summer fun.
I’m linking to some great parties. Check them out here.


