Month: July 2013

Play Time: Stress Free Finger Painting

Does the idea of letting your preschooler play with paints make you cringe and give you the beginnings of a headache?  No worries.  We’ve been painting like crazy all summer and the Bear and I have it down to a science.  Yes, it’s messy, but it is also fun and can be stress free.  Here’s how we do it.

What You Need:
washable non-toxic paint
paper (really any kind will do, but we prefer cardstock or construction paper)
a 20-30 minute time slot
a hose or kiddie pool
an outside work space


Make It Happen:
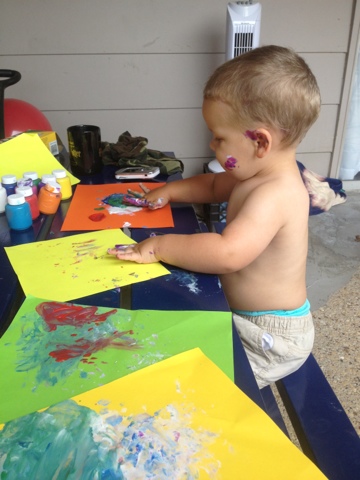
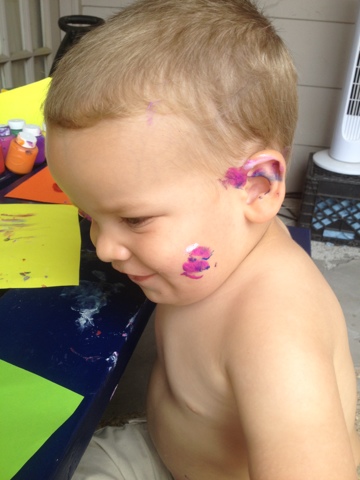
We set up on the picnic table my husband made for the kids.  He’s working on a tutorial if you’re interested.  Use one sheet of paper as your child’s palette.  Let them pick 2-3 colors to start with and put a dollop of each color on the palette.  Take off your child’s shirt.  Show them how to dip their fingers in the paint and use their finger as a paint brush.  We also read a book about Curious George mixing paint before we painted for the first time to help with the concept.    


Step back and let them create.  Resist the urge to correct.  Let them mix and swirl and get messy.


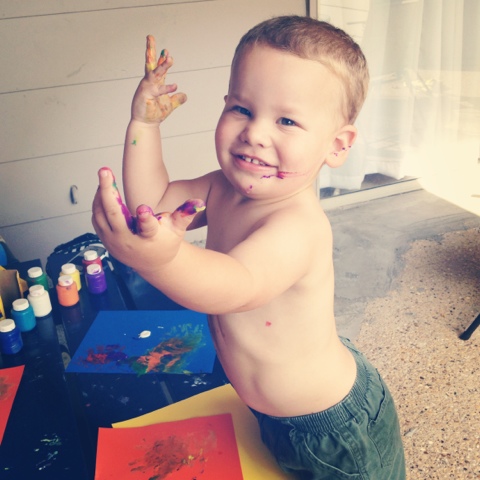
Every few minutes bring in a new sheet of paper.  Show them how to make hand prints, a useful skill for grandparent gifts later.  Take some photos and enjoy the flowing creativity.

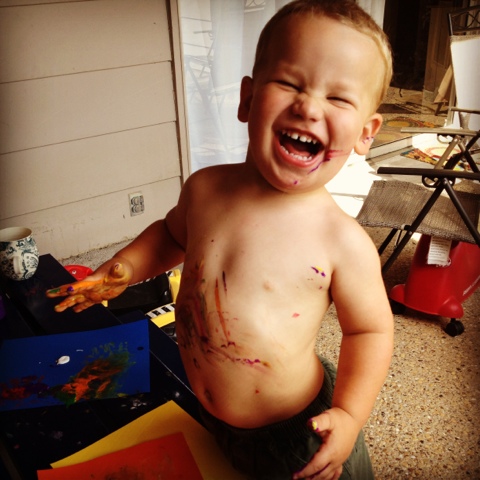
After about 20 minutes, ask if they are ready to be done (if they haven’t stopped already).  Grab your hose (and possibly and inflatable kiddie pool) and strip them down to wash off.  This might be as fun (or more) than the actual painting.  Give them 2 cups to fill up or and help facilitate a little rinsing.  While they are rinsing, lay out the masterpieces to dry and pick up the paints.  Give your table a wipe down, then dry off your now clean child.  You’re done, and you both survived with your sanity in tact and you get the fun mom of the year award.  Everybody wins!

What’s your favorite preschool art idea?

Duck Creek DIY: Antique Dining Room Chair Makeover {With Tutorial}

We have a beautiful dining set given to us by Jed’s dad.  It is 80-100 years old and has been passed down through several generations.  The seats have been recovered several times with some pretty unfortunate fabric.  The latest was a tan vinyl that has probably been there for 30+ years.  It was time for a change.  We love the color of the wood and the set is very well made.  The wood is in great shape, but the seats were struggling.  We have five chairs, a table, and a buffet.

Before = Struggling

This was our first time recovering chairs, so it took a little trial and error, a few Youtube videos, and quite a few Pinterest links to get through the adventure.  We’ll walk you through it, so you can learn from our mistakes and save yourself a little pain and suffering.  I highly recommend checking for coupons online before you buy your fabric and foam.  You can save a bundle with a 40% off coupon at Joann’s.  We originally bought a stripped linen home decor fabric, but it didn’t work out.  We went back and found an awesome Ikat outdoor fabric that will be perfect for the spills and thrills that come with small children using furniture.

Here’s what you need:
sheet of plywood
circular saw
foam (enough to cover your chairs + a little extra)
outdoor weight fabric (or another thick fabric, at least home decor weight)
staple gun
staples (We used 5/16 size.)
sharp fabric scissors
exacto knife or utility scissors

Make it happen:
1) Take your chairs apart.  Unscrew your seat from the chair and remove the padding and fabric.  If you can salvage the padding, go for it because it will save you about half the cost of this project.  If your seats are still in good condition, you can skip down to step three from here.

2) Create new seat bases from your plywood sheet.  Use the existing seat to cut out a new one using your circular saw.  Create your pattern by tracing the old seat, then cut out each new seat carefully.

3) Use the previous fabric seat cover to trace a pattern on your new fabric.  Make sure you check to see that all of your seat cover are the same size (end chairs are often larger).  Use fabric scissors so that the least amount of damage is done while cutting the fabric.

4) Cut out your foam if needed.  Again, salvage the old foam if you can.  We used a 1 1/2 inch thick green foam material because the density will help with wear and tear.  Use the seat as a template for cutting out your foam.  Don’t use your fabric scissors on the foam or they will no longer be sharp.  Use an exacto knife or utility scissors.

5) Assemble!  Place the foam on top of the wooden seat, then wrap the fabric tightly around it.  Starting in the back, pull the fabric tightly over to the bottom of the seat.  Staple that bad boy down.  This is where we ran into trouble with our first fabric choice.  The linen couldn’t handle being pulled tightly and started to run.  Disaster!  The outdoor weight fabric worked MUCH better.  After you staple down the back, move to the front and repeat on all four sides.  Do not be afraid to use a LOT of staples.  Seriously.  Get after it.

6) Reattach your seat to the chair.  Done!

I’m obsessed with this fabric, and I think the grey and green goes really well with our teal walls.  What do you think?

I love linking my ideas at these blog parties.  Click the links to check them out and find crafty inspiration.  If you’ve never visited a blog party, you will be blown away by the creativity shared and imaginative ideas.
Monday: CraftOManiacMad in CraftsSew Chatty,  Keeping It SimpleC.R.A.F.T.Boogie Board Cottage, and Sumo’s Sweet Stuff   
Tuesday:  Hope StudiosToday’s Creative BlogCoastal Charm, and New Nostalgia
Wednesday: The Trendy TreehousePolka Dots on ParadeLil Luna, and The Thrifty Home
Thursday: All Things with Purpose, Somewhat SimpleThe Shabby Creek CottageThe Girl Creative, and House of Hepworths
Friday: Sugar and SpiceKojo DesignsDiana Rambles Pin Me Party, and The Shabby Nest
Weekends: Sweet Tea Social @ Texas Women Bloggers, Tatertots and Jello, Serenity Now
Buttercream Bakehouseand Candace Creations 

Trying for a VBAC: Eleanor Pearl’s Birth Story

Eleanor came into this world just three months ago, but it seems as though she has been a part of our family forever.  Her story begins with my journey towards a VBAC (vaginal birth after cesarean) even before she was a twinkle in my eye.  After the Bear’s traumatic birth, I knew I wanted something different, something better, for my next child and for myself.  I started researching like crazy and reading everything I could about birth.  I joined my local ICAN chapter (International Cesarean Awareness Network) and read blogs like Birth Without Fear on a regular basis.  You can read more about from my Trying for a VBAC series here to get the whole background story.  I found a supportive OB, hired a doula, and wrote my birth plan.  I visited a chiropractor, read many books, and practiced my coping techniques.  I prepared myself to go past my due date because induction brings unnecessary risk and my previous birth was “late.”  I was as ready as I could be.  I posted my 39 week update and was sure I’d have to share a 40 week blog post soon.  Eleanor had other plans.
Sunday morning came, four days before her “guess date”, and we attended the baptism and celebration of our sweet little friend Grace.  We had a fun day and that evening I felt a little off, but chalked it up to a big day.  I was already dilated to between 3-4 centimeters and completely effaced, and had real and Braxton Hicks contractions daily for weeks.  At 2 am I woke up with real and steady contractions.  Because I am the best wife ever, I dealt with them on my own for four hours without waking Jed up.  I bounced on my birth ball, used my Spinning Babies positions to relieve the wicked back labor, got in and out of the tub and shower, and reheated my rice sock heating pad over and over.  I texted and talked a few times with my doula, Erica.  She was such a trooper, having arrived home from a 24 hour birth just a few hours before.  She talked me through positions over the phone and helped me decide when it was time to wake up Jed and call our babysitter.  I had been throwing up consistently, but that is how I’ve always dealt with pain so it wasn’t that abnormal.  At 6 am I woke Jed up and told him he wouldn’t be going to work that day because we were having a baby.  I also wished him a happy birthday and was excited and overwhelmed that our daughter would most likely share her daddy’s birthday.  We decided it was best to head to the hospital to beat rush hour traffic, because we live in a northern suburb and Baylor Hospital is downtown.  Our awesome friend Raychel came over to take care of Bear when he woke up, and we took off for the hospital.

{Unfortunately we only have phone photos from her birth because of a computer crash.}

The ride to the hospital was rough, but faster than we’d hoped with early morning traffic.  We arrived at the hospital around 7 am.  I was checked and still not 4 cm, but was still 100% effaced and at a 0 station.  Erica (my doula) arrived at 7:30 am and got straight to work positioning me to relieve the back labor.  The pretzel position really helped, with one leg crossed over my body and up as high as I could get it.  Dr. Lawson asked that I be monitored for an hour, and if I had not progressed be allowed to leave and walk around.  I prayed hard for progress and doubts began to creep in reminding me of my previous birth trauma.  I labored in my own clothes which was a powerful way to feel less like a sick patient and more like an individual working towards a healthy birth. I used our DIY heating pad scented with lavender essential oil to help relieve pain and help me relax. Ocean wave sounds played on my phone to help my mind focus.

The nurse checked me at 9:05 am and I had reached 5 cm.  Yay for progress!  They moved me from the labor and delivery triage over to the real labor and delivery wing.  We were able to settle in for a few minutes before my pressure waves really cranked up a notch.  At a little past 11, my doula called my chiropractor and asked her to come in and adjust me to help with the back labor.  Dr. Denisa Weber arrived at 11:40 and adjusted me which really seemed to help.  I was officially in labor land and things got really fuzzy after that.  Later I realized it was because I had moved into transition, and was floating through it.  There was pain and hard work, but I wouldn’t change a thing.  Baylor requires VBAC mamas to be continuously monitored, but most doctors and nurses will allow you a 15 minute break every hour to “go to the bathroom”.  For me this was time to get up and move around, try to empty my bladder, and try new positions.  My amazing nurse gave me lots of grace with the time limits, and even held the monitors in crazy positions while I moved through contractions.

I labored hanging over the bed, on the toilet, hanging on Jed, pushing on the bed, and on the birth ball.  Kneeling backwards over the bed was my favorite.  After several adjustments by Dr. Denisa, I felt the baby move down more and felt intense pressure and the sensation of pushing around noon.  I continued to labor her down and was checked by a nurse at 12:36 pm who thought I was between 8-9 cm and possibly even complete.  Transition happened while being adjusted and I really believe that the chiropractic help made it much easier to deal with.  A resident came in and checked me, confirming that I had reached 10 cm at 12:45 pm.  At 1 pm my nurse, Julie, confirmed that Eleanor had reached a +1 station.  This was HUGE for me because the Bear never got past 0 station.  I wept with pure joy and a sense of victory, but the battle was far from over.
Dr. Lawson arrived at 1:10 pm, even though it was her day off.  I cry just thinking about how crucial she (and the rest of my birth team) were to the birthing process.  She decided to break my bag of waters after a bit of observation, hoping that it would help bring the baby down.  After that I worked harder than I’ve ever worked in my life to get my daughter to move down into the birth canal.  She was stuck behind my pubic bone, just like my son before his cesarean birth.  After and hour and half of hard work, at 2:39 pm we added a squat bar and changed positions multiple times to try and get her to move down.  Pushing was the hardest work of my life, but the most rewarding by far.  I struggled with self doubt and began to feel that maybe my body was broken, was a lemon, and I couldn’t do this.  Dr. Lawson saw the look in my eyes and told me that I could do it, was in fact doing it, and to keep going.  Her words pushed me past the pain and helped me to keep going.  Erica continued to encourage me and provide counter pressure to my hips and back as she had done throughout the day.  She was incredible.

Someone brought the mirror over so I could watch the progress, and it was incredibly motivating.  Such a change from my first birth where I wanted no part of the mirror.  Jed watched and held my hand as out beautiful daughter came into the world at 3:56 pm after almost 14 hours of all natural labor.  She had the cord wrapped around her neck and was a little blue.  After greeting her for a few minutes the nurse had to suction her for a while to get her to breathe well.  Dr. Lawson stitched my 2nd degree tear, which I hardly noticed.  I couldn’t believe my girl was here and my body was able to do what it was designed to do.   Ina May Gaskin’s words rang so true in my mind, “Your body is not a lemon!”

Eleanor Pearl weighed in at 7 lbs 15 oz, and was 20 in long with a beautiful head full of hair.  We were able to nurse as soon as her little lungs cleared out, and she stayed with us the entire time we were in the hospital.  We waited to bathe her until the next day and Jed and I both helped with her first bath.  We got so much support from the Baylor Hospital staff with the birth process, breastfeeding, and rooming in.  I didn’t have to fight for any part of my birth plan and the whole experience was incredibly healing.  I am so thankful to have had a healthy, normal, natural birth.  Every piece of the postpartum process was easier because of the VBAC.  Healing, recovery, breastfeeding, adjusting to life with a newborn, all of it went so much smoother.  My daughter is such a joy and a healthy, happy little girl.
If you have had a cesarean section, I would strongly encourage you to do your research, find your local ICAN chapter, and consider trying for a VBAC.  It is worth it.  Your body is not a lemon.

My Birth Team:
If you are in the Dallas area and looking for a VBAC supportive OB, I highly recommend Dr. Lawson at Madewell OB/GYN.  You can find her here.
If you are in DFW and in search of a doula who will support you through labor, Erica Sosa is your woman.  She has personally experienced c-section and VBAC and supported many clients through their births.  You can find her here.
My Webster certified chiropractor is Dr. Denisa Weber.  She is also an experienced doula and played a critical role in Eleanor’s birth story.  I would definitely recommend her services.  You can find her here.

Life to the Full: Listening to Jesus

I’m a talker.  Always have been.  Like many great talkers, I’m not always the greatest listener because I’m often formulating what I’m going to say next rather than hearing what the other person has to say.  It is a very real fault of mine and I long to be a great listener.  When it comes to listening to what the Lord has to say to me, I’m often too busy to slow down and listen.  This past Sunday our pastor preached on Psalm 46 and the need for us to just be still and listen, and know that He is God.  It was exactly what my soul needed to hear.  He asked us if we would even recognize our soul if faced with it, and my answer was, “I don’t know.”  I want to be a woman who knows herself and her soul and her Jesus.  I want to be a person who listens to what God has to say to me and spends quality time with my Savior each day.
In a world taken over by two very small but demanding people, it is a challenge to have silent alone time.  We all have excuses, don’t we?  Before kids came along it was something else.  My challenge to myself this week in my quest for Life to the Full is to slow down, shut up, and listen.  My plan is this: get up 30 minutes before my kids, grab a cup of coffee, read my devotion for the day, and listen.  In silence.  Will you join me?

This week’s challenge:  Spend time in silence with Jesus.

How do you carve out time to listen to the Lord?

You can read the rest of my Life to the Full series here.

Frugal Friday: Four Ways to Stick to Your Dining Out Budget

I get questions all the time about the specifics of our budget.  “How much do we spend on groceries?”  “How much do we set aside for clothes?”  By far the most common question is, “How much do you spend on restaurants?”  The answer is, “Not much.”  Our monthly dining out budget on one income is $70.  That’s it.  Would we love for it to be more?  Of course.  Click on some of my ads and affiliate links and maybe we’ll get to increase it.  Just kidding (but seriously…).  How do we stick to spending only $70 per month on dining out?

1) We don’t go to fancy restaurants.  I have a growing list of great local places and a few chains where we can get a great meal for under $20.  It is possible and a lot easier than you might think.  We would rather have 3-4 meals out a month than one expensive one.  

2) We don’t buy kids’ meals.  The Bear is still a toddler with a varying appetite, and every time we’ve ever bought him a restaurant meal we regret it because he leaves most of it on the plate.  Instead we bring in a sandwich, veggies, fruit, and a sippie cup every time we go out to eat, and offer him some of our meals.  Yes, this takes a little planning on our part.  No, we won’t be able to get away with it forever.  We’ve never had a waiter even ask a question about it, and several have even commented on what a great idea it is.

3) We don’t buy drinks.  Soft drinks and alcohol in restaurants are a total rip off, in my opinion.  Why would we pay $2.99 each for a diet coke?  Crazy town.  Sometimes we break this rule, and when we do Jed and I split a soft drink rather than both getting one.  We get free refills and french kiss each other on the regular, so what’s the big deal?

4) We meal plan.  Before we started budgeting, we spent an outrageous amount of money on restaurants because we were both busy and dinner time would roll around without us having a plan.  We’ve learned that dinner is not an emergency, it comes at about the same time every day.  If we plan out our meals one week in advance we end up spending far less on groceries, making fewer grocery store trips, and eat out far less.  This way we can plan our meals out and make them count rather than have them be a last minute rush decision.

Do you have a budget for dining out each month?  How do you stick to it?

Life to the Full: Daily Prayer Lists

In this quest to live this one life to the fullest extent the Lord has planned for me, I’m trying each week to concentrate on one aspect of becoming the woman I want to be.  You can read about my definition of who that woman is here.  I long to be a woman of prayer.  If you are blessed to know a real prayer warrior, you know there is something different about them, something intangible.  Not only do they have that Jesus joy that shines through so many of His followers, they also have a quiet sense of connectedness to the Father that I want so desperately.  You know they pray for you, even without them voicing it.  You know they spend rich, full, time with their Daddy each day.  I am one who often says a quick prayer throughout the day, but lacks the fortitude to commit to consistent, deep time with Him.  But I want it.  Oh, how I want it.  So, I’ve decided no more will I wait on the sidelines for that magical time when I become the woman I want to be.  The time is now, and it starts with prayer.  
Will you join me?  If you, too, have longed to be a prayer warrior, join me as I try to bridge this gap.  I’ve decided to start with intentional prayer lists.  Using the notes section of my iPhone, I’ve made a list for each day of the week.  There I can easily add prayer requests for friends (both IRL and online) and family, pray for missionaries and churches, and for my husband and children.  My phone is like an extra appendage, so my prayer list will always be with me.  Hopefully each list will be prayed over multiple times per day.  From now on, if I tell someone I’m praying for them, I’m really praying for them.  I want those words to have meaning.  
Challenge #1: Create a prayer list for each day of the week.

Who do you want to be when you grow up?  What steps are you taking to become that person today?

Easy DIY Instagram Magnets {Make 6 for $3}

I heart Instagram.  For ages I used it just to add fun filters to my phone photos but finally started using it socially a few months ago.  Now I’m addicted.  You can follow me on Instagram here.  The big drawback of taking pictures on your phone has always been the difficulty in printing and displaying them in real life.  My friend Sarah who blogs here shared a tutorial for creating Instagram magnets using the Walgreens app, and I thought it sounded like a fabulous idea.  When I went to Joann’s to looks for magnet strips, I found something exciting – a whole magnetic sheet!  I’d never seen one before and thought it would be perfect for this little project.  I used a coupon at both Joann’s and Walgreens so the total cost of this project was only $3 for 6 magnets.  If you print off your pics in a 3×3 format instead of the 4×4 using the app, you could get 12 magnets out of a sheet instead of 6.  Bonus!  Here’s how I did it:

Materials needed:
1 8×12 magnetic sheet (use your mobile craft store coupon)
6 4×4 Instagram prints (or 12 if get them printed 3×3)
Exacto knife or box cutter
piece of cardboard

Make it:
Get your pictures printed through the Walgreens app, or format and print yourself at home.  Strip the adhesive backing off of your magnetic sheet.  This is the hardest part.  That backing was not trying to come off for me.  Lay out your photos on the magnetic sheet.  Put a piece of cardboard underneath to protect your work surface from your cutting implement.  Cut them out.  Done.

These make a fun and very personal gift.  I gave the set of 5 to Jed for Father’s Day to take to his classroom, and saved one for our fridge at home.  My goal is to make these once a month so that we have our Instagrams on display in real life and have a festive fridge.

How do you display your phone pictures?

Be sure to follow me on Instagram at Bare Feet on the Dashboard.  

I love linking my ideas at these blog parties.  Click the links to check them out and find crafty inspiration.  If you’ve never visited a blog party, you will be blown away by the creativity shared and imaginative ideas.
Monday: CraftOManiacMad in CraftsIt’s So Very CheriSew ChattyThe Girl CreativeKeeping It SimpleC.R.A.F.T.Boogie Board Cottage, and Sumo’s Sweet Stuff   
Tuesday: Raising 4 PrincessesThe Kurtz CornerHope StudiosToday’s Creative BlogCoastal Charm, and New Nostalgia 
Wednesday: The Trendy TreehousePolka Dots on ParadeLil Luna, and The Thrifty Home
Thursday: All Things with Purpose, Somewhat SimpleThe Shabby Creek Cottage, and House of Hepworths
Friday: Sugar and SpiceKojo Designs, and The Shabby Nest
Weekends: Tatertots and Jello, Serenity Now, and Candace Creations 

Family Travel: Sharing a Hotel Room with Babies {Without Losing Your Mind}

If you’ve traveled with small children, you know it can be a challenge.  Sharing a hotel room with small people who go to bed early can end with parents exiled to bathrooms and balconies.  Not fun.  I’m a traveler with a gypsy soul, and plan to continue seeing the world with my two wee ones in tow.  We’ve discovered that it is possible to share a hotel room with our small people without losing our minds.  The Bear goes to bed at 7 and turns into a grump if he stays up late, so we try to honor bed time no matter where we are.  Here’s how we do it.

 I apologize for the crappy pictures.  Hopefully you can still get the idea.  You will need a Pack ‘n Play , two blankets, thumb tacks, and the room’s clock radio.  We build a hotel tent around our pack-n-play.  On one ill-fated occasion we used the hotel “crib” at a super nice resort that shall remain nameless.  It resembled something found in an orphanage in Kazakhstan.  Horrible.  We went out the next day and bought a cheap pack-n-play and then donated it to a ministry in the area when we left.  It would have cost $50 to fly with our travel crib from home each way ($100 total) and the cheap-o crib cost $40.  Awesome.

Set up your pack-n-play in the corner of the room.  Plug in your clock radio and set it to a non-station playing only white noise.  Turn it up and place it under the pack-n-play.  Tack your blankets to the ceiling making a tent.  Rock that wee one to sleep and place them in their lovely mini room.  Continue to go about your business in your room, even enjoying your tv or computer on a low volume.  White noise is miraculous, my friends.  Some folks use a wifi monitor and head to the hotel lobby or pool, but that is up to you and your level of comfort.  I go back and forth, but it really depends on the hotel.  We’ve used the hotel tent method in many different venues, and it always works.  We are not co-sleepers, so our kiddos are used to sleeping in their own space.  We use a Twilight Turtle with our older child so the dark isn’t scary.  It may take a few tries to get your child used to the Hotel Tent, but it will be well worth it when you aren’t trapped with your spouse on a bathroom floor.  Your child gets the sleep they need to enjoy the trip and you don’t have to watch a movie in the bathtub.  Everybody wins.  
What are your secrets to traveling with kids?  

Fisher Scott (The Bear) at Two Years

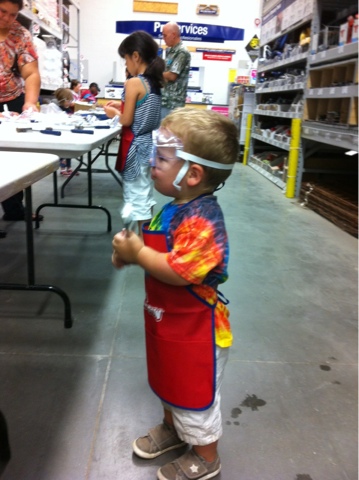
Our boy is two! He is a ball of energy, nonstop action, rough and tumble, wild and fun. We are convinced he is a toddler genius, obviously.

The Bear’s Stats at Two Years Old:
34 pounds 6 oounces
35.5 inches tall
95th percentile for weight
70th percentile for height
20 inch head
90th percentile for head size

He loves trucks, tractors, trains, horses, and dogs.  He calls horses “nay nays”.
He loves for Mama or Daddy to read to him.  
His favorite books are Curious George & the 1st Day of School, The Little Blue Truck, Green Eggs and Ham, Brown Bear Brown Bear, and anything about trucks and tractors.   
His favorite shows are Dinosaur Train, Curious George, Handy Manny, and Bob the Builder.  
  He loves playing with his older cousins, his friends, and is super sweet to his little sister.  He loves having his favorite friends over to play as well as going over to their houses.

He can throw, kick, run, and jump with both feet.  He loves to color and paint and stack blocks.  
He recently moved into his big boy room and is learning to sleep in a regular bed.
He just started using the potty chair with limited success.  

His favorite foods are bananas, peanut butter and honey sandwiches, waffles, pancakes, oranges, grapes, blueberries, and strawberries.  He recently had his first popsicle and it was a big hit.  He love to drink milk and mommy’s green smoothies.  
He loves to swim wearing his puddlejumper.  He is so brave and loves jumping off the side of the pool to Mama or Daddy, and loves it when Daddy throws him up in the air.
His giggles are pure joy and totally contagious.
He is stubborn and curious and hilarious.
He loves his Dede, Poppy, and Paw Paw, and all his aunts and uncles.
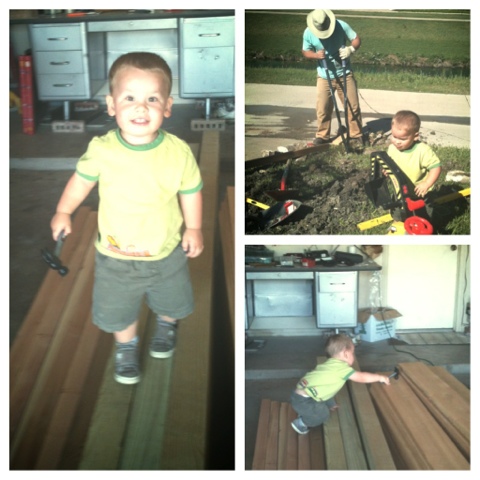
His favorite thing to do is help Daddy work around the house.
We are so proud of our big boy and love him more every day. 

Frugal Friday: Confessions of a Gift Wrap Hoarder

Y’all know I love to clean out, clear out, sell stuff, and give it away.
That is still true about most things in my life, with a few exceptions.
Today I’m confessing the ugly truth.
My name is Becca, and I’m a gift wrap hoarder.  
Why do I hoard gift wrap?  I do it because it saves us tons of money at every gift giving holiday, birthday party, baby shower, and wedding.  I rarely spend money on gift wrap.  It started with our wedding five years ago.  If you’ve had one, you know you get tons of presents, all beautifully wrapped, and it seems like such a waste to throw away all those bags and tissue paper.  I started folding it all up neatly and holding on to it.  I moved my collection cross country and 3 times since.  It is totally worth it.  For every shower and birthday I’ve saved at least $3-5 in gift wrap by using my stash.  
At Christmas I buy one roll of brown packing paper from the dollar store and use it to wrap all my box presents.  I tie the packages up with recycled bows from my stash or plain ribbon.  Brown paper packages tied up with string, these are a few of my favorite things.  
I never have to run by Target or the Hallmark Store at the last minute to grab a gift bag, and our presents always look super cute for at no extra cost.  Lots of people don’t keep gift wrap because it takes up space, and quite frankly we live in a disposable culture.  I rack up every Christmas on new gift wrap because no one else can be bothered to keep it.  Oh, I’ll always take it off their hands.  Don’t mind if I do.  
Do you have a gift wrap stash or a frugal gift wrap solution? Share it in the comments section below.