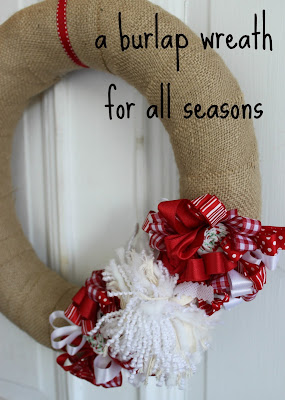
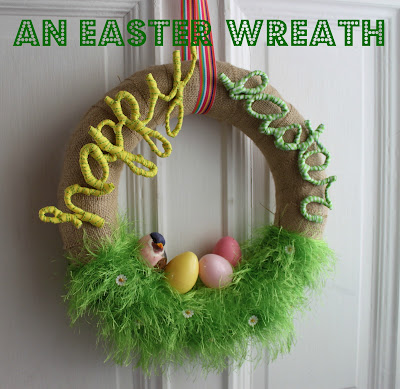
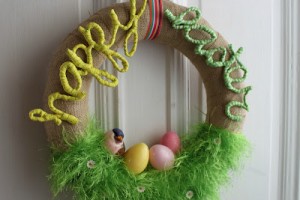
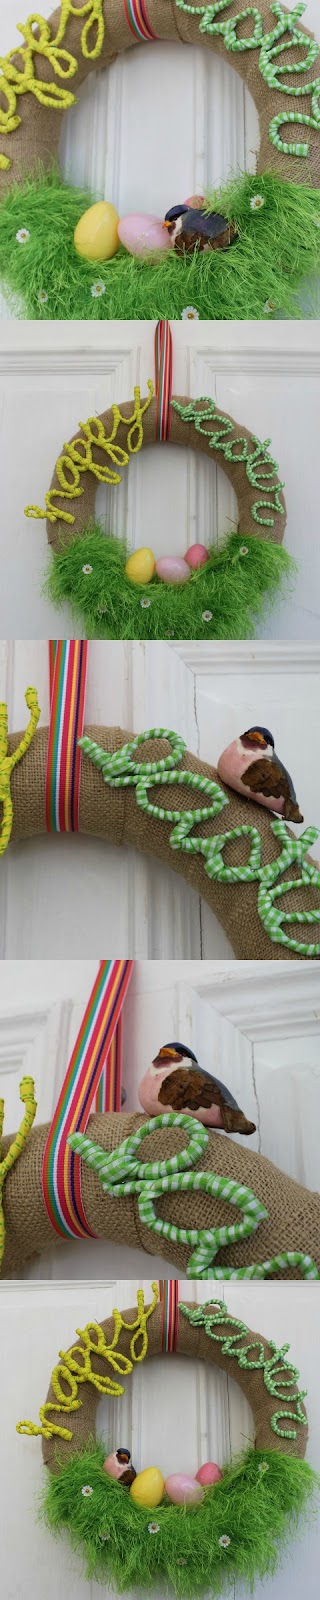
It’s my 3 year blogging anniversary this week, and I’m celebrating by bringing you my favorite and most popular posts from the past 3 years. I’m kicking off the party with my favorite crafty posts. I started blogging to have a creative outlet, and creating fun stuff is a huge part of that. I’d love for y’all to check out my old projects and feel free to pin away if you like what you see.
Category: crafts
**UPDATED** Pinterest and Time Management ~ Free Printable
After wasting a considerable amount of time on my beloved Pinterest today looking for ideas for Mini Bear’s room, I decided a free printable was in order. Click HERE for the free PDF. Just play nice and link back here if you post it.
Frugal Christmas: Our Red and Aqua Mantle and Color Scheme
These blue mason jars were a gift from my Meme (that’s southern for grandmother) and I use them all the time. I filled them with Smell of Christmas potpourri by Aromatique, an Arkansas company. I tied red ribbon leftover from other projects around them and placed this cute little trio on one end of the mantle.
Our stockings are hung by the chimney with care. I made Jed’s and mine, but ended up throwing the one I attempted for the Bear away in a fit of crafting rage last year (long story). You can read about how I made ours here.
For the wreath I took apart this spring wreath, spray painted it white, and wrapped it in aqua ribbon. I used pine cones that were already wired from my bouquet in Marci’s winter wedding, spray painted them white, and tied them with aqua and white ribbons. I attached three red jingle bells leftover from the Bear’s toddler friendly Christmas tree. I hung it with wide aqua ribbon.
I bought the joy sign at a yard sale a few years back, and the red and aqua Christmas balls were from after Christmas clearance years ago. I nestled them in aqua fine net tulle that I also used the last few years.
The red candles normally live in other spots around the house, but they look cute as a trio mirroring the trio of mason jars.
I carried the red and aqua theme into our bedroom by decorating another mini tree with leftover jingle bells and white ribbon.
Frugal Gift Ideas: Personalized Coffee Mugs
Everyone found a mug of their choice. There were three different shapes and sizes. I told everyone the could use Sharpies as long as they didn’t put it near the lip of the mug or on the inside. I shared the doily stencil idea, and demonstrated how to tape the stencils onto the mugs. Then everyone went for it. Some folks used just Sharpies, others used just acrylics, and still more used a combination of the two. I let them all dry, baked them at 350 for 30 minutes, and then let them cool. The Sharpies ran until they dried, FYI.
Take a look at a few of our finished products. I used a Sharpie to paint my mug, but kept the marker clear of the area where my mouth would be. You can see the pattern the doily made on a few of the mugs above and below.
Some of the mugs that were totally covered in acrylic needed to be glazed after baking. They ended up with a rough, dry finish. The Sharpied mugs and mugs with smaller patches of paint looked great after being baked. If you make these as a gift, be sure to let the recipient know that they need to be hand washed.
A Big Brother T-Shirt to Announce Our Pregnancy
I shot a few pics of The Bear in his t-shirt after I finished it, and sent them out to friends and family that live far away, with the caption, “The Bear has an announcement.”
It took some of our friends and family a bit to figure out they had to read the shirt to get the announcement.
Later we put the shirt back on The Bear to go see some of our friends at our regular Taco Thursday dinner. Such great reactions.
The Bear also wore his shirt to my Young Life “retirement” party to share the good news with all our YL friends.
Finally, I used the the pics to announce the pregnancy here on the blog.
To make the shirt, I used a plain navy blue shirt that was already a part of The Bear’s wardrobe. I have a collection of vintage felt and embroidery floss from and estate sale purchase years ago. I used orange felt and navy blue floss and an embroidery needle that was waaaaay too big to stitch the design. I fastened the felt into an embroidery hoop and stitched away after drawing the words with an disappearing ink pen. I used the hoop as a guide to cut out the circle, and then stitched the circle onto the shirt. Done.
I’m sharing this design over at Prudent Baby’s Embroidery Contest and at some other fun craft parties.
Summer Mantle and a Cheap Giant Photo
My husband cut out a piece of foam insulation to fit the print, and I painted the edges aqua to match other accents in my living room and disguise the ugly foam insulation. I mounted the print using spray adhesive. Easy.
Tuesday: Raising 4 Princesses, The Kurtz Corner, Hope Studios, Today’s Creative Blog, Coastal Charm, and New Nostalgia
Wednesday: The Trendy Treehouse, Polka Dots on Parade, Lil Luna, and The Thrifty Home
Thursday: Somewhat Simple, Tales from Bloggeritaville, The Shabby Creek Cottage, and House of Hepworths
Friday: Sugar and Spice, Kojo Designs, and The Shabby Nest
Weekends: Tatertots and Jello, Serenity Now, and Candace Creations
Burlap and Pinwheels – A Summer Wreath
Getting the pinwheels to stick in the wreath was far more difficult than I thought it would be. I thought the stakes would poke through and make the pinwheels stand up. Nope. They broke off instead. I weaved each stake through the grass a little bit and then used straight pins to secure the stakes onto the back of the wreath. Because the wreath is on our front door and gets opened and shut a lot, I’ve had to readjust the pinwheels several times. I’m ok with that. I love the whimsical look of this wreath and the fact that it cost only $1 to switch to a summer version.
Tuesday: Raising 4 Princesses, The Kurtz Corner, Hope Studios, Today’s Creative Blog, Coastal Charm, and New Nostalgia
Wednesday: The Trendy Treehouse, Polka Dots on Parade, Lil Luna, and The Thrifty Home
Thursday: Somewhat Simple, Tales from Bloggeritaville, The Shabby Creek Cottage, and House of Hepworths
Friday: Sugar and Spice, Kojo Designs, and The Shabby Nest
Weekends: Tatertots and Jello, Serenity Now, and Candace Creations
Decorating an Easter Mantle
The bunnies were inspired by a few Pinterest finds like this one, but I couldn’t find a pattern that was the right size. I sketched one out and used it to cut the design out from several different colors of cardstock. Then I glued little puff ball tails onto my bunnies and glued the bunnies onto a brown ribbon measured to hang across the mantle.
I brought in 2 giant flowers that we’ve had since our wedding. They decorated the gift table at our rustic barn reception. I filled 2 of my Meme’s old blue mason jars with plastic eggs, inspired by this Pinterest find. I added artificial flowers leftover from last year, and a sweet flocked bunny I won from a blog giveaway at Goodbye House, Hello Home a few years ago.
I love the color the eggs and bunnies and flowers bring into the room. It feels like spring.
Our wedding and engagement pictures have been on our mantle for a while now, and I’m feeling it is time for a change. I’ve searched for ideas and landed on a few that I’m working on.

Let’s Make an Easter Wreath

Frugal Friday – A Burlap Wreath for All Seasons
I bought a straw wreath form at Hobby Lobby using their eternal 40% one item coupons. I had a ton of burlap left over from other projects, so I cut it into 4-5 inch wide strips. I kept the plastic on the wreath form after searching all over for tutorials. I started gluing and wrapping the burlap strips, pulling them super tight to keep the wreath looking neat. Every time I work with burlap I forget that it is super messy. Seriously, consider yourself forewarned. You will have burlap dust EVERYWHERE. It is itchy and insidious. Bring out the vacuum.
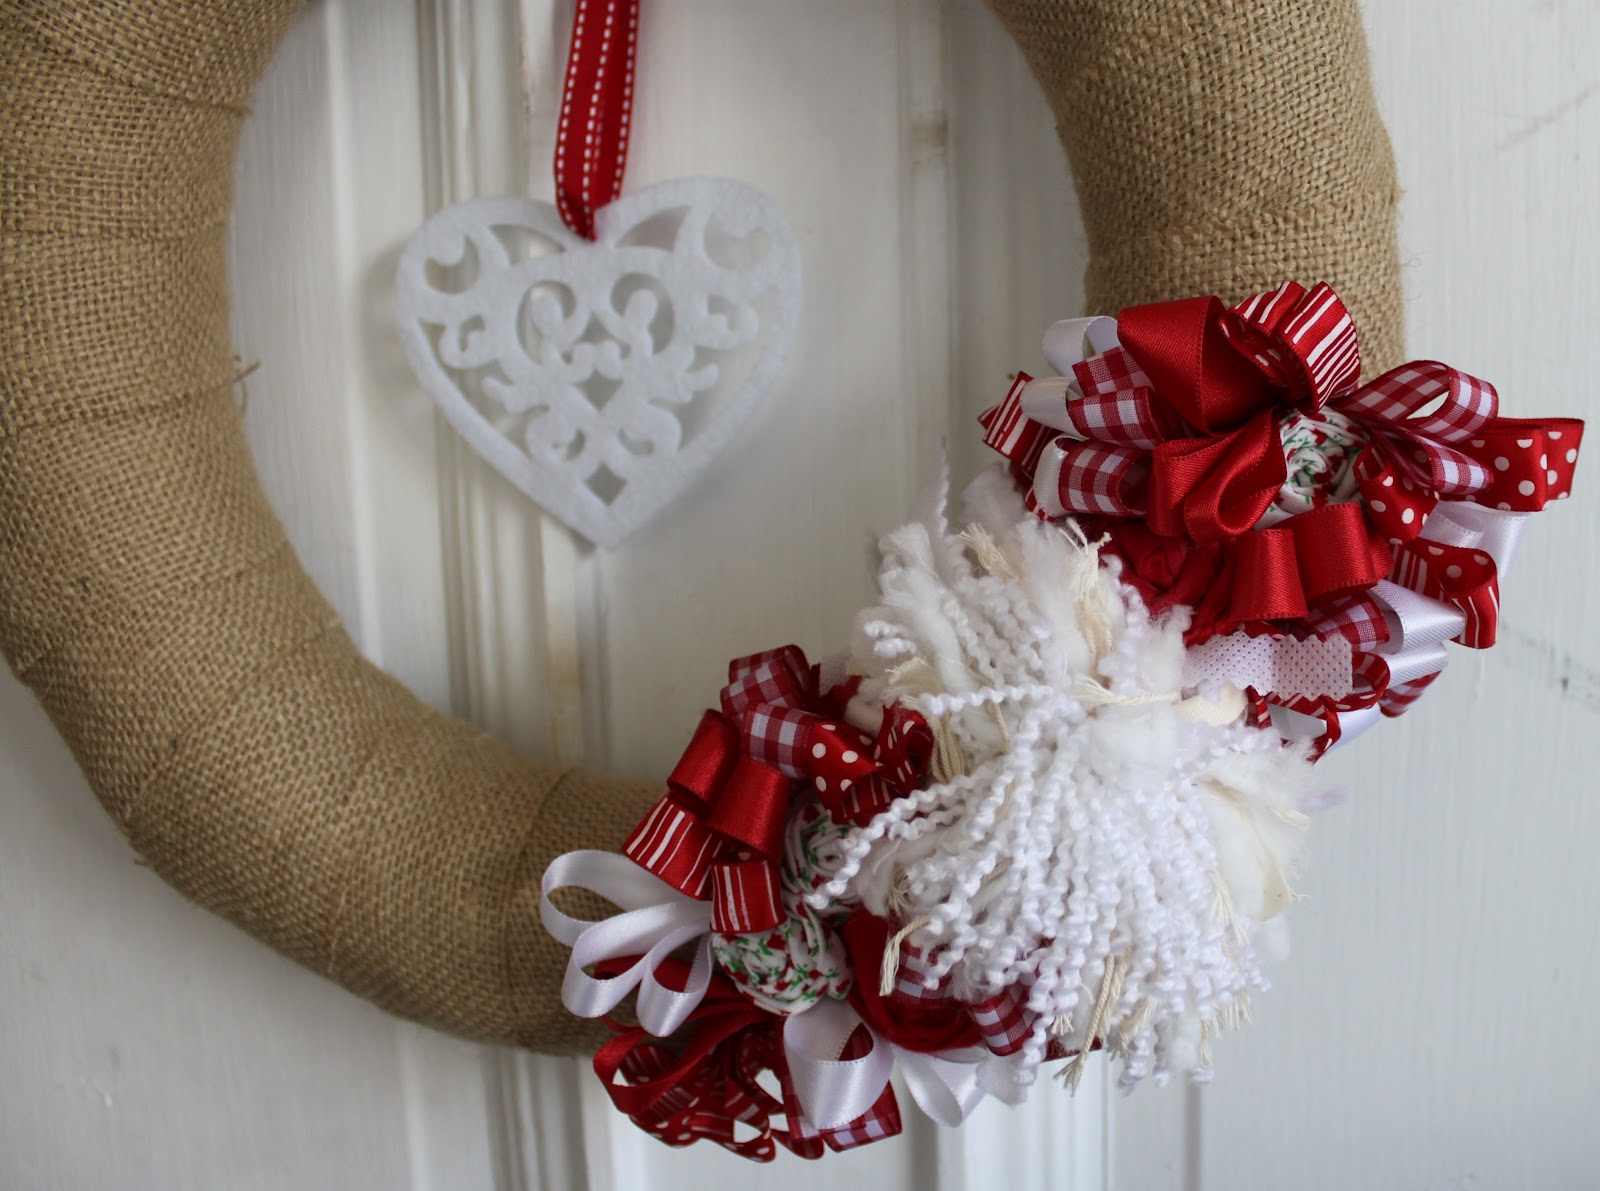
After letting the burlap dry, I went through my scrap ribbon and pulled out all the reds and whites. The big white poof in the middle was the bow on a Christmas gift I received. I used straight pins to attach the poof to the wreath, then started pinning the looped ribbon to the wreath around the poof.
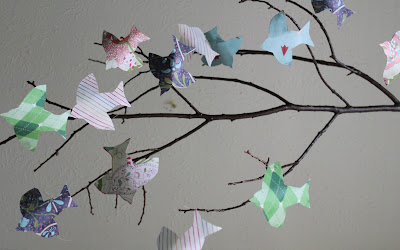
I had a few fabric roses made from vintage fabrics lying around, so I pinned them on the wreath as well. I cut scrap ribbon into workable lengths and looped each piece 3 times before pinning it to the wreath. I kept pinning ribbon loops onto the wreath until it felt right. I was inspired by lots of burlap wreaths and ribbon wreaths that I’ve seen around the internet on Tatertots and Jello, Pinterest, and other fabulous sites.
You can see one of the pins I used in the photo above. My plan is to remove all the ribbon and switch to a springy wreath this weekend. I’ll toss the scrap ribbon back into my pile and start over.
I couldn’t decide if I liked it better without the felt heart hanging in the middle (3 for .30 at Target after Christmas). I took it down and liked it much better.
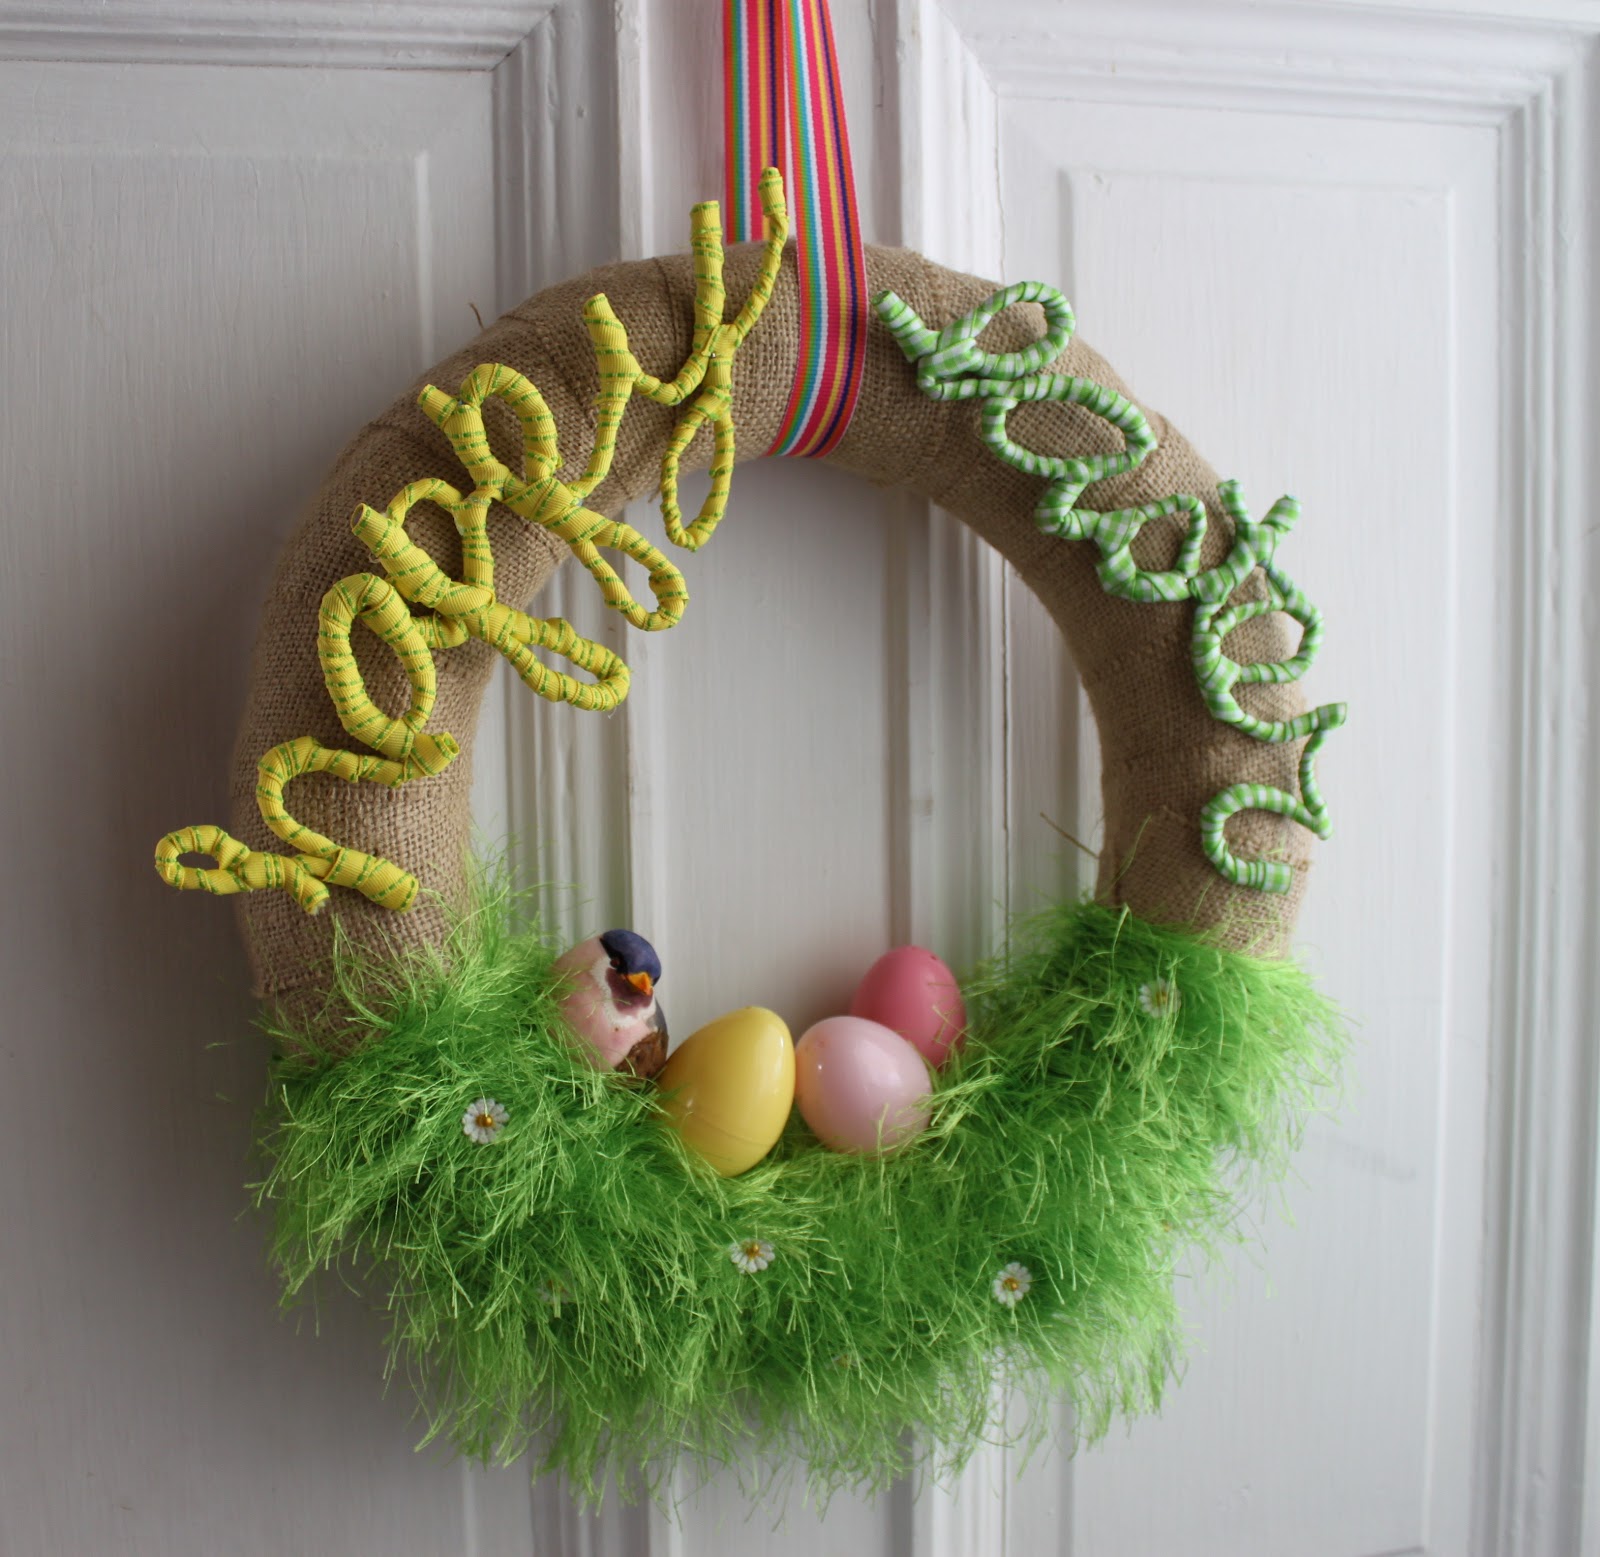
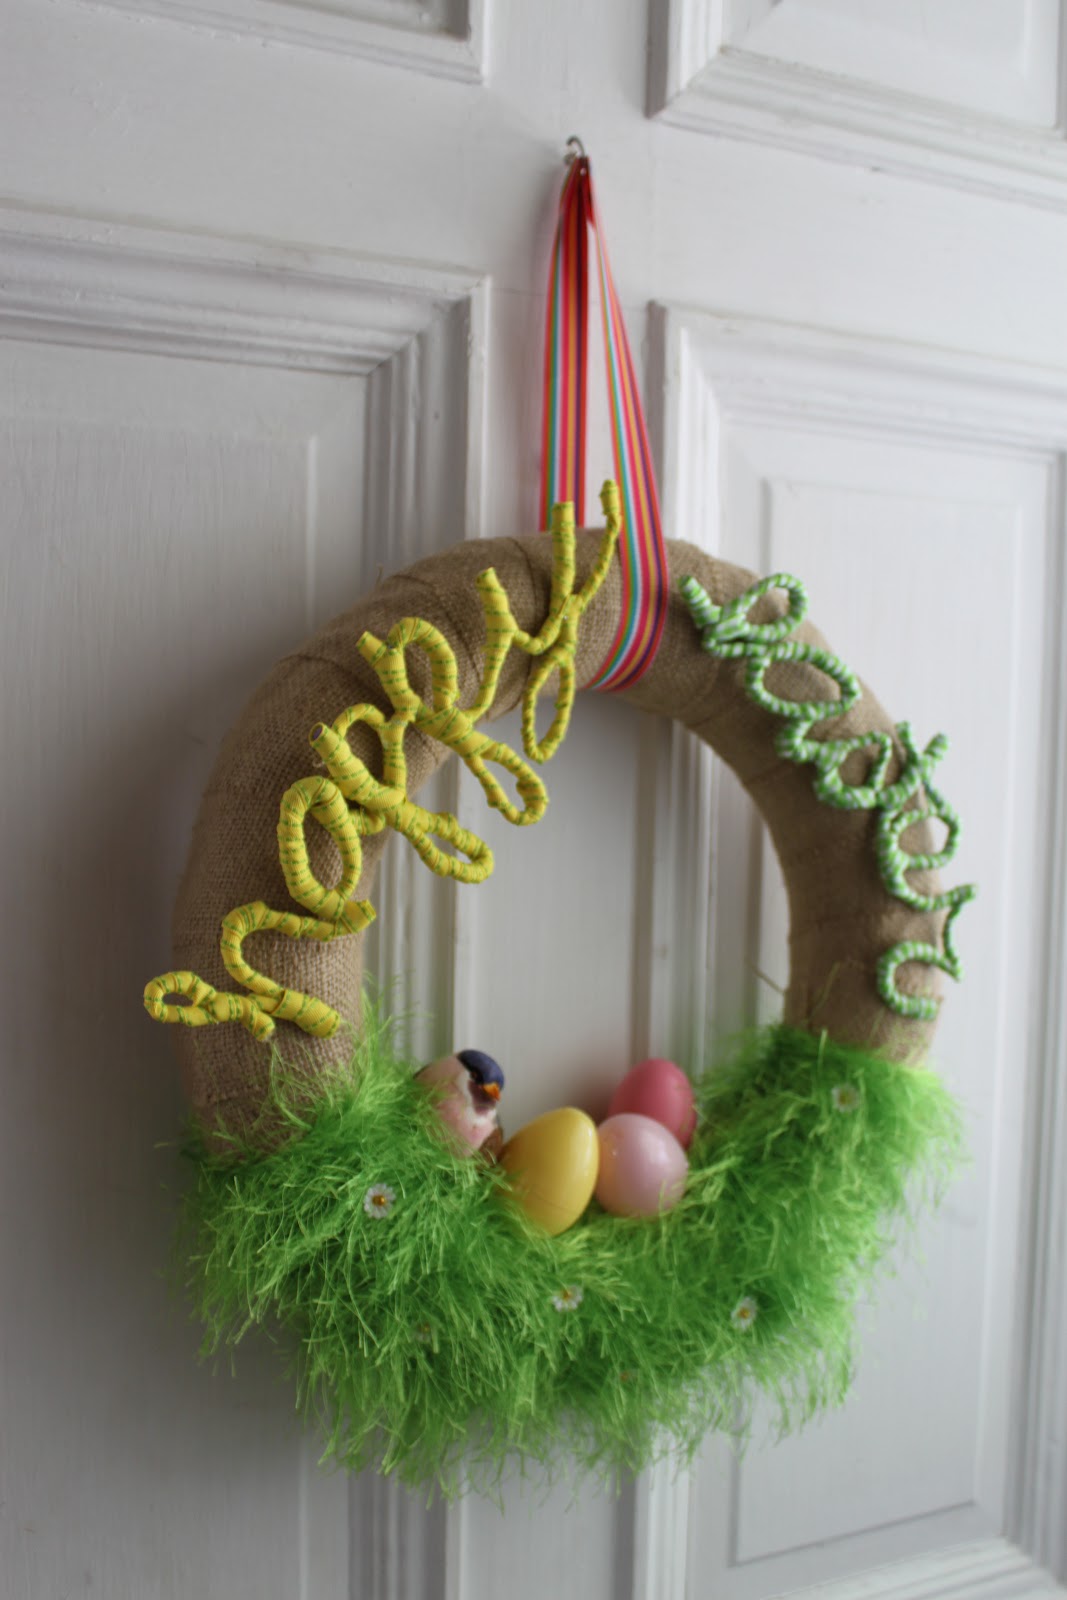
I tied a loop of ribbon to the top so that I could change that out easily as well. The whole thing will change to a new season with very little effort.