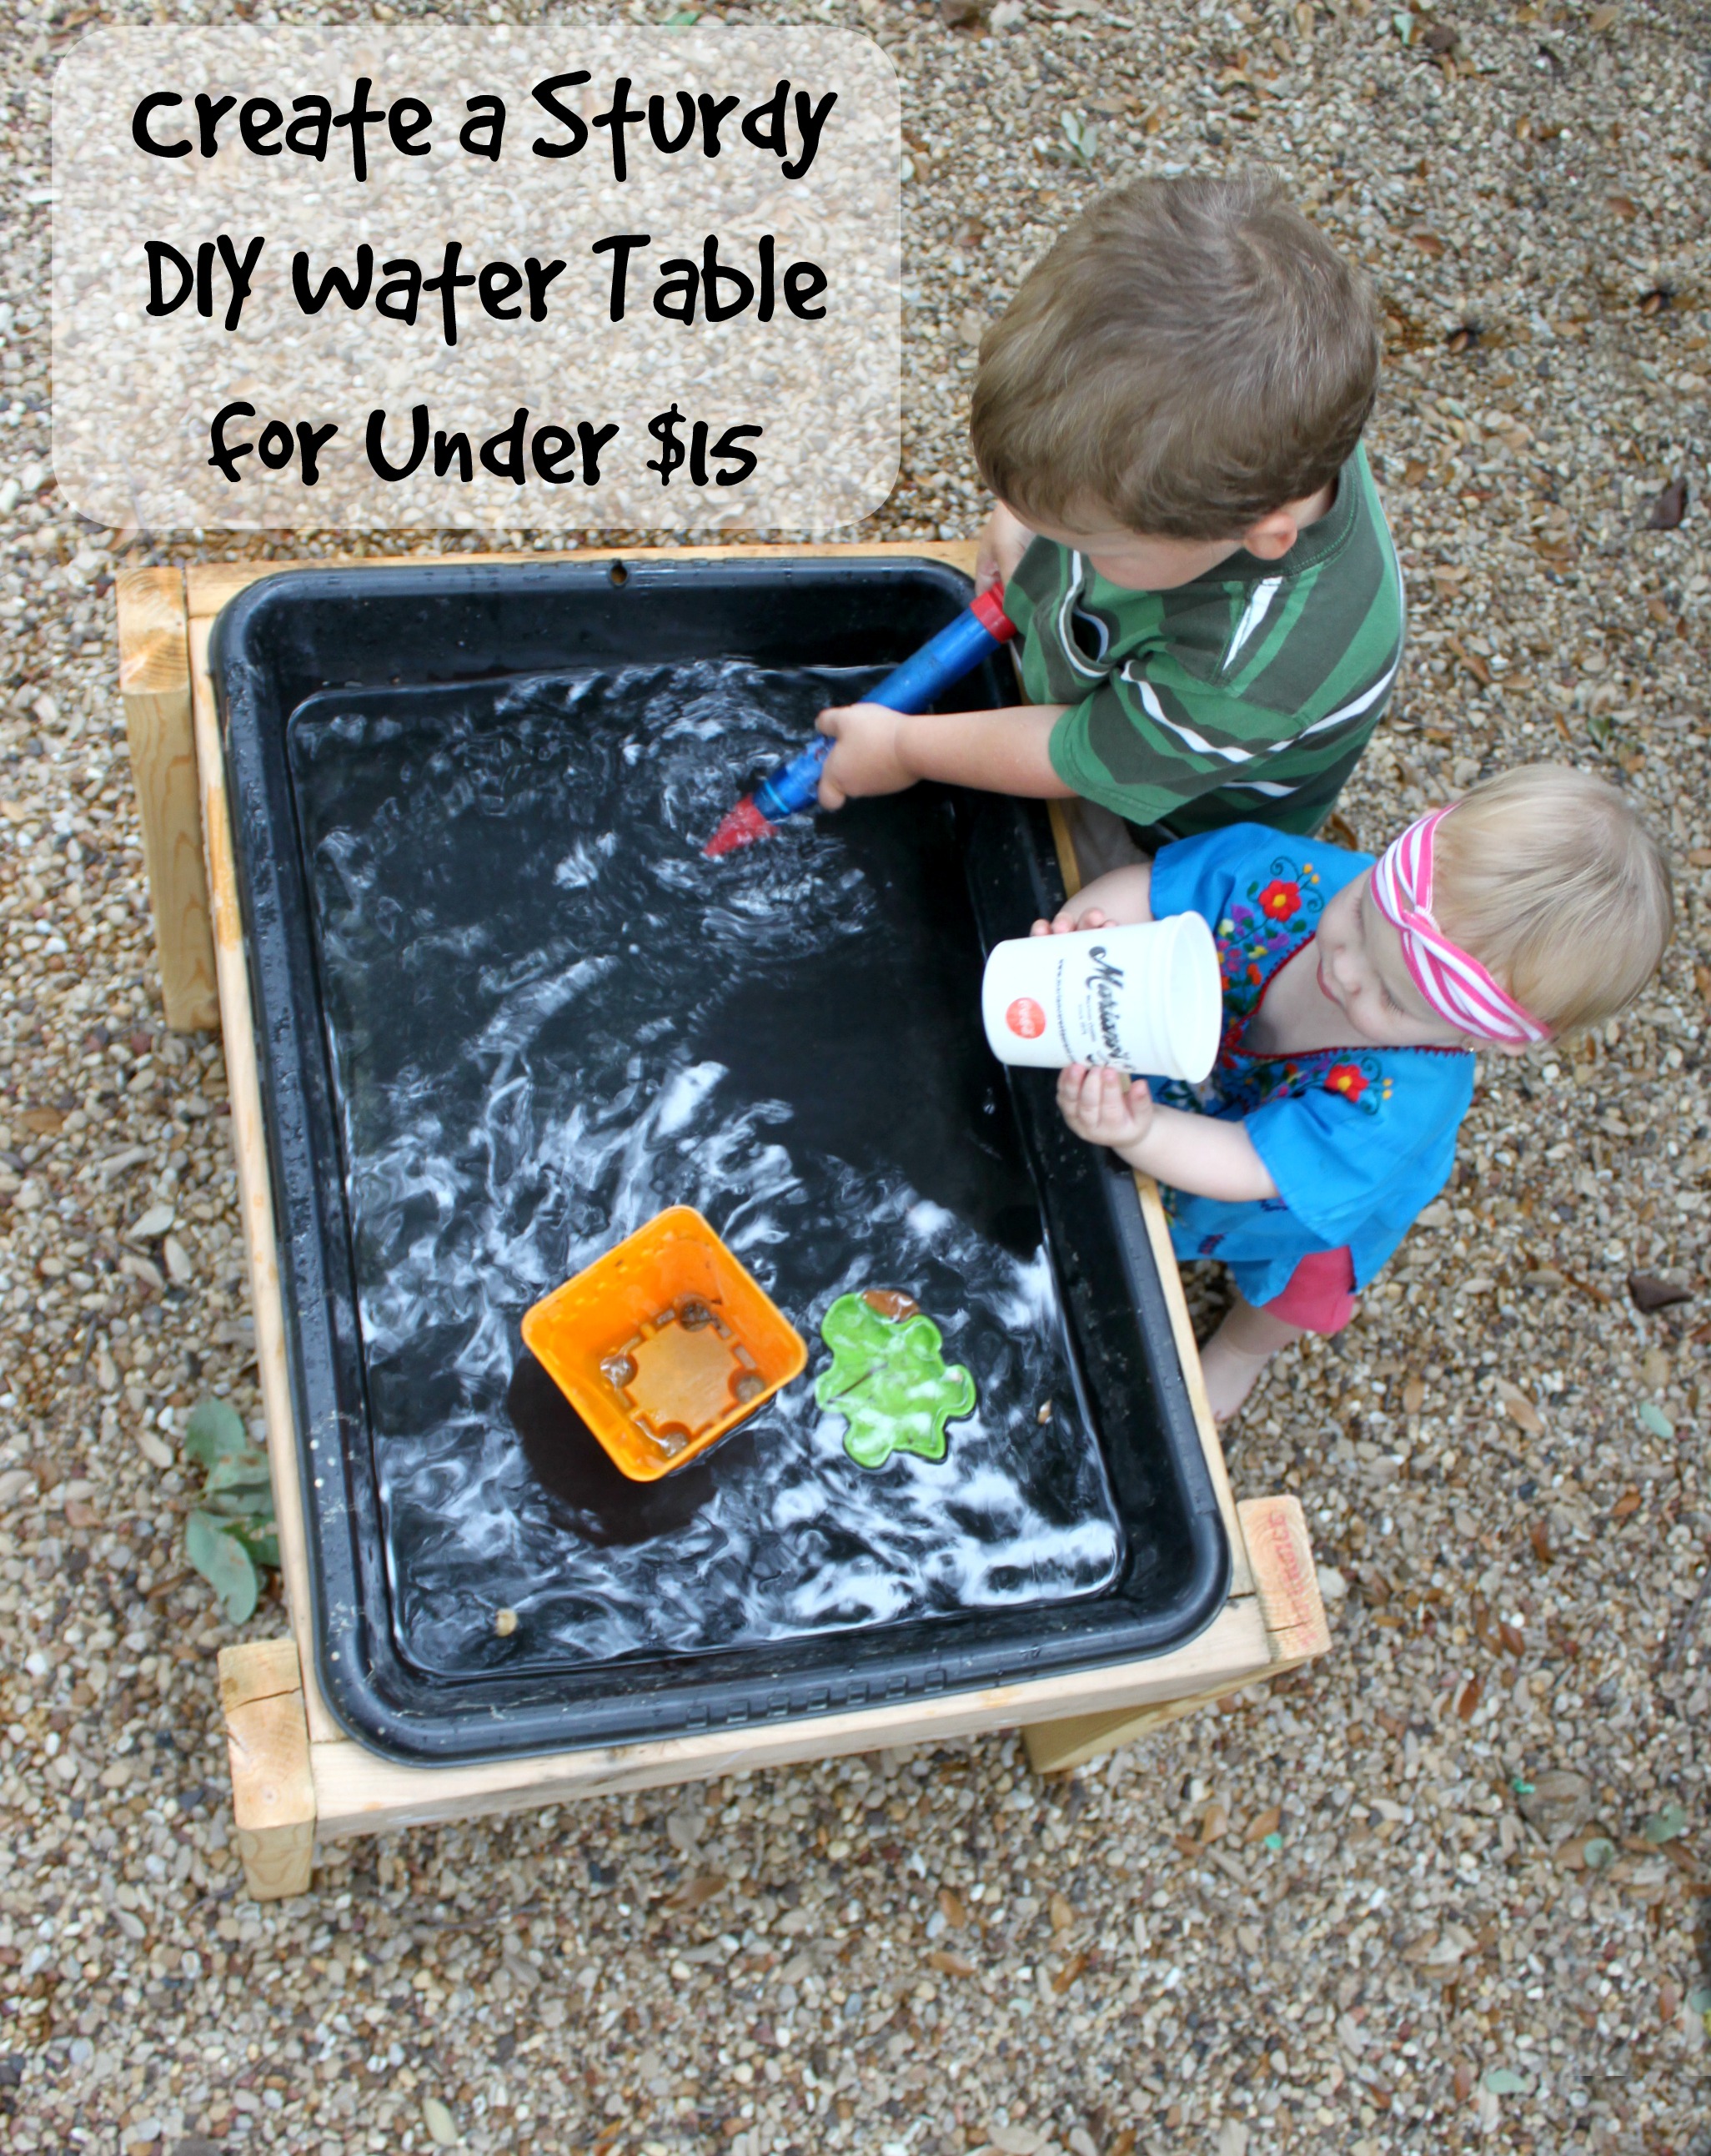
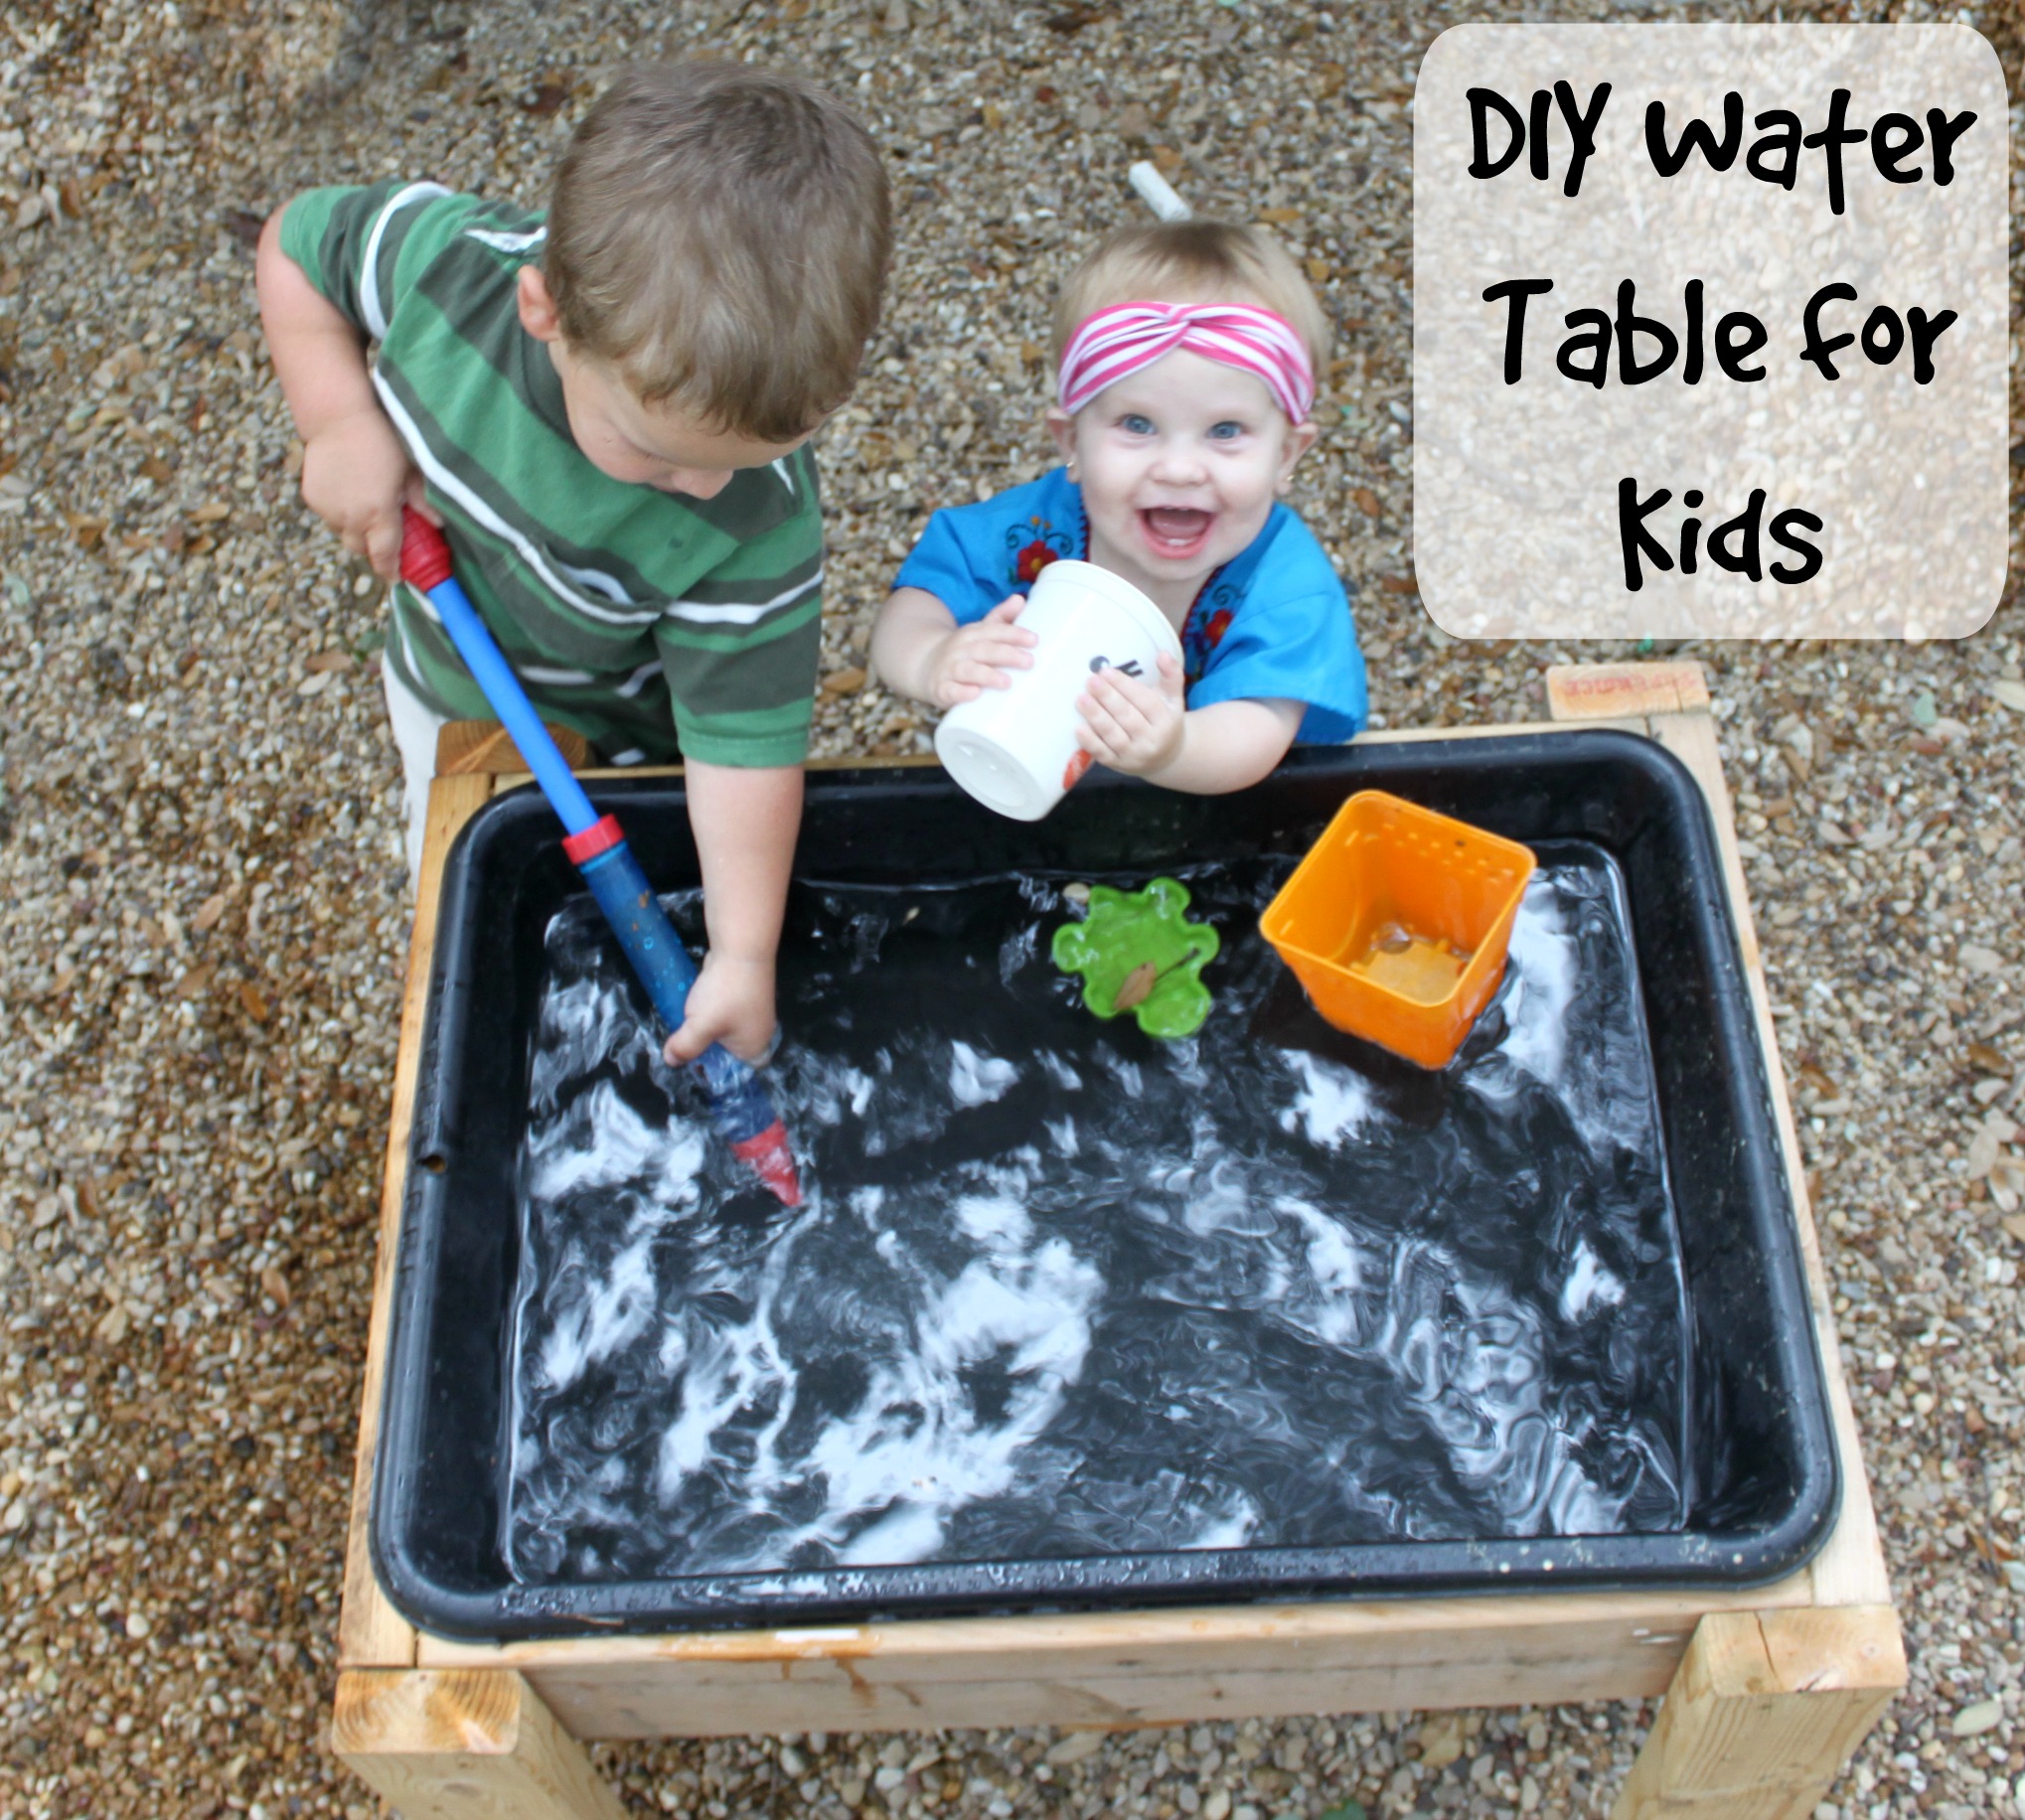
One of our sweet toddler friends received a water table at his birthday party this past spring, and every kid from 10 months to 6 years old was instantly obsessed. The Bear talked about it endlessly after we left, so we looked into buying one. The plastic ones we found online ran anywhere from $30-50, and sturdier wooden ones were much more expensive. Jed knew he could build one, so we headed out to pick out materials. Below you’ll find a tutorial for our simple and sturdy DIY water table, perfect for water play and sensory play. You can make it at home for less than $15, and is sturdy enough to put up with the abuse preschoolers can dish out. We still plan to paint it with outdoor paint, but haven’t gotten around to it yet because the kids use it almost every day.
Materials:
Sturdy Tub – We used a concrete mixing tub, because it was the perfect depth (5.5 inches) and will hold a stomping toddler. Our’s is the medium sized tub, 28×20 inches. Be sure to check your dimensions because the size of your tub will affect your wood cuts. You can tweak this design to fit any tub.
Lumber – 1 2x6x8 board, 1 2x4x8 board We did not use pressure treated wood, but that is a great option for added durability. We plan to paint our water table soon with outdoor paint to protect it.
Screws or Nails – 28-30 (2.5 inch) We used screws.
Tools – Mitre Saw or Circular Saw, Tape Measure, Drill or Hammer, square
Directions:
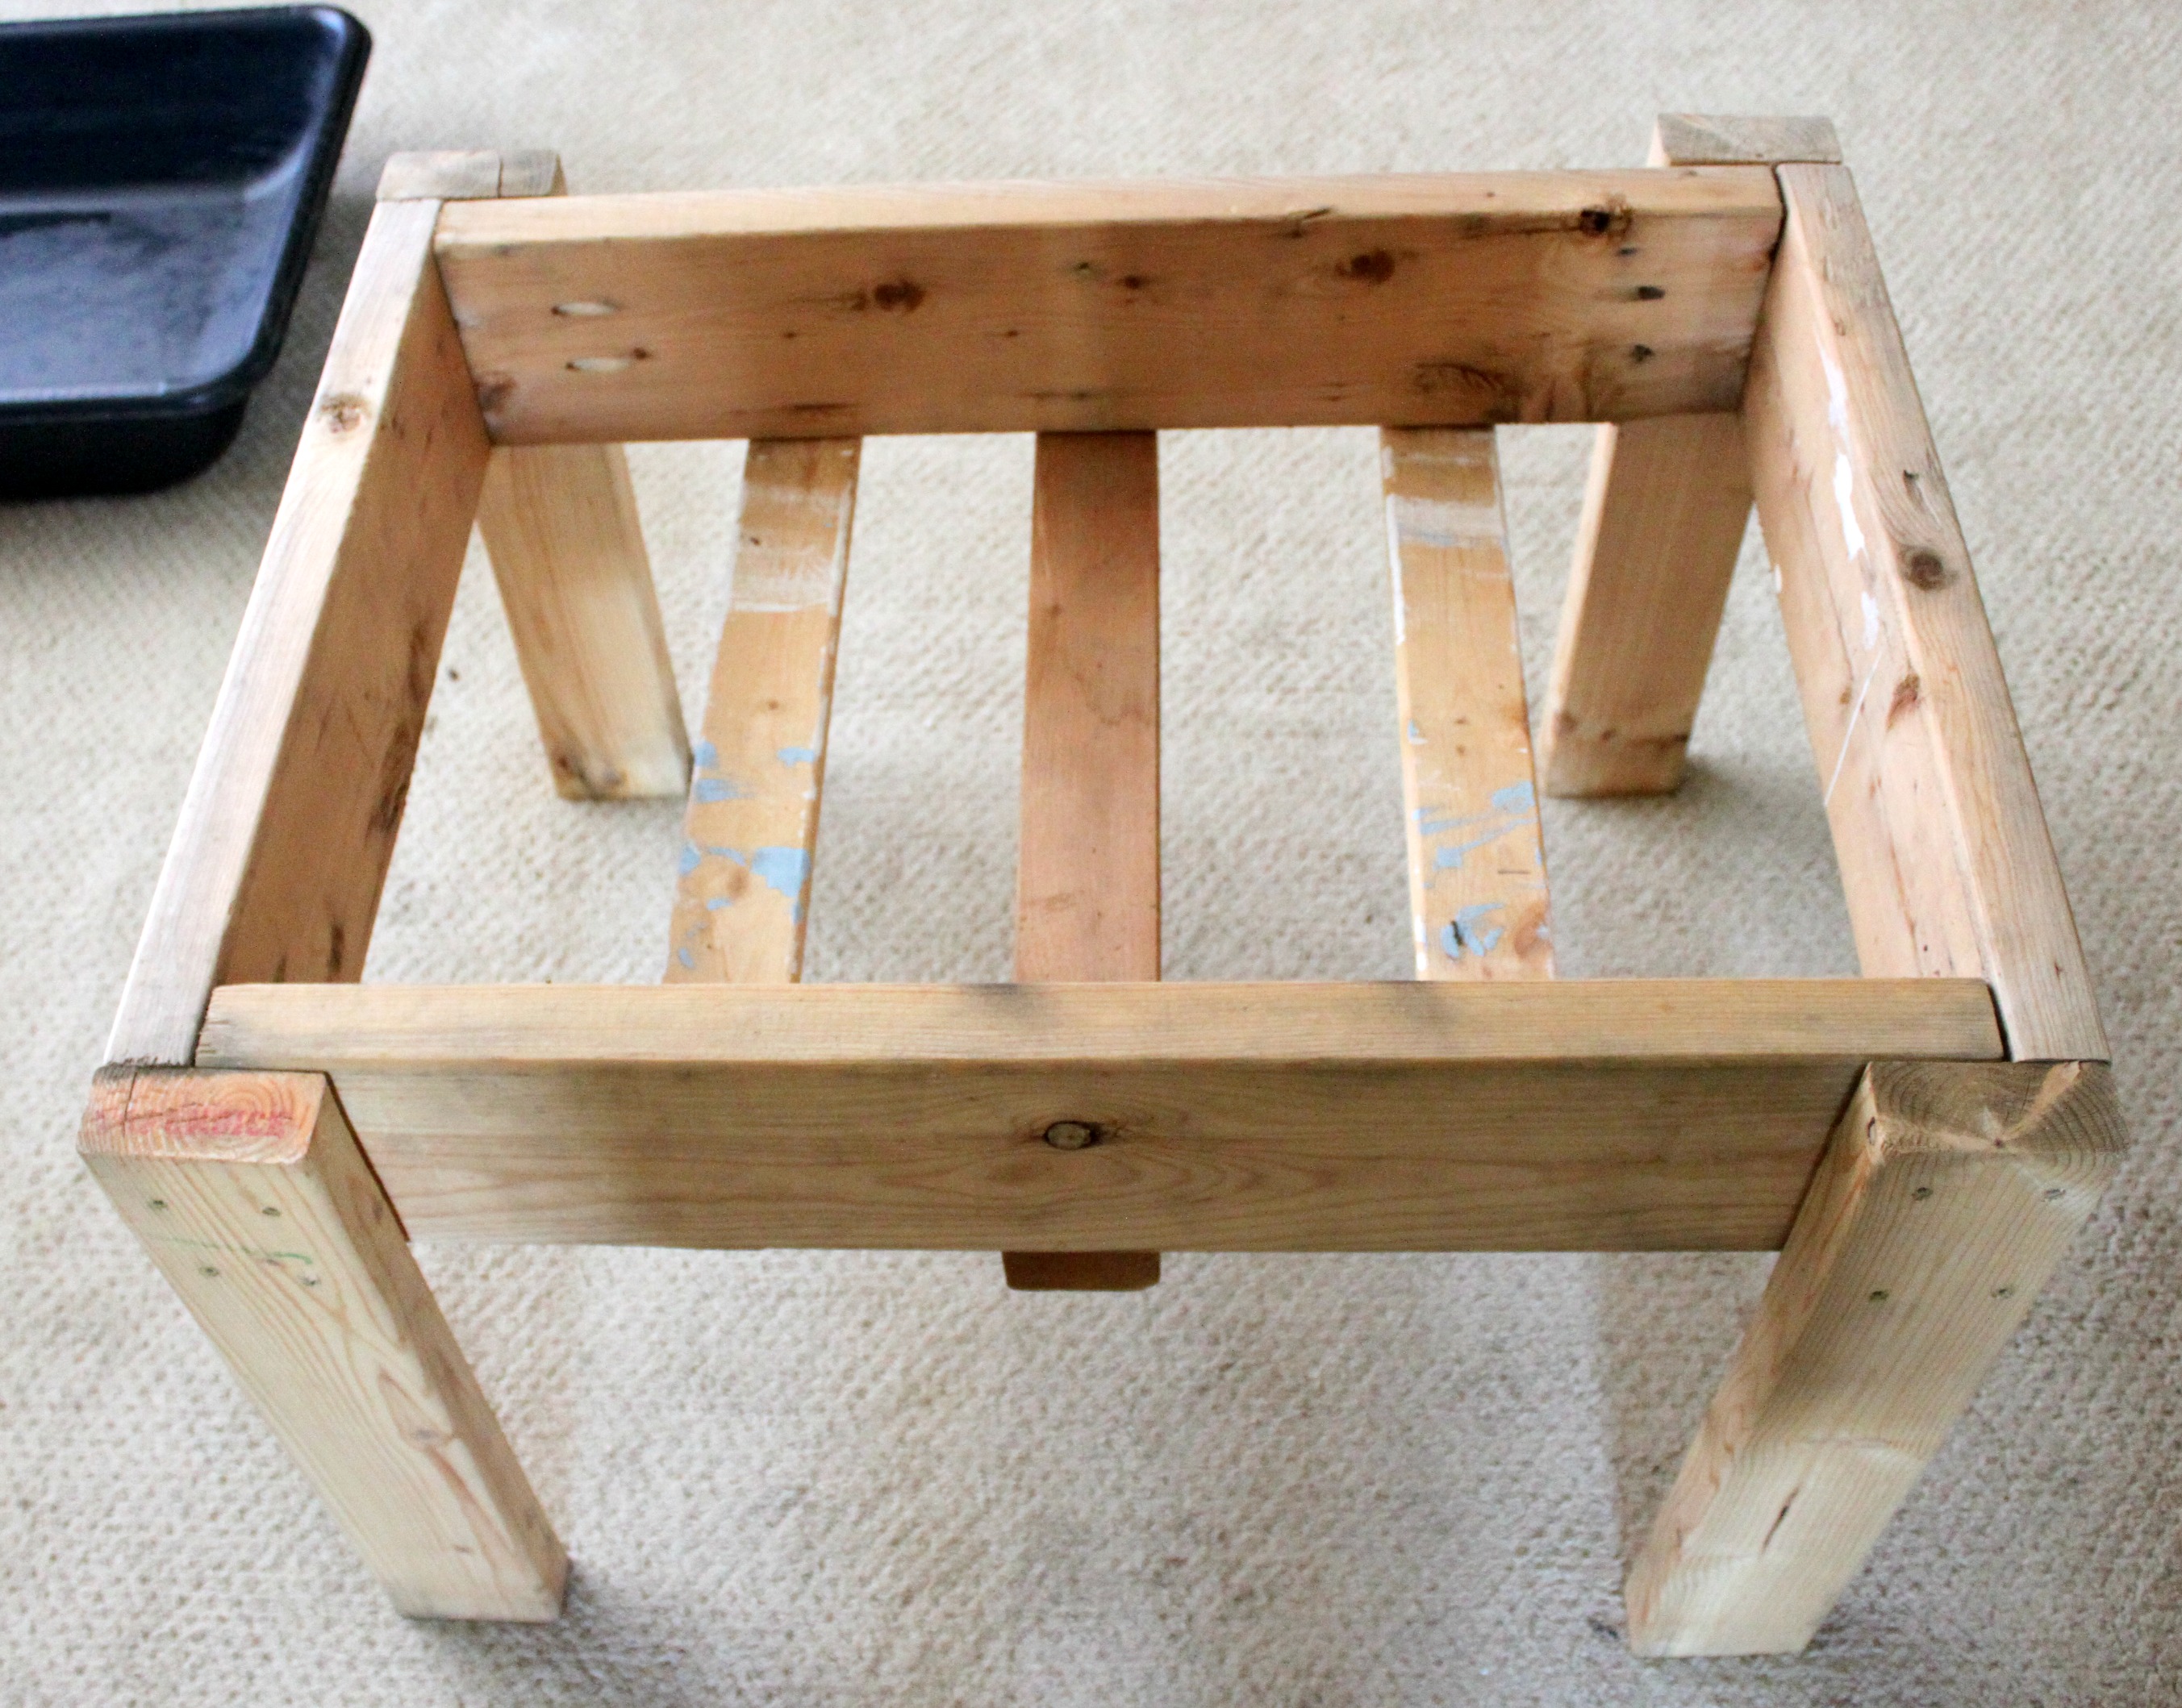
Cut your 2×4 board into 4 pieces that are each 18 3/4 inches long. Cut a fifth piece that is 20 inches long (this will be the brace).
Cut your 2×6 – 2 pieces at 25.5 inches, and 2 pieces at 20 inches long.
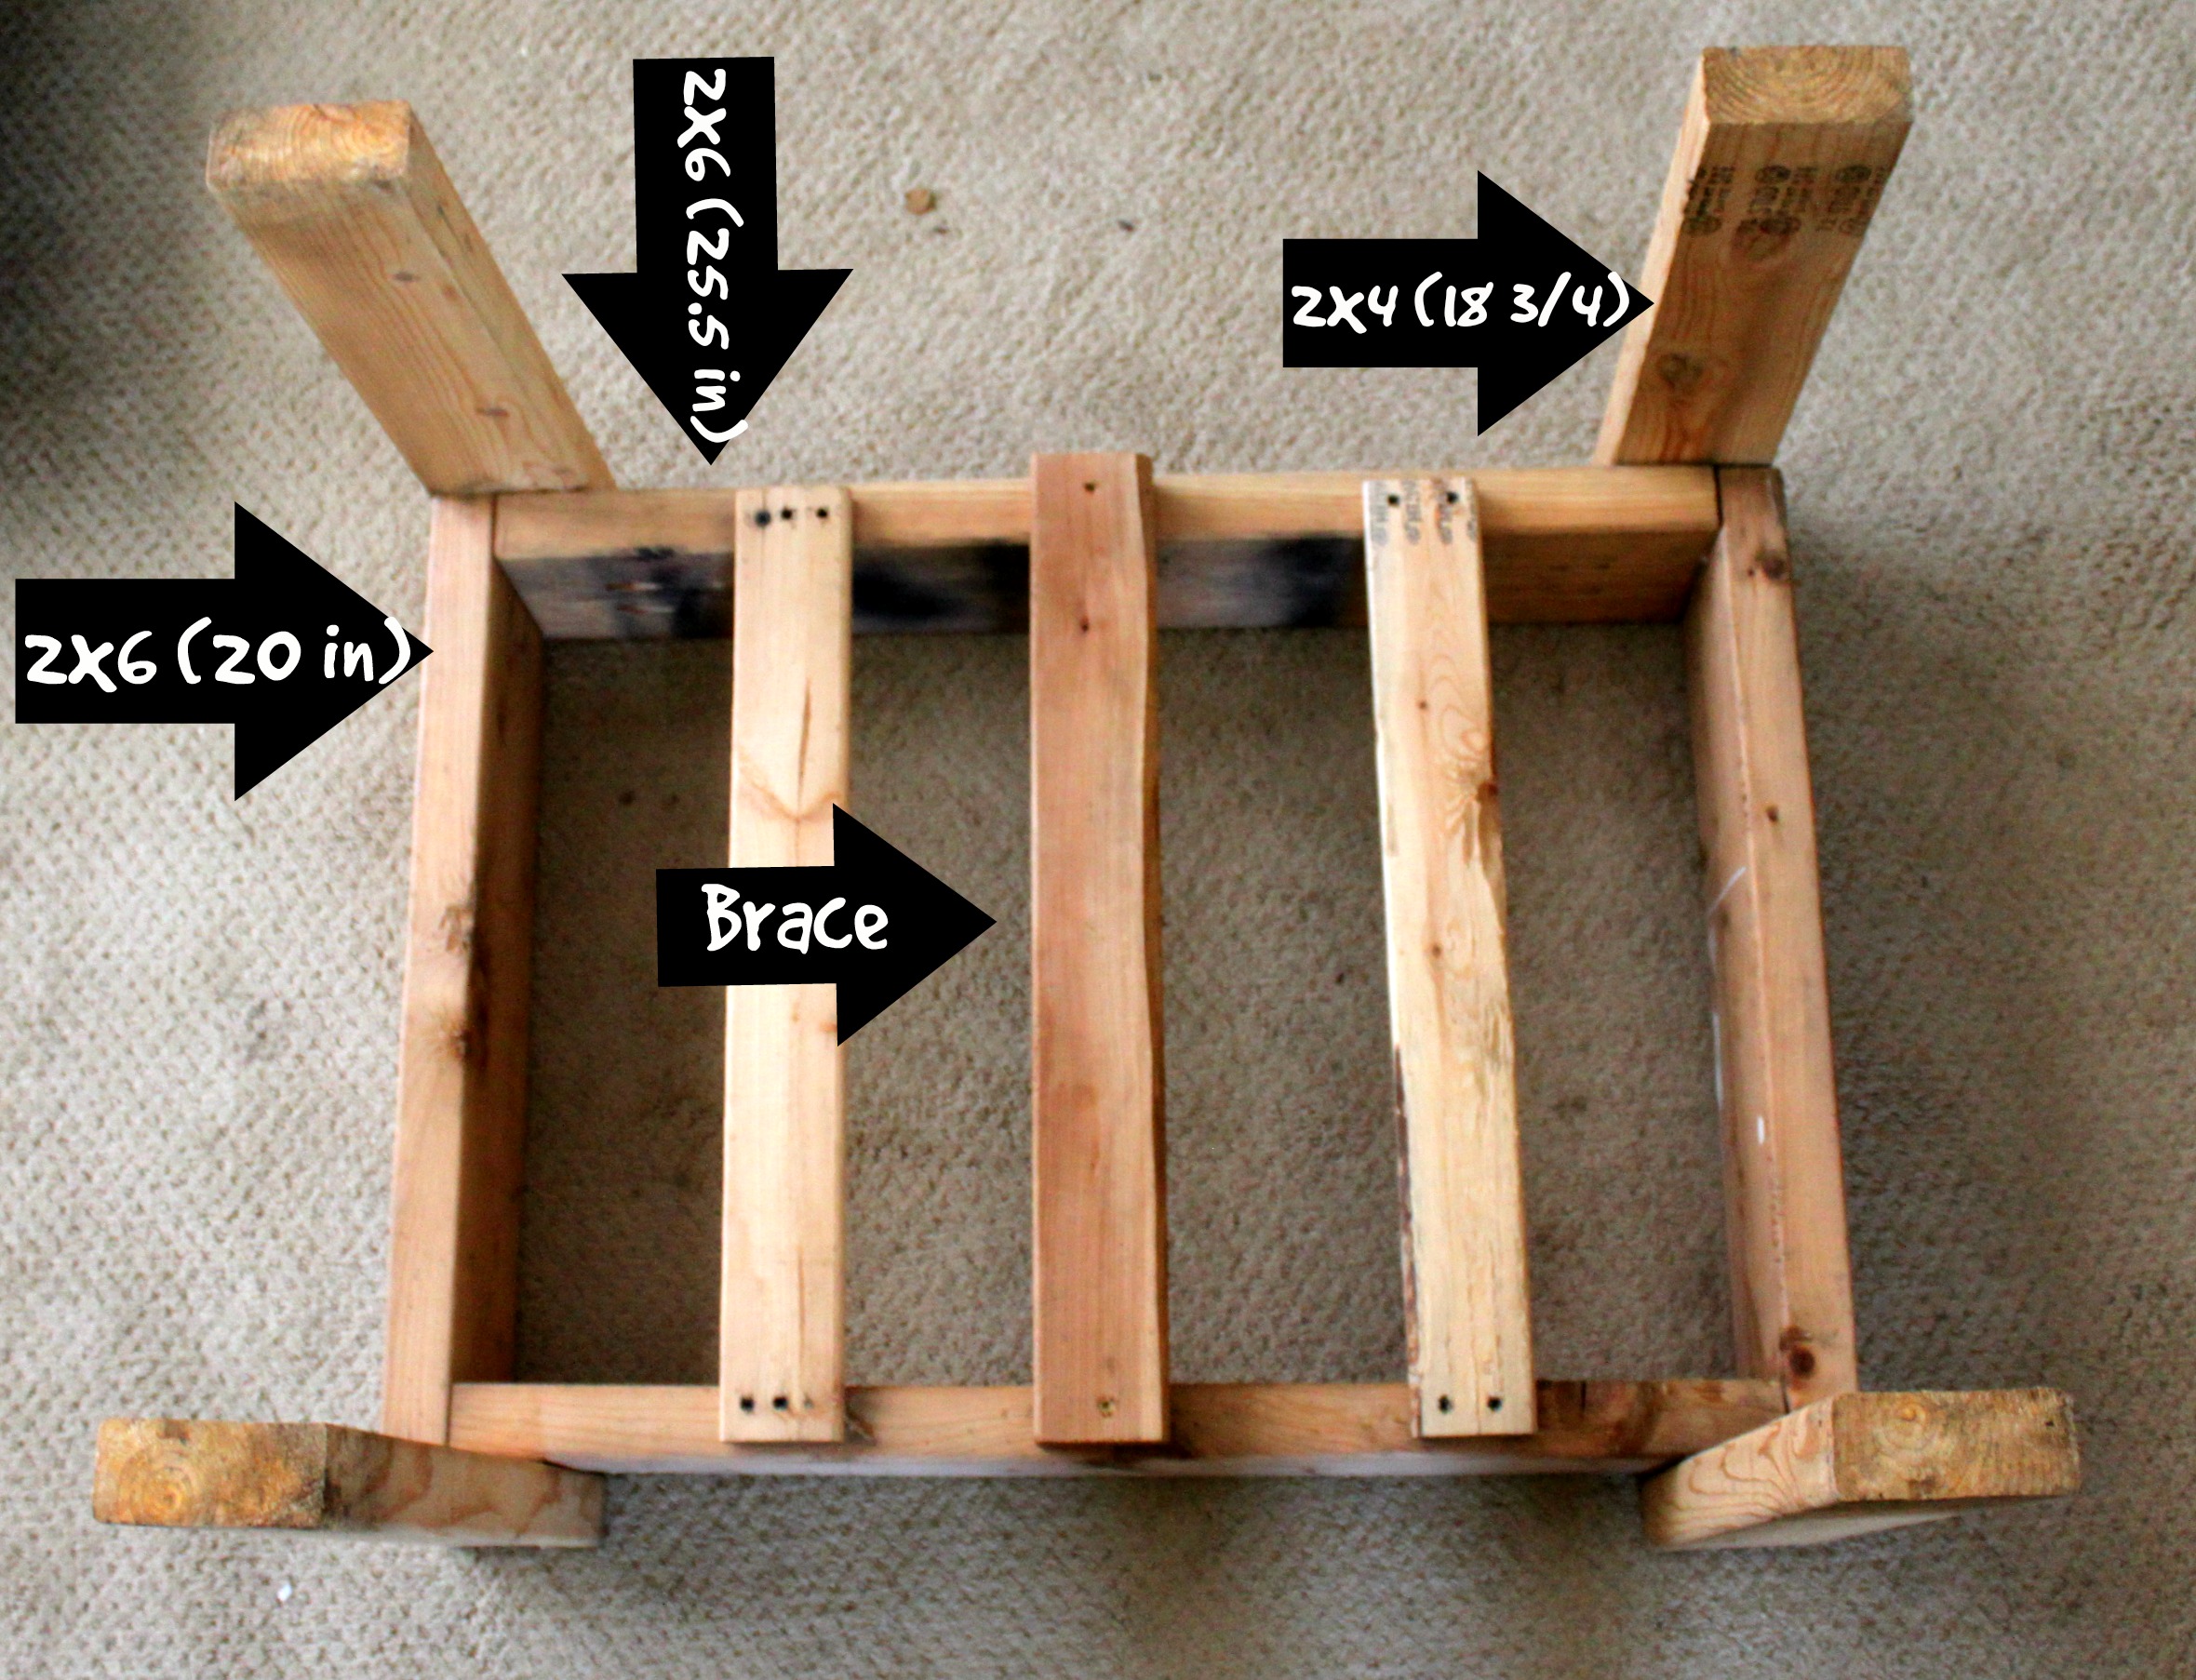
Assemble your table working upside down as shown. The 20 inch pieces of 2×6 will be the short ends, while the 25.5 inch pieces will fit inside them. The overall width of the table is 20 inches.
Attach the brace piece to the underside of the 25.5 inch pieces in the middle. Jed had scrap wood laying around, so he added 2 extra brace pieces.
Attach each of the four legs to the outside of each corner. Jed predrilled each hole to prevent the wood from splitting.
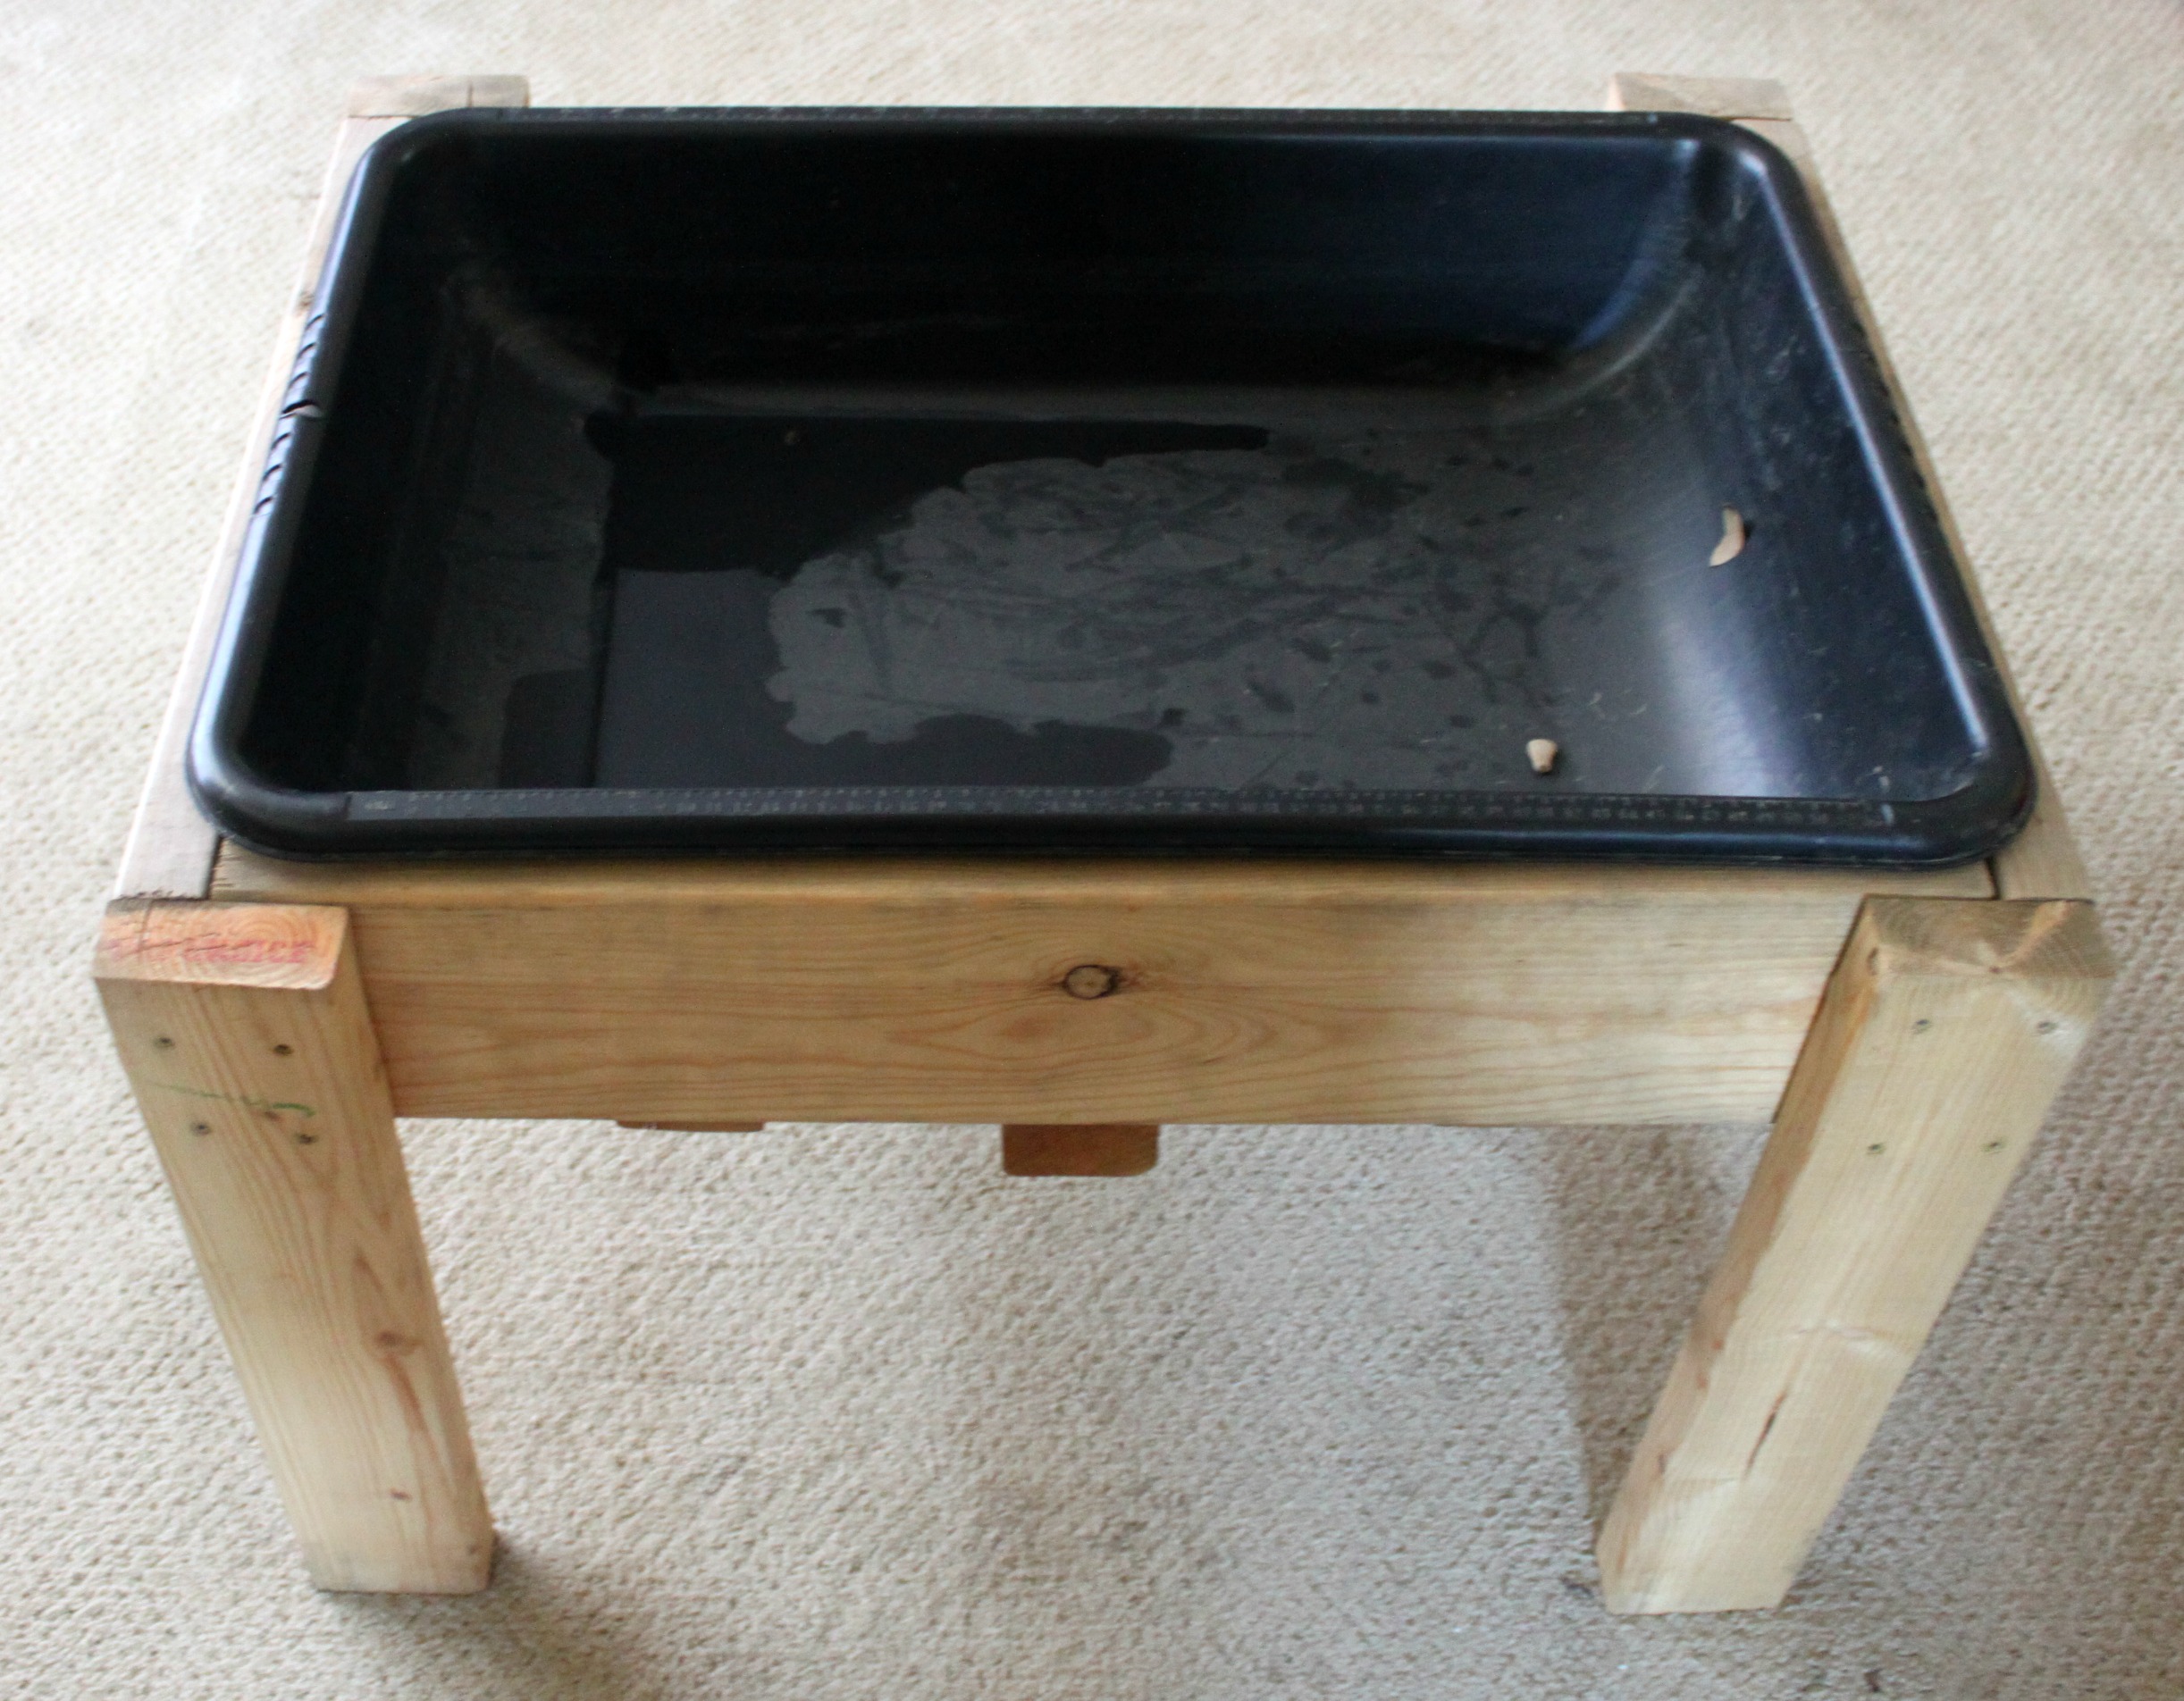
This table is the perfect height for toddlers and up, and big enough for several kids to use at once. I love the removable tub because it is super easy to clean and tough enough for pretty much anything my kids can do. If your kids love water and sensory play, this table is perfect for them.
Where did you get the tub and how much did you have to pay for it? I want to try to build on of these for my grand daughter. Thank you for the DIY project.
Glad u asked this, I just assumed Home Depot, but I’ll call and ask in the morning just incase.
We made this exact water table a few years ago!
It’s the best! So simple and the kids just love it.
We made this tonight using your tutorial. It worked perfectly!! I was even able to find the exact tub you guys used. I can’t wait to let my little guys try it out tomorrow. They are going to be in love. Thank you for providing such great directions!!
Yay!!! I’m so glad it worked for you. Have so much fun with it.
Where did you find the tub please?
it’s a concrete mixing tub from Home Depot, or any of those tool stores
Just built this for my little punkin at my wife’s request. Instructions were perfect. Looks great. Now I just have to paint it and let my baby girl splash away! Thanks for sharing!
Loved this! And it was so easy- thank you!
This worked out perfectly! Followed your simple directions step by step. Thank you!
Made it today and it came together beautifully! Had the boards cut at Lowe’s and then just used a circular saw to nudge a little off to make everything square & level. FUN!
Followed the instructions and it turned out PERFECT!! I opted for treated lumber to extend the life of the table. THANKS FOR SHARING THIS AWESOME DIY! My son loves it!!
This is awesome! How are you covering the tub when not in use? I’m thinking of this being a sand or water table and would love to keep it covered and clean. Thanks!
Where did you get the toys from? Especially the suction hose one?
We just finished our water table using your tutorial. It came out great and our little guy loves it. Thanks so much for sharing.